Classic White Cake
Prep
Cook
Inactive
Total
Yield One 4-layer, 6-inch cake
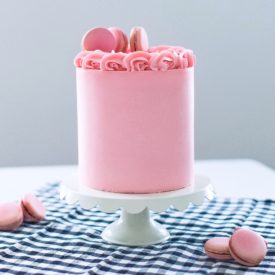
Classic White Cake.
Tender and fluffy white cake layers with a whipped vanilla buttercream.
Ingredients
For the Cake
- 5 large egg whites, at room temperature
- 1/2 cup (120 g) sour cream, at room temperature
- 1 cup (240 g) buttermilk, at room temperature
- 3 teaspoons (12.6 g) clear vanilla extract
- 3 cups plus 3 tablespoons (366.5 g) cake flour
- 1 3/4 cups (350 g) granulated sugar
- 1 tablespoon (10 g) baking powder
- 3/4 teaspoon (4 g) salt
- 1 cup (226 g) unsalted butter, room temperature and cut into cubes
For the Buttercream
- 2 cups (452 g) unsalted butter, chilled (I take the butter out of the fridge 30 minutes before I make my frosting)
- 6 cups (750 g) powdered sugar, measured and then sifted
- 3-4 tablespoons (43.3-57.75 g) heavy whipping cream
- 2 teaspoons (8.4 g) clear vanilla extract
- Pinch of salt
Instructions
For the Cake
- Preheat your oven to 325 degrees. Spray four 6-inch round or (three 8-inch round baking pans) with nonstick spray, line the bottom of each pan with parchment paper and spray again. Set aside.
- In a medium bowl or measuring cup, combine and stir the egg whites, whole egg and the vanilla. Set aside.
- In a bowl of an electric mixer, combine the butter and the sugar. Beat until light and fluffy, about 2 minutes on medium speed.
- Add the egg mixture, followed by the sour cream. Mix until combined. Don't worry if the mixture looks curdled.
- In a separate bowl, whisk together the flour, the baking powder and the salt.
- With the mixer on low speed, alternately add the flour mixture and the buttermilk, starting and finishing with the flour.
- Using a kitchen scale, divide batter evenly among your pans (about 12 ounces of batter in each of the 6-inch pans and about 16 ounces of batter in each of the 8-inch pans), spreading evenly with a small offset palette knife.
- Bake until a cake tester or toothpick comes out with a few crumbs when inserted into the center, about 23 to 28. Check cake at 23 minutes and then set the timer for 2 to 3 minute intervals if the cake needs to bake longer. You're looking for a few moist crumbs to come out on the toothpick when inserted into the center of the cake.
- Let the cake layers cool on racks for 10 minutes before inverting onto greased wire racks. Gently turn the cakes back up so the tops are up and cool completely.
- Once the cakes are cooled completely, level the tops if needed.
- Wrap each cake layer with plastic wrap and chill in freezer for at least an hour before using. The cake layers can be stored for up to a few days wrapped once in plastic wrap and frozen. To store longer than a few days, wrap twice in plastic wrap, then in foil, and seal in a zip-lock bag.
For the Buttercream:
- In the bowl of a stand mixer fitted with a paddle attachment, cream the butter for about 2 minutes. This will soften the butter without it having to be warm.
- With the mixer on low speed, gradually add the sifted powdered sugar, one cup at a time, mixing a little in between each addition.
- With mixer on medium speed, add whipping cream, vanilla and salt.
- Turn the mixer to medium-high speed and beat for an additional 5 to 7 minutes. The frosting will become lighter in color and texture.
- Before spreading on your cake, spend a couple minutes mixing the buttercream by hand with a wooden spoon to push out the air pockets.
Assembly
- Place the first cake layer, top side up. For the 6-inch cake, add about 1/2 cup of frosting on the cake layer. For the 8-inch version, add about 1 cup of frosting. Spread over the cake layer as evenly as possible. Make sure to get eye level with the cake to ensure the frosting is spread evenly over the cake.
- Repeat this step until you get to the final cake layer, which you will lay top side down.
- Apply a thin coat of frosting around the entire cake to lock in the crumbs. Freeze for about 10 minutes.
- After the crumb coat is set, continue frosting and decorating the cake.
Notes
I did three 6-inch cake layers and baked for a little longer.
Courses Dessert
Cuisine Cake
Recipe by Cake by Courtney at https://cakebycourtney.com/classic-white-cake-vanilla-buttercream/