Learn how to make the best homemade angel food cake with this light, airy, and foolproof recipe. Perfect for spring, birthdays, or summer desserts!
Angel Food Cake
You know I love my tall, decadent, layered cakes, but every once in a while it’s fun to switch things up and make an old classic. I’ve always loved angel food cake, but have never made my own! It wasn’t until I was browsing through my vintage cookbooks and saw angel food cake in every single vintage book I had, that I decided it was high-time I tackle this light and fluffy classic cake.
Angel food cake gets its well-known height and texture from a combination of egg whites, cake flour and sugar. We also use cream of tartar as a whipping agent that helps stabilize our egg whites. The biggest difference between angel food cake and a traditional cake is that there’s no fat in an angel food cake. No egg yolks. No butter. Not buttermilk. No oil.
What You Need to Know About Angel Food Cake
As you might have seen on my Instagram account, making this cake wasn’t quite as easy as I expected. It wasn’t because this is a hard cake to make. In fact, there are only a few ingredients and there’s no decorating. Seems simple enough, right? Well, the trouble came because I didn’t know everything there is to know about making an angel food cake. Once I learned all of the do’s and don’ts, this cake was pretty basic.
So, to make things as simple and as fool-proof as possible for you, here’s everything you need to know about angel food cake:
- Room temperature egg whites – just like we do with my regular cakes, we want room temperature egg whites for this cake too.
- Higher oven temperature – I tested the cake a few times at a lower temperature (325 degrees F) and simply couldn’t get the cake to stick to the sides of my pan (even when I didn’t spray the pan). Using a higher temperature (375 degrees F) helps the cake to cook a little more quickly on the sides, which in turn helps the batter to stick to the sides so it doesn’t fall out when you flip it over for cooling later.
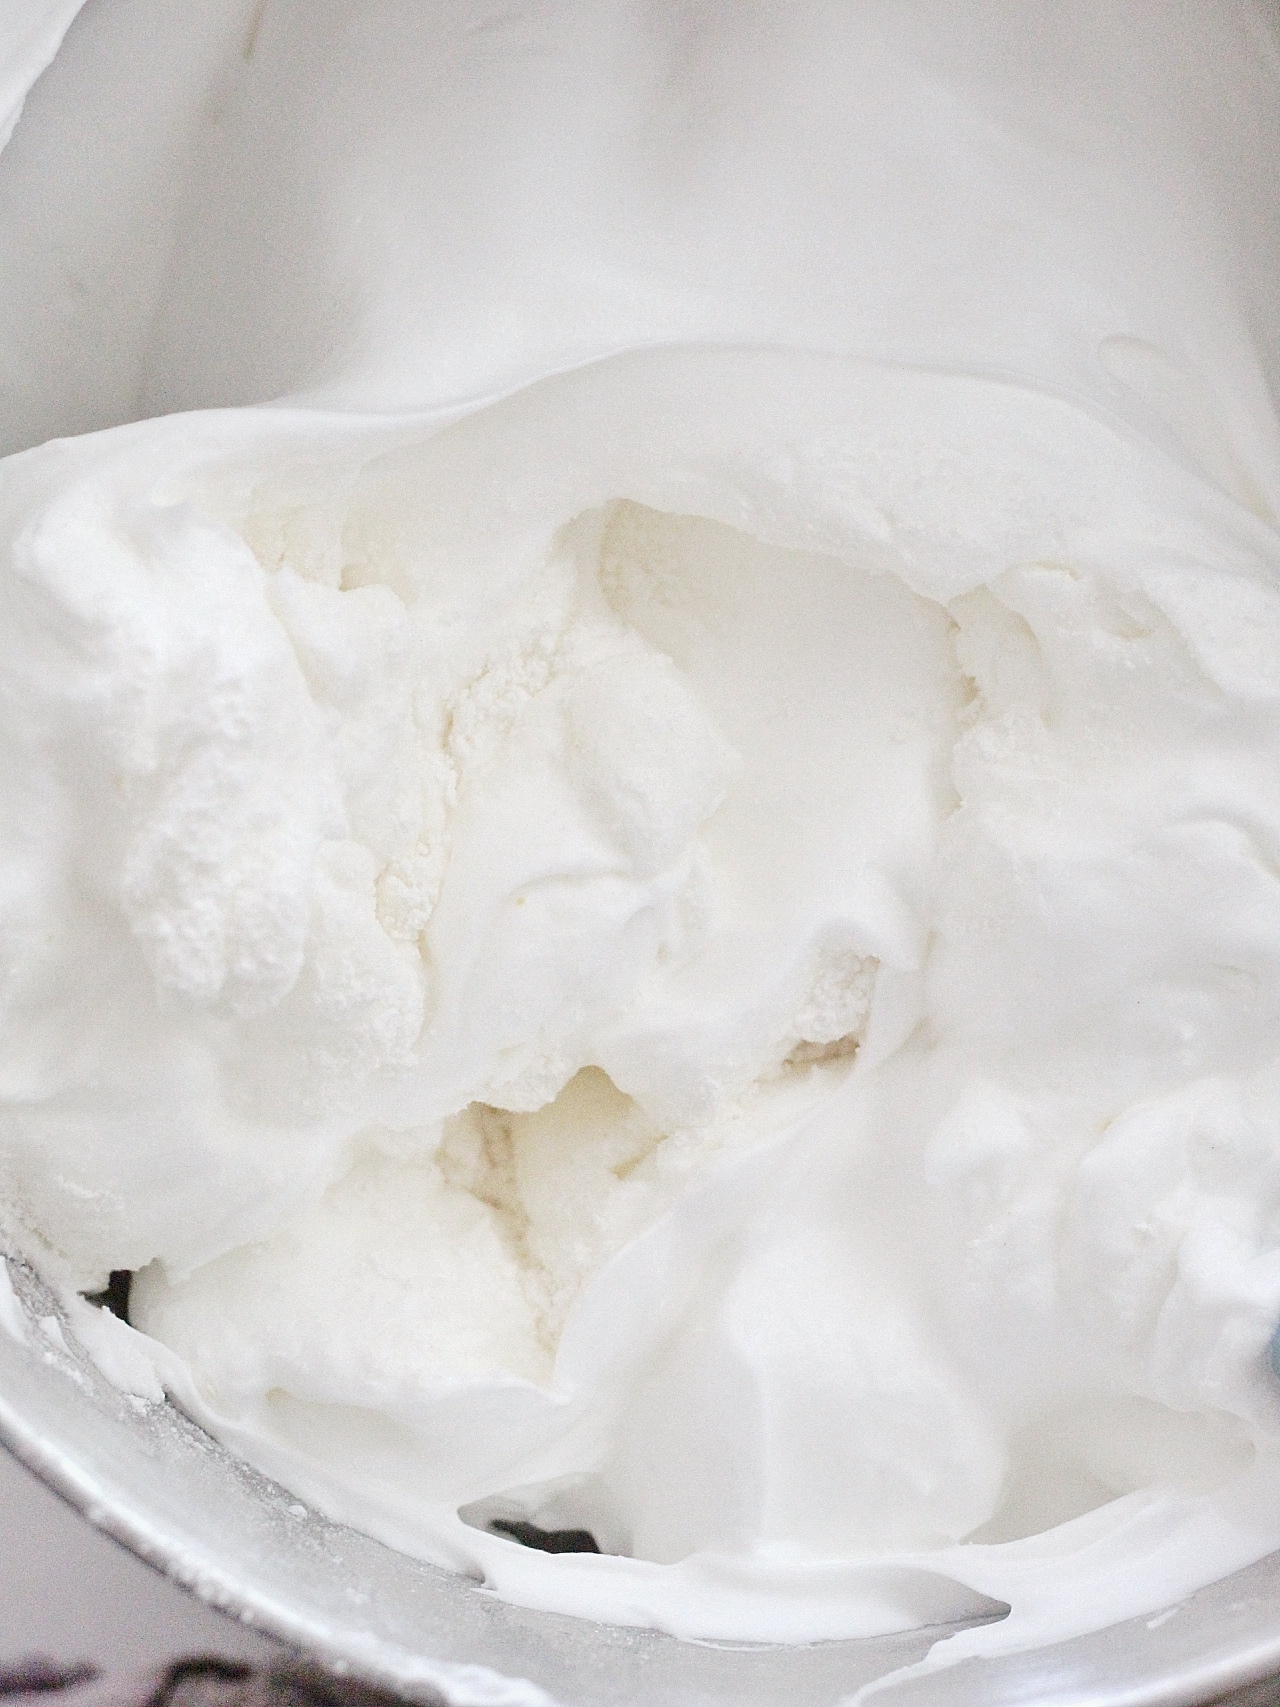
- Whip egg whites to soft peaks – this is different from stiff peaks that you may be used to seeing in recipes for meringues. We want soft peaks to ensure the right texture in the cake as it bakes. If you beat the egg whites to stiff peaks, your angel food cake will have a gummier texture. For reference, the picture below shows you how the egg white mixture folds over on the top of the whisk. As you run your whisk through the egg whites and pull it out, the peaks should gently fall over. This is soft peaks.

- Use cream of tartar – cream of tartar is an acid and stabilizes the egg whites. Without cream of tartar, your cake will collapse. Other acidic ingredients aren’t quite as strong, so I wouldn’t recommend substituting cream of tartar with anything.
- Sift some of the sugar and flour several times – four to be exact. This ensures you don’t have any clumps and that the consistency of your batter will be light and smooth.
- Gently fold the dry ingredients into the egg whites – to do this, you’ll actually add the dry ingredients in four separate additions, sifting each addition one more time as you add it in. My vintage cookbooks recommend using 10 strokes as you fold each time. I think they wanted to be super precise so bakers didn’t risk over-mixing and losing the fluffy texture of the whites.
- DO NOT spray your pan with nonstick spray, line the bottom with parchment or use a nonstick pan – we want the cake to stick to the sides and bottom of the pan so that while it cools, it holds its shape.
- Run a knife through the batter – once you’ve poured the cake batter into the tube pan and gently leveled the top with your spatula, use a kitchen knife and swirl it through the batter once or twice to remove any big air pockets.
- Bake the angel food cake until it’s a dark golden brown on top – I noticed that during my trial rounds, one of the reasons my cake wasn’t sticking to the pans and would sink was because I didn’t cook the cake long enough. In my fifth attempt, I bumped my temperature up to 375 for most of the bake time, and then, as the cake started to brown more and more on top, I reduced the temperature (without removing the cake or opening the oven door) to 350 for the remaining 10 minutes.
- Cool the cake upside down – your tube pan should have “feet” and/or a center tube that is taller than the sides of the pan. This is to allow the cake to have some room from the counter surface to cool. We want to cool the cake upside down so that the weight of the cake doesn’t fall in on itself. Cooling the cake upside down ensures that it holds its shape and air circulates underneath it.
- Once the cake is cooled, cut it out of the pan – using a sharp knife, gently run the knife around the edges of the cake and the center tube. Flip the cake over onto your cake stand and pat the top a few times to release the top of the cake.
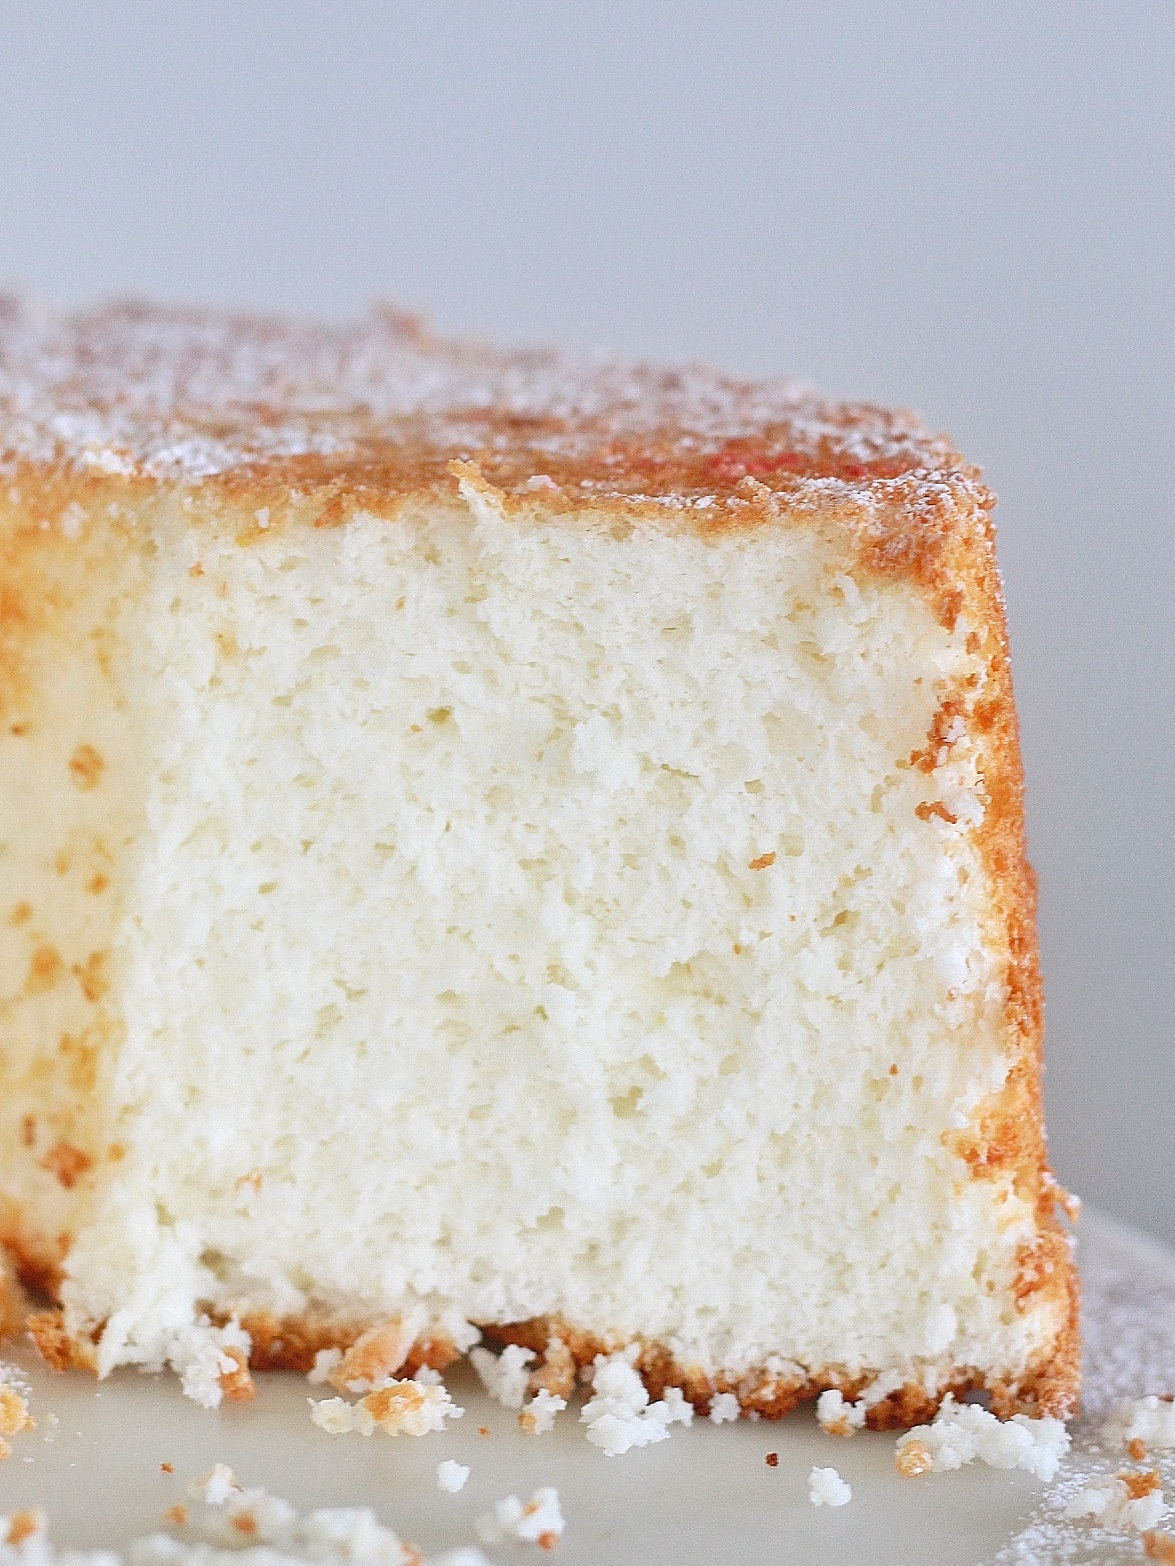
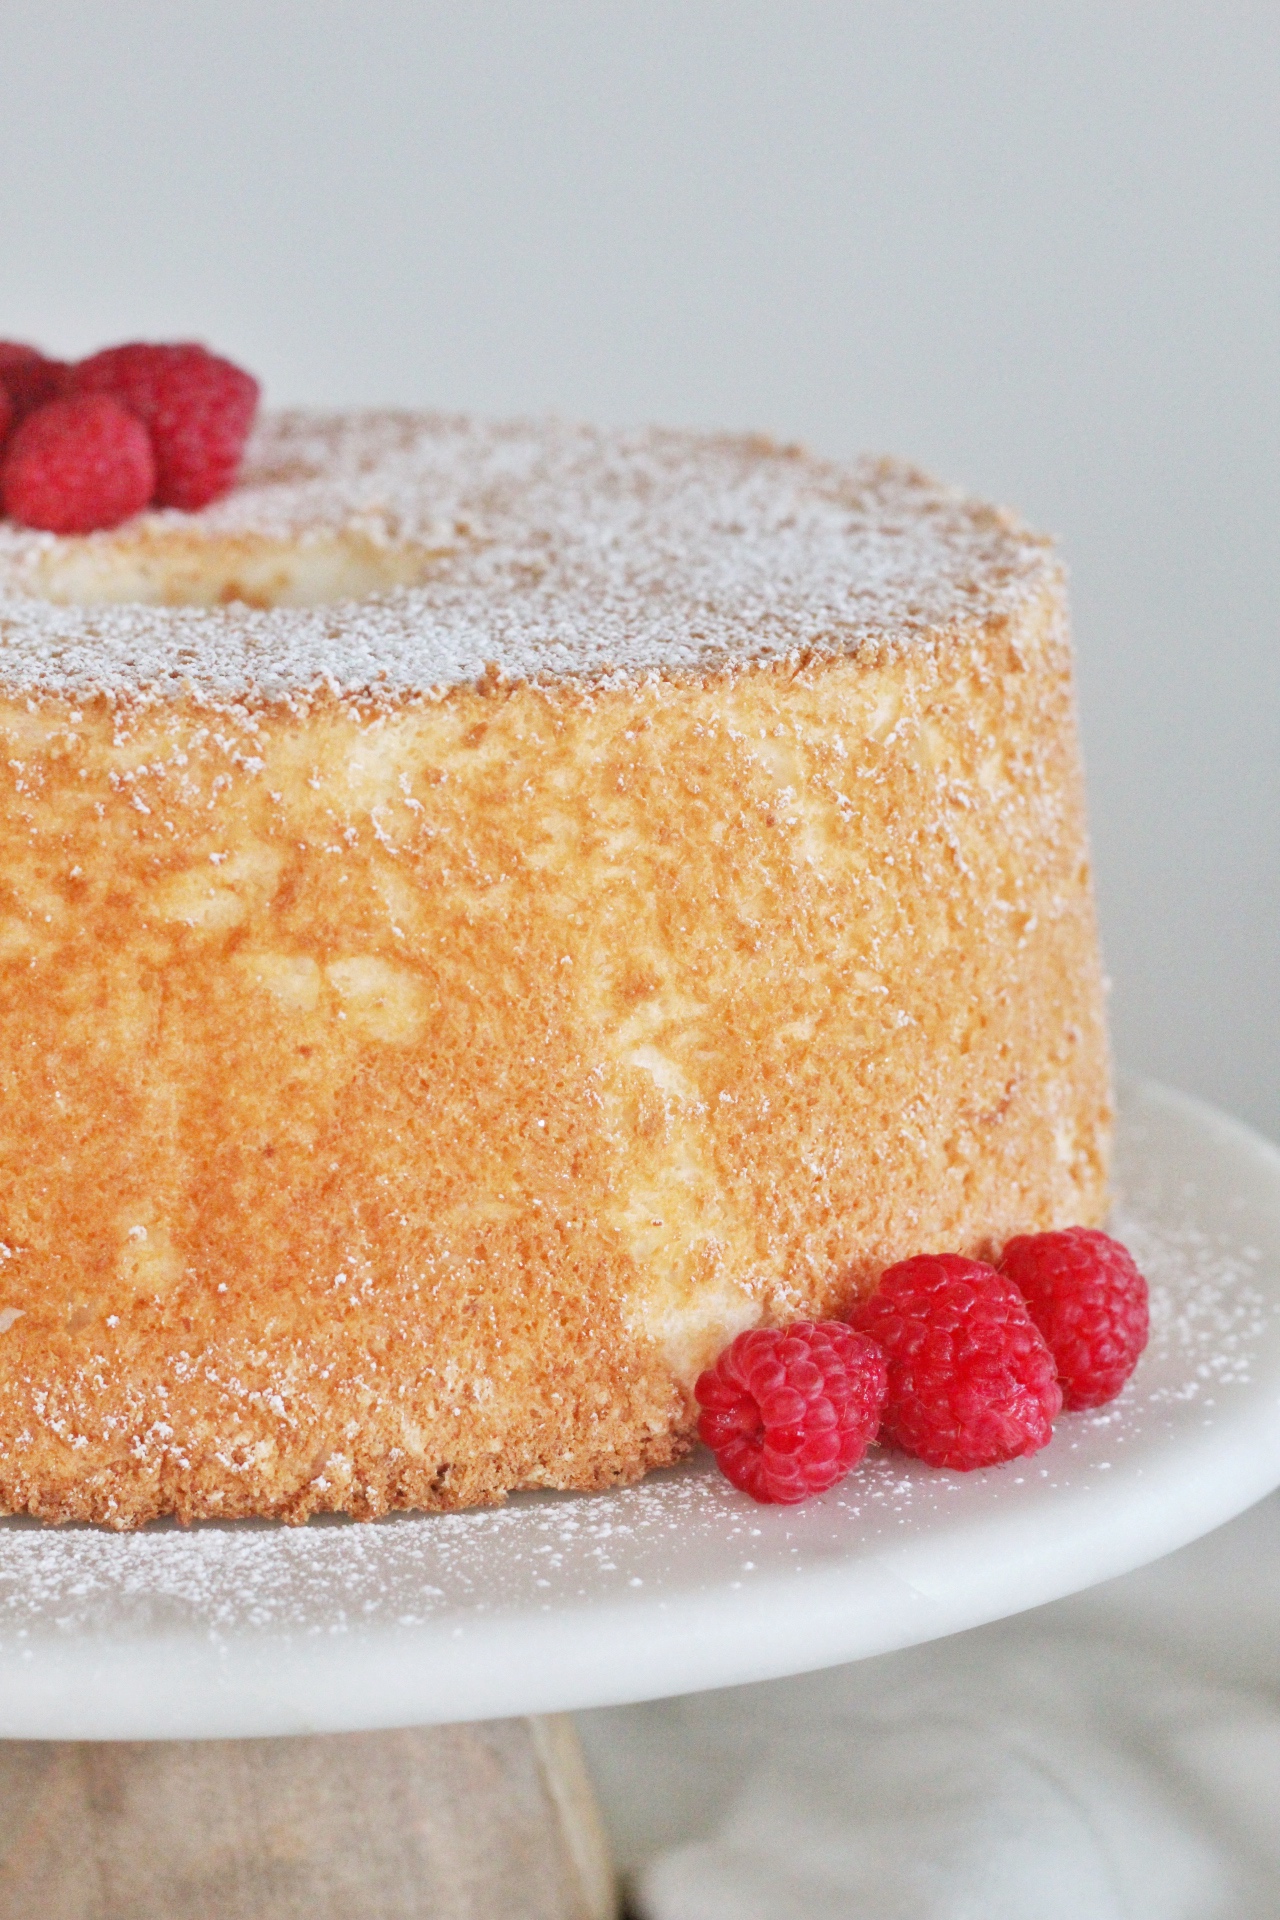
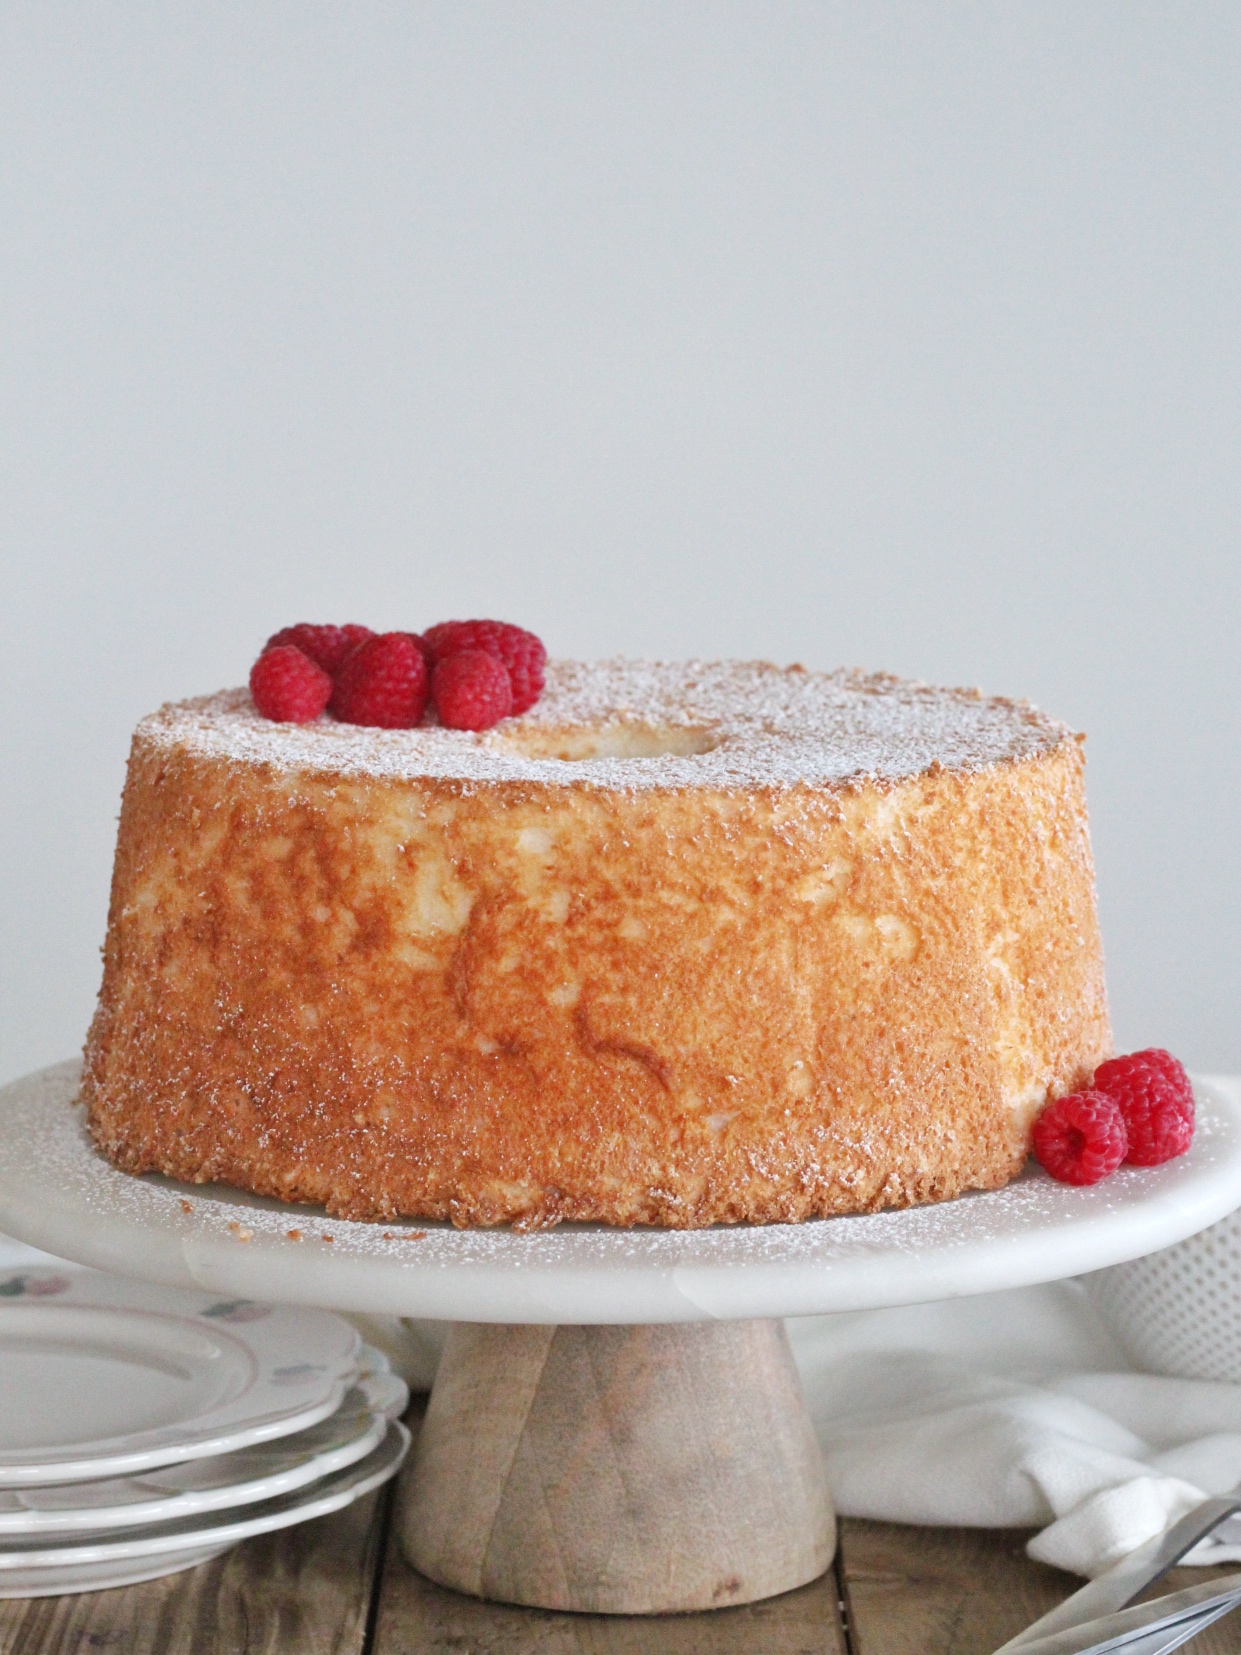
Once I nailed all these tips and tricks, the final product took my breath away! Look how tall the cake rose and how light and fluffy those crumbs are.
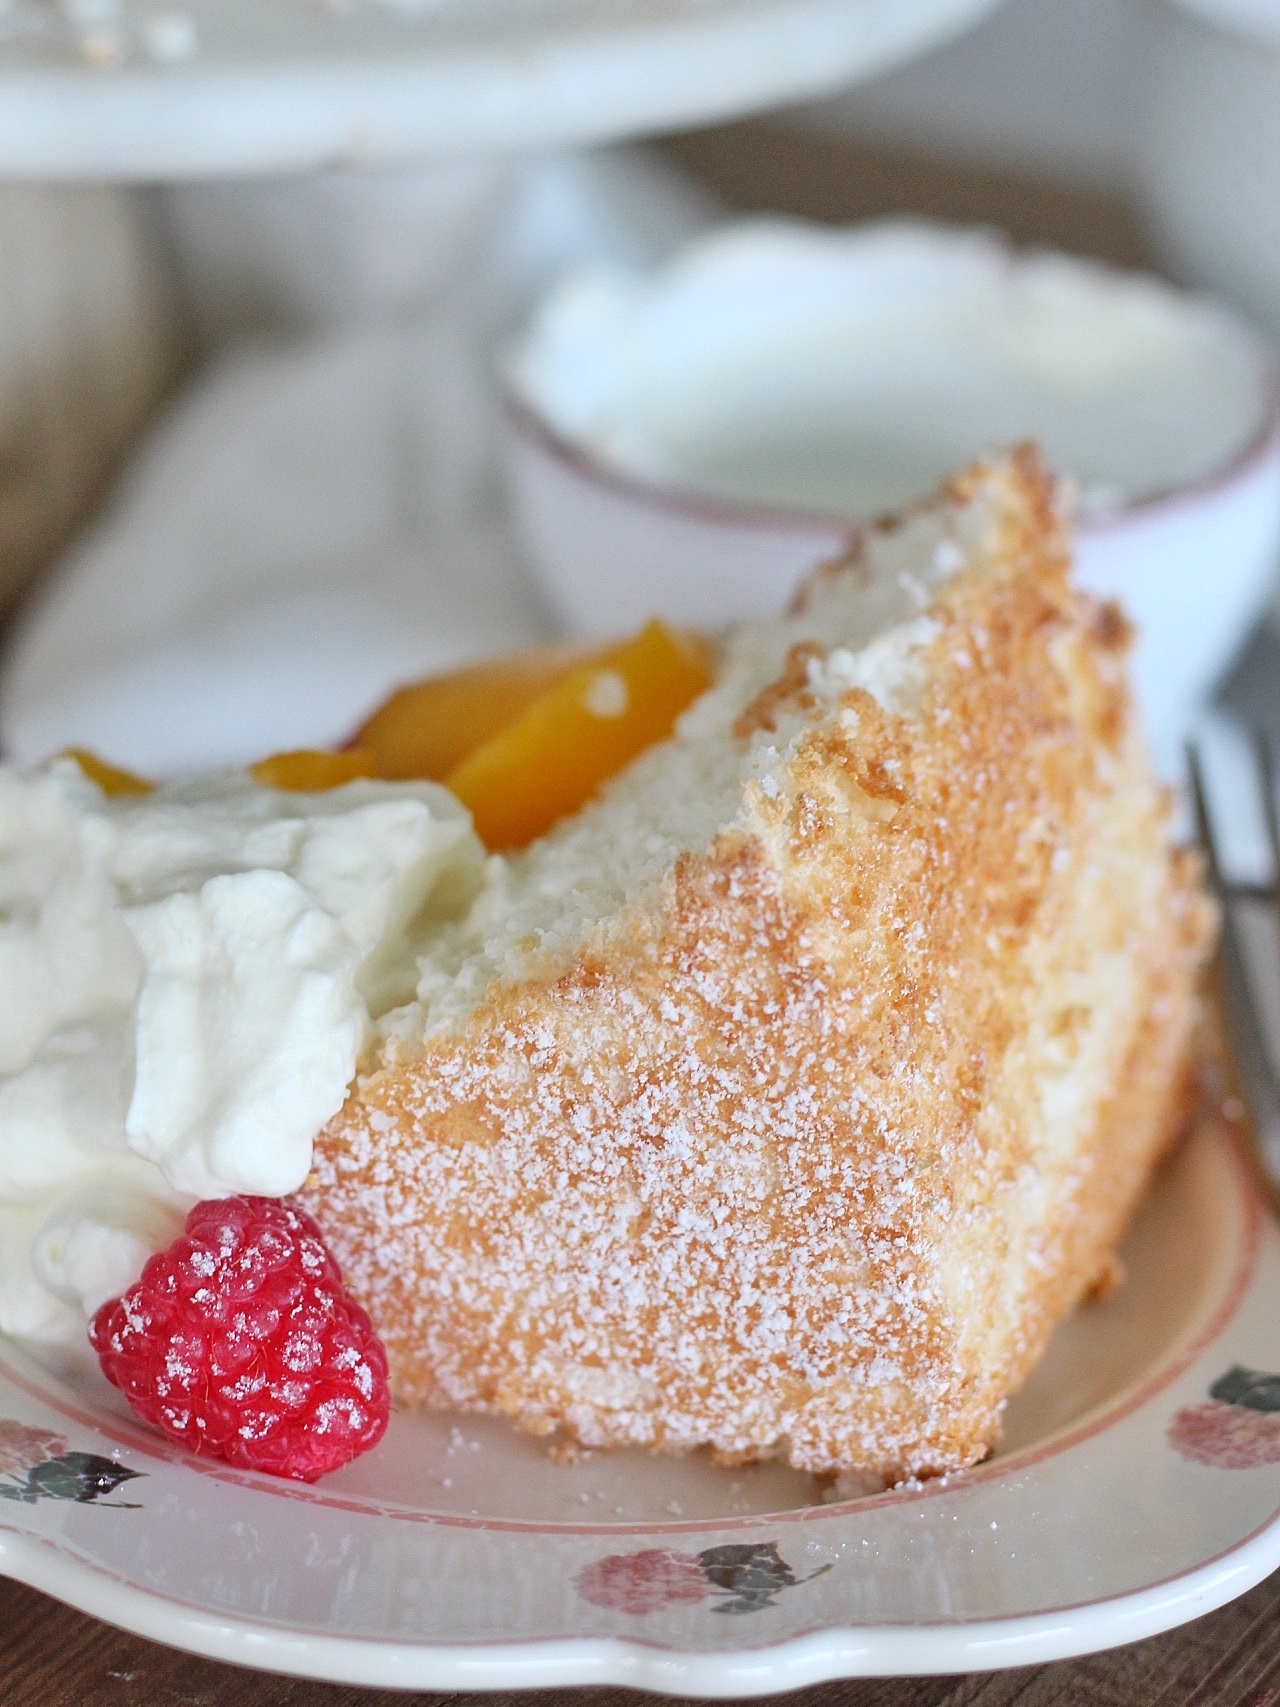
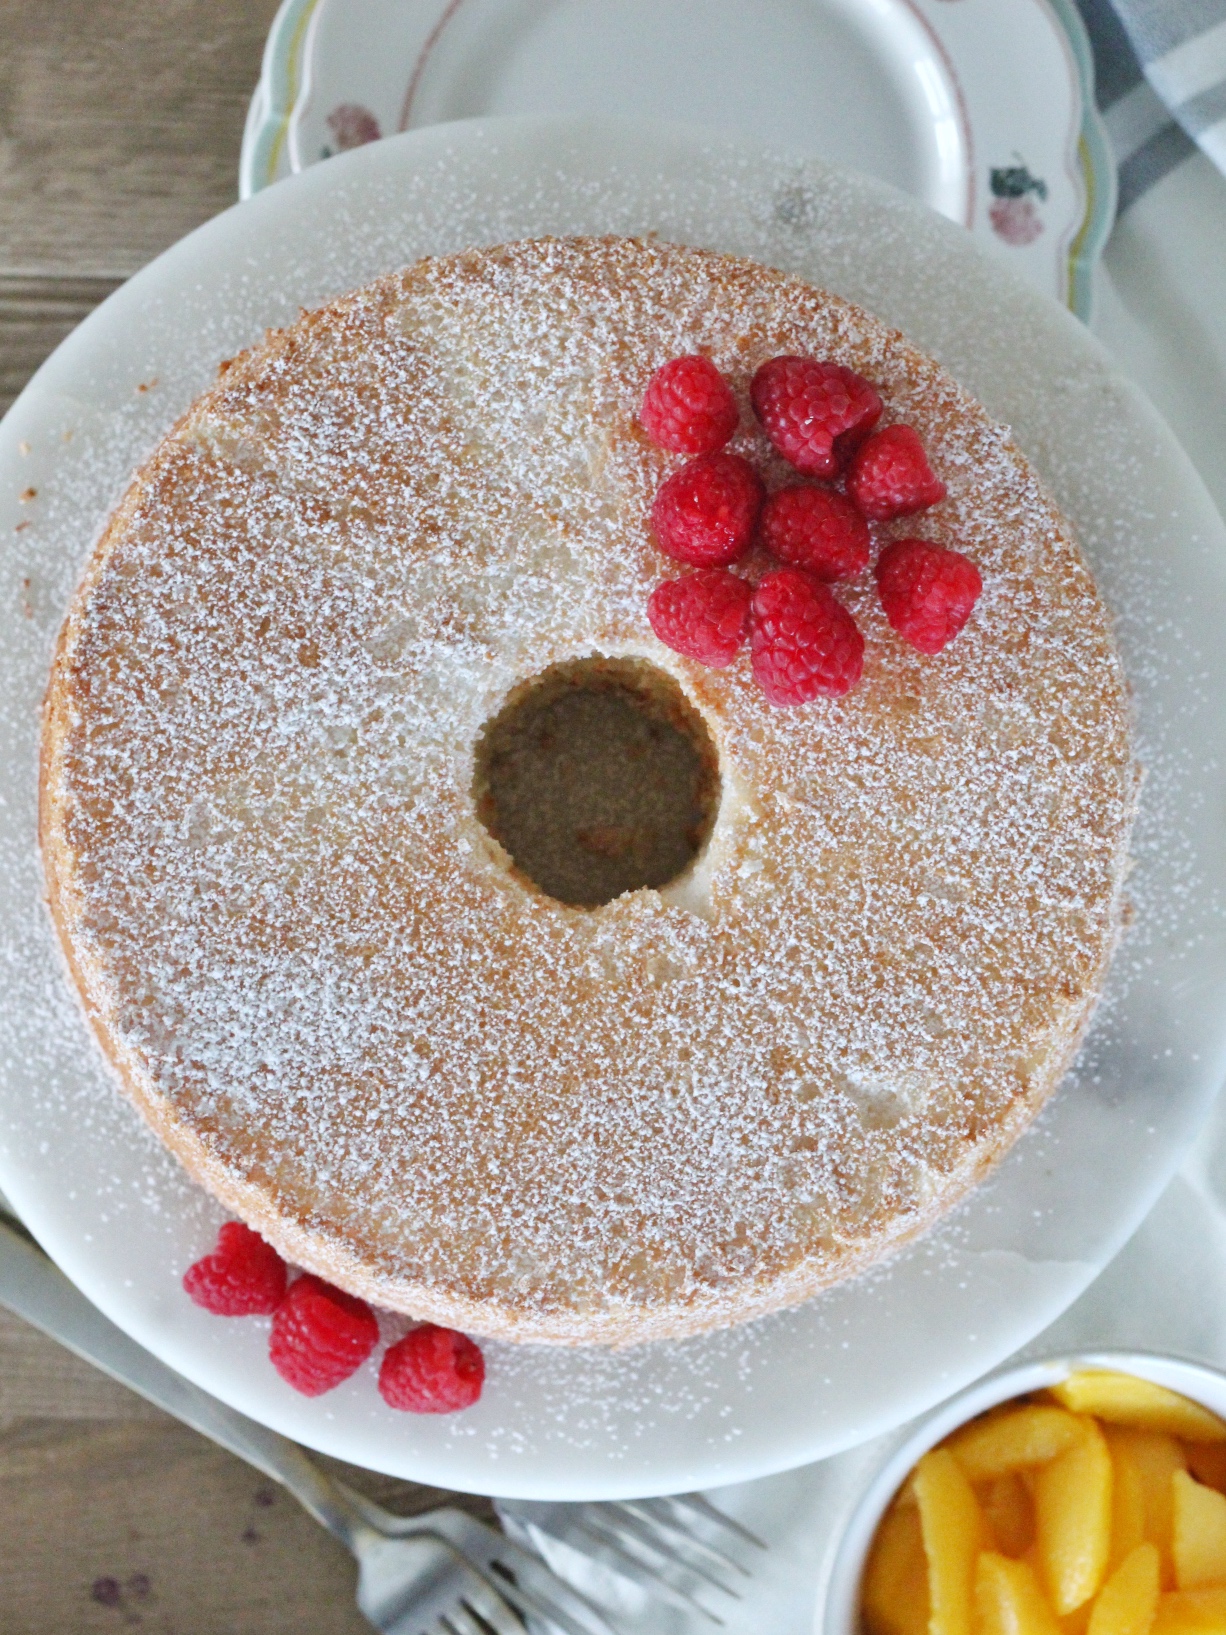
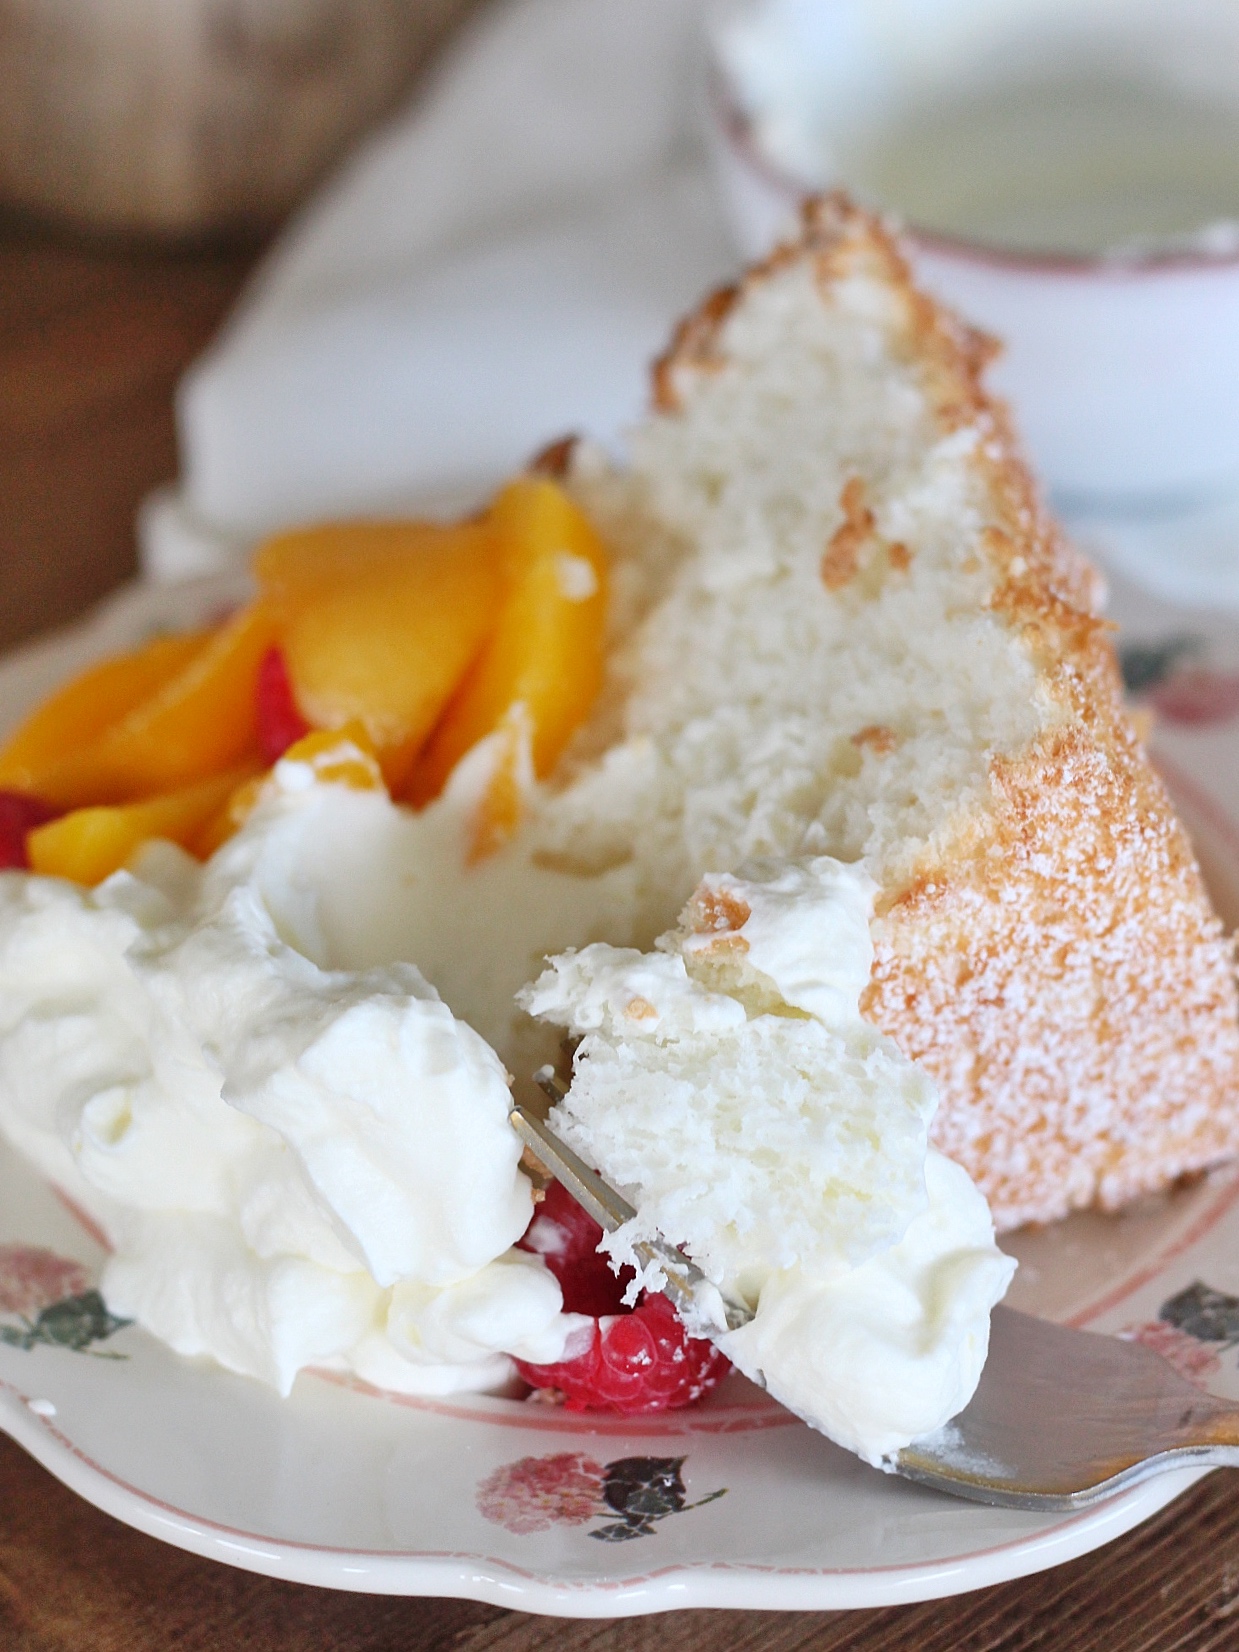
I made a simple homemade whipped cream and served each slice with fresh peaches.
I’m so excited for you to try this cake. I think you’ll the hint of citrus I added to the batter. If you don’t want the lemon and orange extract, you can certainly replace them with vanilla extract.
Enjoy!
More Recipes You’ll Love
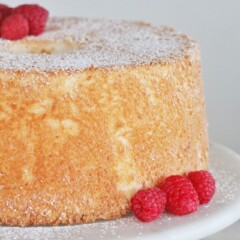
Angel Food Cake
Equipment
- Tube Pan
Ingredients
FOR THE CAKE
- 1 3/4 cup (350 g) granulated sugar divided
- 1 cup (113 g) plus 2 tablespoons cake flour
- 1/4 tsp (2 g) salt
- 1 1/2 tsp (5 g) cream of tartar
- 1/2 tsp (2 g) lemon extract
- 1/2 tsp (2 g) orange extract
- 13 large egg whites at room temperature
FOR THE WHIPPED CREAM
- 1 cup (231 g) heavy whipping cream cold
- 1/2 cup (62.5 g) powdered sugar measured and then sifted
- 1 tsp (4.2 g) vanilla extract
GARNISH
- Fresh berries or peaches
Instructions
FOR THE CAKE
- Preheat your oven to 375 degrees F.
- Combine one cup of the sugar, all of the cake flour, and salt in a small bowl. Whisk to combine and then sift the ingredients through a mesh strainer, four times. Set aside.
- In the bowl of a stand mixer, fitted with the whisk attachment, whisk the egg whites on medium-high speed. After a minute or so, you'll see that the egg whites start to foam a little. At this point, add the cream of tartar and the orange and lemon extracts while the mixer is going.
- As the egg whites start to froth even more, very slowly add the reserved 3/4 cup of sugar while the mixer is still on medium-high speed.
- You're looking for the egg whites to get white in color and create soft peaks. This means that as you pull the whisk attachment out of the mixture, the egg whites lift with the whisk but then as they pull away, the peaks fall softly and don't stay in a stiff peak. Notice in the picture how the egg whites fold over on the end of the whisk attachment. If you over beat the egg whites to stiff peaks, this will result in a gummy, chewy texture in the cake.
- Once your egg whites have reached soft peaks, turn your mixer off, remove the bowl from the stand. You'll then sift the dry ingredients into the egg whites in FOUR additions, folding gently between each addition. In my vintage cookbook, it specifically says "fold with 10 strokes of your spatula" each time. Make sure you're scraping the bottom of the bowl, as well as the sides, to gently incorporate all of the dry mixture into the egg whites.
- Pour the batter into your tube pan. The pan SHOULD NOT be sprayed with non stick spray or lined with parchment paper. Remember, you want the cake to stick to the sides of the pan a bit.
- Once the batter is poured evenly in the pan, run a knife through the batter a couple times to help get rid of any air pockets.
- Bake the cake for 25 minutes. At 25 minutes, reduce oven temperature to 350 and continue to bake for another 10 to 15 minutes. My cake took a total of 38 minutes.
- Remember, do not open the oven door at any point during the baking time.
- Once the cake is baked, gently turn the tube pan over onto a cooling rack. Tube pans usually have "feet" or a tube in the middle of the pan that's taller than the sides of the cake. This allows the pan to rest on a cooling rack, while allowing air to flow from the bottom and help cool the cake.
- Cool the cake completely, about an hour. Once the cake is cooled, turn the pan back over. Using a sharp knife, carefully cut the cake away from the sides and middle of the cake pan. Turn the cake over into a cake plate or cake stand and pat the top to remove the cake from the pan.
- Serve with fresh whipped cream and berries or peaches.
FOR THE WHIPPED CREAM
- In a cold stainless steel bowl, combine the cream, powdered sugar and vanilla. Whip on high until soft peaks form. Keep cold until ready to use.
Can I use egg whites in a carton or do they need to be from eggs?
You can!
Note: Not all egg whites in cartons will whip up to soft peaks. I learned this the hard way by trying some from my local grocery store. After failing to get soft peaks I read the label on the carton and it specified that they weren’t recommended for meringues or angel food cakes. Just a heads up.
When I tried again with eggs that I separated myself the recipe worked great and turned out delicious.
I just noticed that in step 2 of the recipe it says to use a paddle attachment, but in step 5 (and the picture) a whisk is used. Wondering if I missed a switch somewhere, or if it should have been the whisk all along? Can’t wait to try this. It’s baking right now for my husband’s bday and I’m crossing my fingers it turns out as beautiful as yours!
It should be a whisk! I fixed that. Thank you!
Can I make this angel food cake in advance? Or does it not store well?
Also, if replacing the citrus extract with vanilla, what measurement of vanilla extract should I use?
It’s definitely better fresh. And same amount of vanilla as citrus.
My cake is puffing up higher than the tube pan…is my pan too small?
It’s ok if it puffs up and then drops a little. If it’s baking ok it’s fine!
How long should the egg whites take to form peaks?
A few minutes.
Absolutely delicious. No eggy taste as others I have made. Perfect sweetness. Tender, yet a beautiful cut with a serrated knife.
**Newbie tip- line up a bottle that will fit in the neck for inverting before you begin; I was scrambling when it came out because I assumed I had a condiment bottle that would fit my pan. Au contraire! Mine only fits something like a beer bottle.
I made vanilla this time but looking forward to trying the orange/lemon as the recipe is written.
Well done. ?
Our family recipe, bake at 375° for 16 minutes, 350°, 15 minutes, reduce to 325° for remainder of cooking.
I attempt angel food cake every year for my husband’s birthday and it always comes out too dense
and gummy. Tried this recipe this year and finally nailed it!!!! Definitely saving and will be using this one going forward. Thank you!!
Hola me gusta mucho la repostería y más las personas que amablemente ayudan a los demás y por vivir en otros países no nos bloquean
GRACIAS por sus ayudas
MUCHAS MUCHAS GRACIAS
Will this work if baked in a normal 8″ pan, or does it need to be in the tube pan?
I haven’t tried it in an 8-inch pan, so I’m not sure. I’m sorry.
Hello and thank you for your delicious recipes. Can this recipe be made into cupcakes? If so, are there any changes in the instructions and baking times and temperatures? Would you need to invert cupcakes to cool them? Lastly, can the recipe be doubled?
Thank you
Hi Krista, I haven’t tried this recipe as cupcakes. With a regular cake, I always say yes they work great as cupcakes, but I’m not sure how these would turn out. I need to give it a try.
I’m excited to try this one! Do you have a tube pan that you love and would recommend. The fat daddio pan doesn’t have a false bottom, do you think the false bottom is good or not necessary?
The one I use doesn’t have a false bottom and it worked great. I like Fat Daddio and the Nordicware brand too.
Could you please share what size tube pan you used for this recipe, please?
Thank you.
Mine is from william sonoma and the measurements are: 9 1/4″ diam., 4″ high (6 1/2″ high with feet).