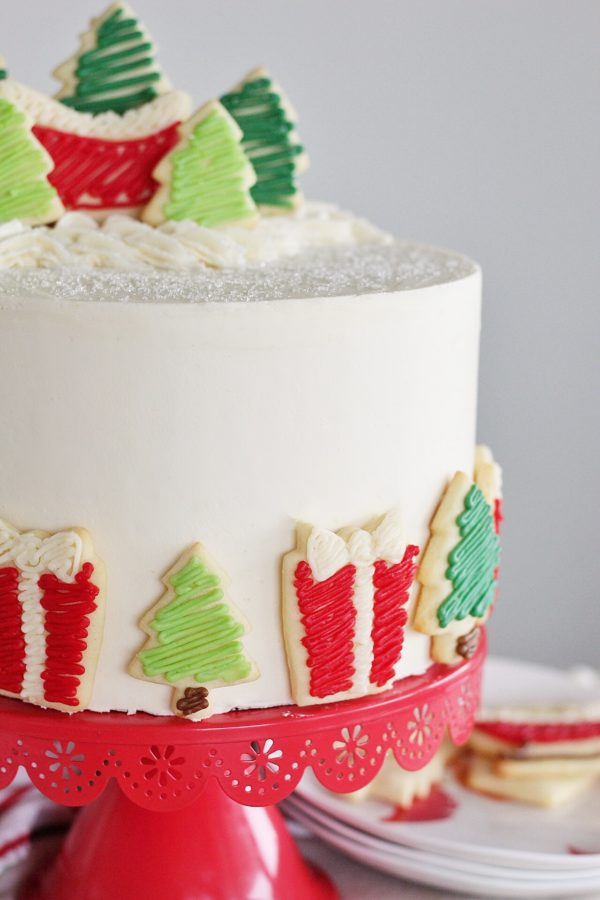
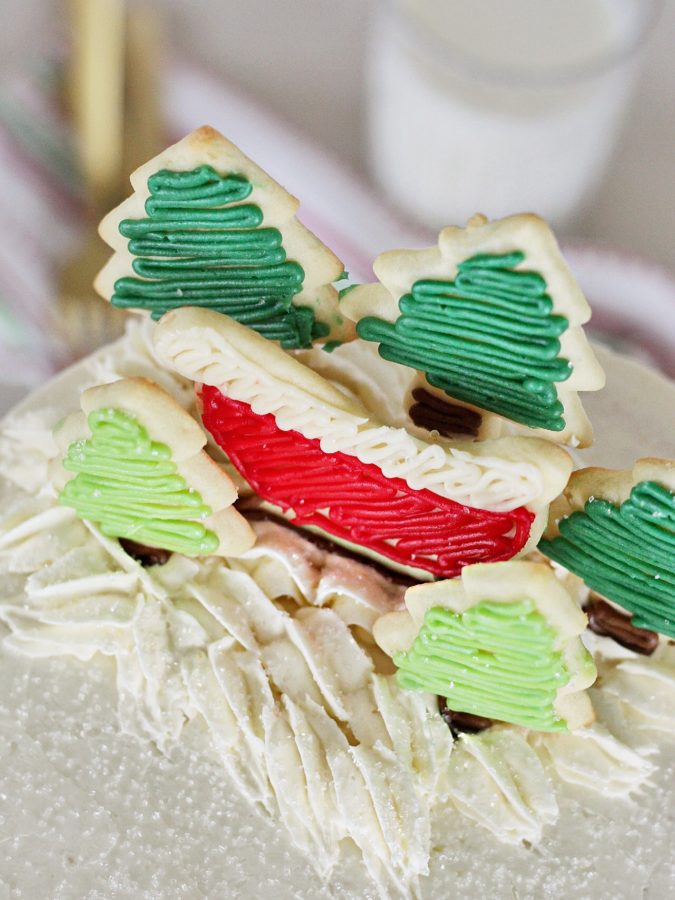
Santa’s Milk and Cookies Cake – vanilla cake layers with vanilla buttercream, sugar cookies and boiled milk frosting.

I’ve been having so much fun revisiting some of my old holiday cakes, but it’s time for a brand new flavor today! Let me introduce you to my Santa’s Milk and Cookies Cake!
Family Tradition
Like many of you, Christmastime is my favorite time of year. I love the music, the decorations, the shopping, the treats, but most of all, I love the time with my family and our traditions. More than any other holiday, Christmas brings with it my favorite family memories that have been built upon traditions we started when I was a kid. And while my family has changed a lot over the years, which means many of our traditions have changed, the one tradition that stays the same year after year is that of decorating sugar cookies for Santa.

Cookie Love
Cookies have always held a special place in my heart because they were the first baked good I felt like I mastered. At a young age, I loved being in the kitchen with my mom making a batch of chocolate chip cookies or rolled sugar cookies. Sugar cookies especially were so fun to make because we could create something different each time. Hearts for Valentine’s Day, shamrocks for St. Patrick’s Day, pumpkins for Halloween, and of course, trees, stars, bells, and snowmen for Christmas.
Our Christmas sugar cookies always became part of a plate of cookies we’d gift to our neighbors. We also always saved our favorite decorated cookies for Santa, which we left out with milk and a note. Sometimes we even remembered the reindeer and left carrots alongside the treats.

Santa’s Milk and Cookies Cake
As I was thinking about Christmas-inspired cakes this year, I couldn’t help but wonder how I could turn this beloved Christmas cookie into a cake. The obvious idea might be to simply combine a vanilla cake with vanilla frosting, but I never like to go with the obvious 😉 Nope. Not me! My first thought, actually, was, “I have to include my favorite Sugar Cookie Recipe!”. These cookies are hands down my favorite sugar cookies. They’re soft and tender, and hold their shape nicely. I decided to bake up two 8-inch round sugar cookies and include them as layers in the cake. You’ll see I noted this in the recipe, but it’s important you don’t over cook the cookies. We want them to be nice and soft when you cut into the cake.

I also chose to use two frostings in this cake. The first is my traditional vanilla buttercream – just like the one you’d want to eat on a sugar cookie. There’s plenty in the recipe for the inside of the cake, as well as for frosting your extra sugar cookies. I also included a boiled milk frosting to represent the milk. I love that this frosting is far less sweet than a typical American Buttercream, actually has a milk flavor, and turns out so white. Isn’t it gorgeous?!
I think you’ll love the subtle flavor difference between the two frostings, as well as the texture combinations of the cake and sugar cookie. I really have a feeling a slice of this cake might end up on a plate next to your fireplace. Pretty sure Santa will approve!
Enjoy!

Santa’s Milk and Cookies Cake
Ingredients
FOR THE SUGAR COOKIE
- 3/4 cup (169.5 g) unsalted butter room temperature (just barely soft enough to leave a fingerprint and still cold)
- 1 cups (200 g) granulated sugar
- 2 large eggs room temperature
- 1/2 teaspoon (2.1 g) vanilla extract
- 2 1/2 cups (300 g) all purpose flour
- 1 teaspoons (4 g) baking powder
- 1/2 teaspoon (2.8 g) salt
FOR THE CAKE
- 4 large egg whites, at room temperature
- 1 whole egg, at room temperature
- 1 1/4 cup (300 g) buttermilk, at room temperature
- 3 teaspoons (12.6 g) vanilla extract,
- 3 cups plus 3 tablespoons (366.5 g) cake flour
- 1 3/4 cups (350 g) granulated sugar
- 1 tablespoon + 1 teaspoon (16 g) baking powder
- 3/4 teaspoon (4.2 g) salt
- 12 tablespoons (169.5 g) unsalted butter room temperature and cut into cubes
FOR THE VANILLA BUTTERCREAM
- 1 cup (226 g) unsalted butter slightly cold (just barely soft enough to leave a fingerprint and still cold)
- 3 cups (375 g) powdered sugar sifted
- 2 tablespoons (28.8 g) heavy cream
- 1/2 teaspoon (2.1 g) pure vanilla extract
- Pinch of salt
- *This buttercream recipe makes enough to fill and cover your cake. If you want to add additional piping, you’ll want to make an extra 1/2 batch.
FOR THE BOILED MILK FROSTING
- 1/4 cup (30 g) all-purpose flour
- 1 teaspoon (5.6 g) salt
- 2 cups (480 g) whole milk
- 2 cups (452 g) unsalted butter, softened
- 2 cups (450 g) castor sugar*
- 1 teaspoon (4.2 g) vanilla extract
- *Can substitute use 1 3/4 cup granulated sugar that you grind to a finer consistency in your blender.
Instructions
FOR THE SUGAR COOKIES
- Preheat your oven to 400 degrees F. Pre two 8-inch round baking pans with nonstick spray, parchment paper and spray again. Set aside.
- In the bowl of a stand mixer fitted with the paddle attachment cream the butter and sugar until light and fluffy, about 2 minutes.
- Add the eggs and vanilla. Mix until incorporated.
- With the mixer on low speed, add the flour, baking powder and salt. Mix until just incorporated.
- Cover and refrigerate for at least one hour.
- Measure out 10 ounces of dough for each of the two cake pans. Using your hands, push the dough out to the edge of the pan (doesn’t need to be touching, just try to create an even circle).
- Bake the two large cookies for 7 to 8 minutes. When you take the cookies out, they shouldn’t be golden brown. We want the cookie to come out still light in color so it’s nice and soft in the cake.
- For the rest of the dough, roll the dough out to about 1/4 inch thick. Use cookie cutters to cut shapes and place the cookie dough 1 inch apart on the baking sheet.
- Freeze the cut dough for 10 minutes and then bake 5 to 7 minutes (time will depend on the size of your cookies).
- Cool completely before frosting.
FOR THE CAKE
- Preheat your oven to 325 degrees. Spray three 8-inch round baking pans with nonstick spray, line the bottom of each pan with parchment paper and spray again. Set aside.
- In a medium bowl or measuring cup, combine and stir the egg whites, whole egg and the vanilla. Set aside.
- In a bowl of an electric mixer, fitted with a paddle attachment, combine the dry ingredients together on low speed for 30 seconds.
- Add the butter one piece at a time, about every 10 seconds. Once all the butter is added, pour in the buttermilk and mix on low for about 1 minute, until the ingredients are incorporated.
- Scrape down the sides of bowl and begin to add the egg mixture in 3 separate batches, mixing on miedum-low until light and fluffy, about two minutes. Fold once or twice to ensure the batter at the bottom of the bowl is incorporated and mix for another 20 to 30 seconds.
- Using a kitchen scale, divide batter evenly among your pans (about 15 ounces of batter in each pan), spreading evenly with a small offset palette knife.
- Bake until a cake tester or toothpick comes out with a few crumbs when inserted into the center, about 25 to 30 minutes. Check cake at 25 minutes and then set the timer for 2 to 3 minute intervals if the cake needs to bake longer. You're looking for a few moist crumbs to come out on the toothpick when inserted into the center of the cake.
- Let the cake layers cool on racks for 10 minutes before inverting onto greased wire racks. Gently turn the cakes back up so the tops are up and cool completely.
- Once the cakes are cooled completely, level the tops if needed.
- Wrap each cake layer with plastic wrap and chill in freezer for at least an hour before using. The cake layers can be stored for up to a few days wrapped once in plastic wrap and frozen. To store longer than a few days, wrap twice in plastic wrap, then in foil, and seal in a zip-lock bag.
FOR THE VANILLA BUTTERCREAM
- In the bowl of a stand mixer fitted with the paddle attachment, beat the butter on medium speed for about 2 minutes, until light and fluffy.
- With the mixer on low speed, gradually add the powdered sugar, heavy cream, vanilla and salt.
- Turn the mixer to medium-high speed and beat the frosting for an additional 5 minutes, until nearly white.
- Before frosting or piping, mix the frosting by hand with a wooden spoon or spatula to push out the air pockets.
FOR THE BOILED MILK FROSTING
- In a medium saucepan, whisk together the flour and 1/2 cup of the milk until smooth.
- Set over medium-high heat and let cook for 1 to 2 minutes or until slightly hot, stirring frequently.
- Whisk in remaining milk and salt. Whisk constantly until the mixture has thickened to the consistency of unset pudding (this can take up to 10 minutes).
- Remove from heat and pour the mixture into a shallow dish. Cover the surface of the mixture with plastic wrap
- Place in the refrigerator until cool for at least an hour.
- When cool, the mixture will be thick like custard. If a film formed on top of the mixture, remove it from the bowl.
- In a large bowl (or a bowl of a stand mixer) beat the butter and sugar together until fluffy. Add vanilla and mix well. Beat in cooled flour mixture one tablespoon at a time on medium-high speed. When all the flour mixture is added, beat on high speed until light and fluffy, about 6 minutes.
- Rub a little frosting between your fingers. If the sugar granules remain, beat for 4 more minutes, or until granules cannot be detected with fingers.
Assembly
- Place the first vanilla cake layer, top side up, on a cake board. Spread about 3/4 cup of the vanilla buttercream over the cake layer. Top with one layer of the sugar cookie rounds, followed by about 3/4 cup of the boiled milk frosting.
- Repeat step 1 for the second cake layer and cookie layer. Place the third cake layer, top side down, on top of the second layer of boiled milk frosting.
- Apply a thin coat of the boiled milk frosting around the entire cake to lock in the crumbs. Freeze the cake for 10 mins.
- After the crumb coat is set, apply the final coat of the boiled milk frosting.
- To get an extra sharp edge and straight sides, you can place an acrylic disk or extra cake round on top of the crumb coat. Once the acrylic disk is in place, frost and smooth the sides of the cake. Freeze the cake for another 20 minutes. At this point, the frosting will be a bit more set and you’ll run a knife under the acrylic disk to “cut” it off from the cake. You’ll have a nice crisp edge. Fill in the top of your cake with more of the boiled milk frosting.
- Use remaining cookie dough to create shaped cutout cookies to decorate the sides of your cake.

Hi. I’m very excited to try this cake recipe. Would you happen to know what changes I should make for high altitude? I’m at about 5500 ft. here in Colorado.
All of my cakes are already ready for high altitude so you should be good!
I’m going to be printing this and giving it a try, nervous to try it but excited at the same time. I don’t have the equipment you have, so it won’t look as good, but might as well give it a try!
I’ve become a tad obsessed with baking myself so I feel like I have found a kindred spirit with you. Love your blog/instagram/story. Keep being awesome!
Allison
https://clementschronicles.com
Can I freeze the sugar cookie layers? If so, how should I do it? I’m planning on making the cakes tomorrow and assembling on Thursday.
Yes you can! Just double wrap them in saran!
Had issues with lumpy butter…is it supposed to be lumpy and melt in when baked? Why not cream the butter and sugar first? Cakes are cooling now and seem to have turned out!
This cake does beat butter and sugar first. If it’s too lumpy your ingredients might have been too cold.
Where did you find that beautiful cake stand?
Target
This looks amazing ! How would you make this into cupcakes ? Fill with the boiled milk frosting and maybe a sugar cookie bottom ?
Yeah I think that would be perfect!
How would you do a sugar cookie bottom for cupcakes? Do you bake the cookie dough before adding the batter? Or just add the cookie dough and batter on top and bake it that way?
This took all day but it was great! It wasn’t too hard, just time consuming!
My boyfriends favorite thing that I bake is sugar cookies, so this was the perfect recipe for his birthday cake. The cake was light and perfect and the sugar cookie in the middle was a nice surprise, with a slight change of texture, but still really cohesive. Now the ermine frosting is a game changer. I didn’t think it would actually taste like milk, I’ve only heard that it’s less sweet than American buttercream, but I might be making this frosting more often. Now I slightly messed up by freezing the ermine frosting because when I whipped it back at room temperature, it came out too thin and runny. I ended up putting this frosting in the middle like a filling and then the American vanilla around the cake. But my ermine frosting had a texture similar to cream cheese and a taste of deliciousness. I can’t really describe it, but everyone loved it only complaint that I have is the recipe says it has enough sugar cookie dough to make extra cookies but mine did not. Not a big deal to me because I was making extra sugar cookies on the side anyways. Everyone loved this recipe and said that it was not as sweet as my other cakes. 10/10!
Hello! I am wondering why the butter is cubed and added into the sugar, flour, baking powder and salt, instead of creaming it first with the sugar. I found that the butter never fully incorporates this way.
It’s a reverse creaming method that creates a super delicate, light crumb. If you try it again, make sure the butter is room temperature.
Thank you! I did try it and it worked out perfectly, never heard of the reverse method. I have one last question… is it okay to use powdered sugar instead of castor in the boiled milk frosting? What difference would that make?