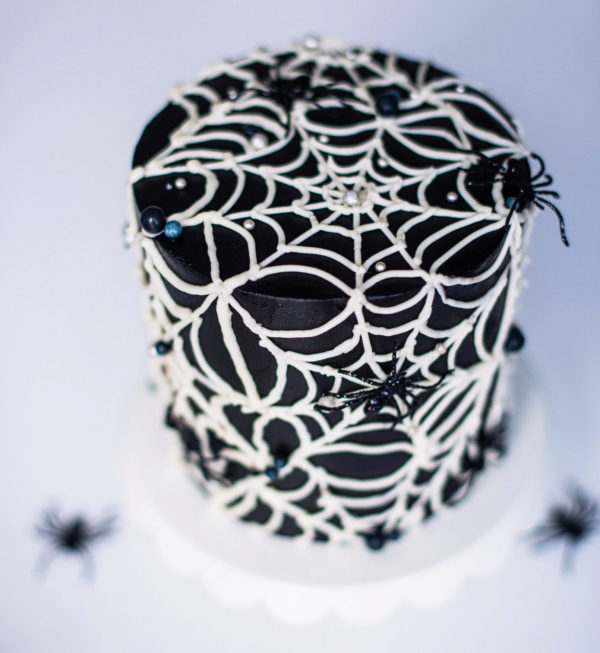
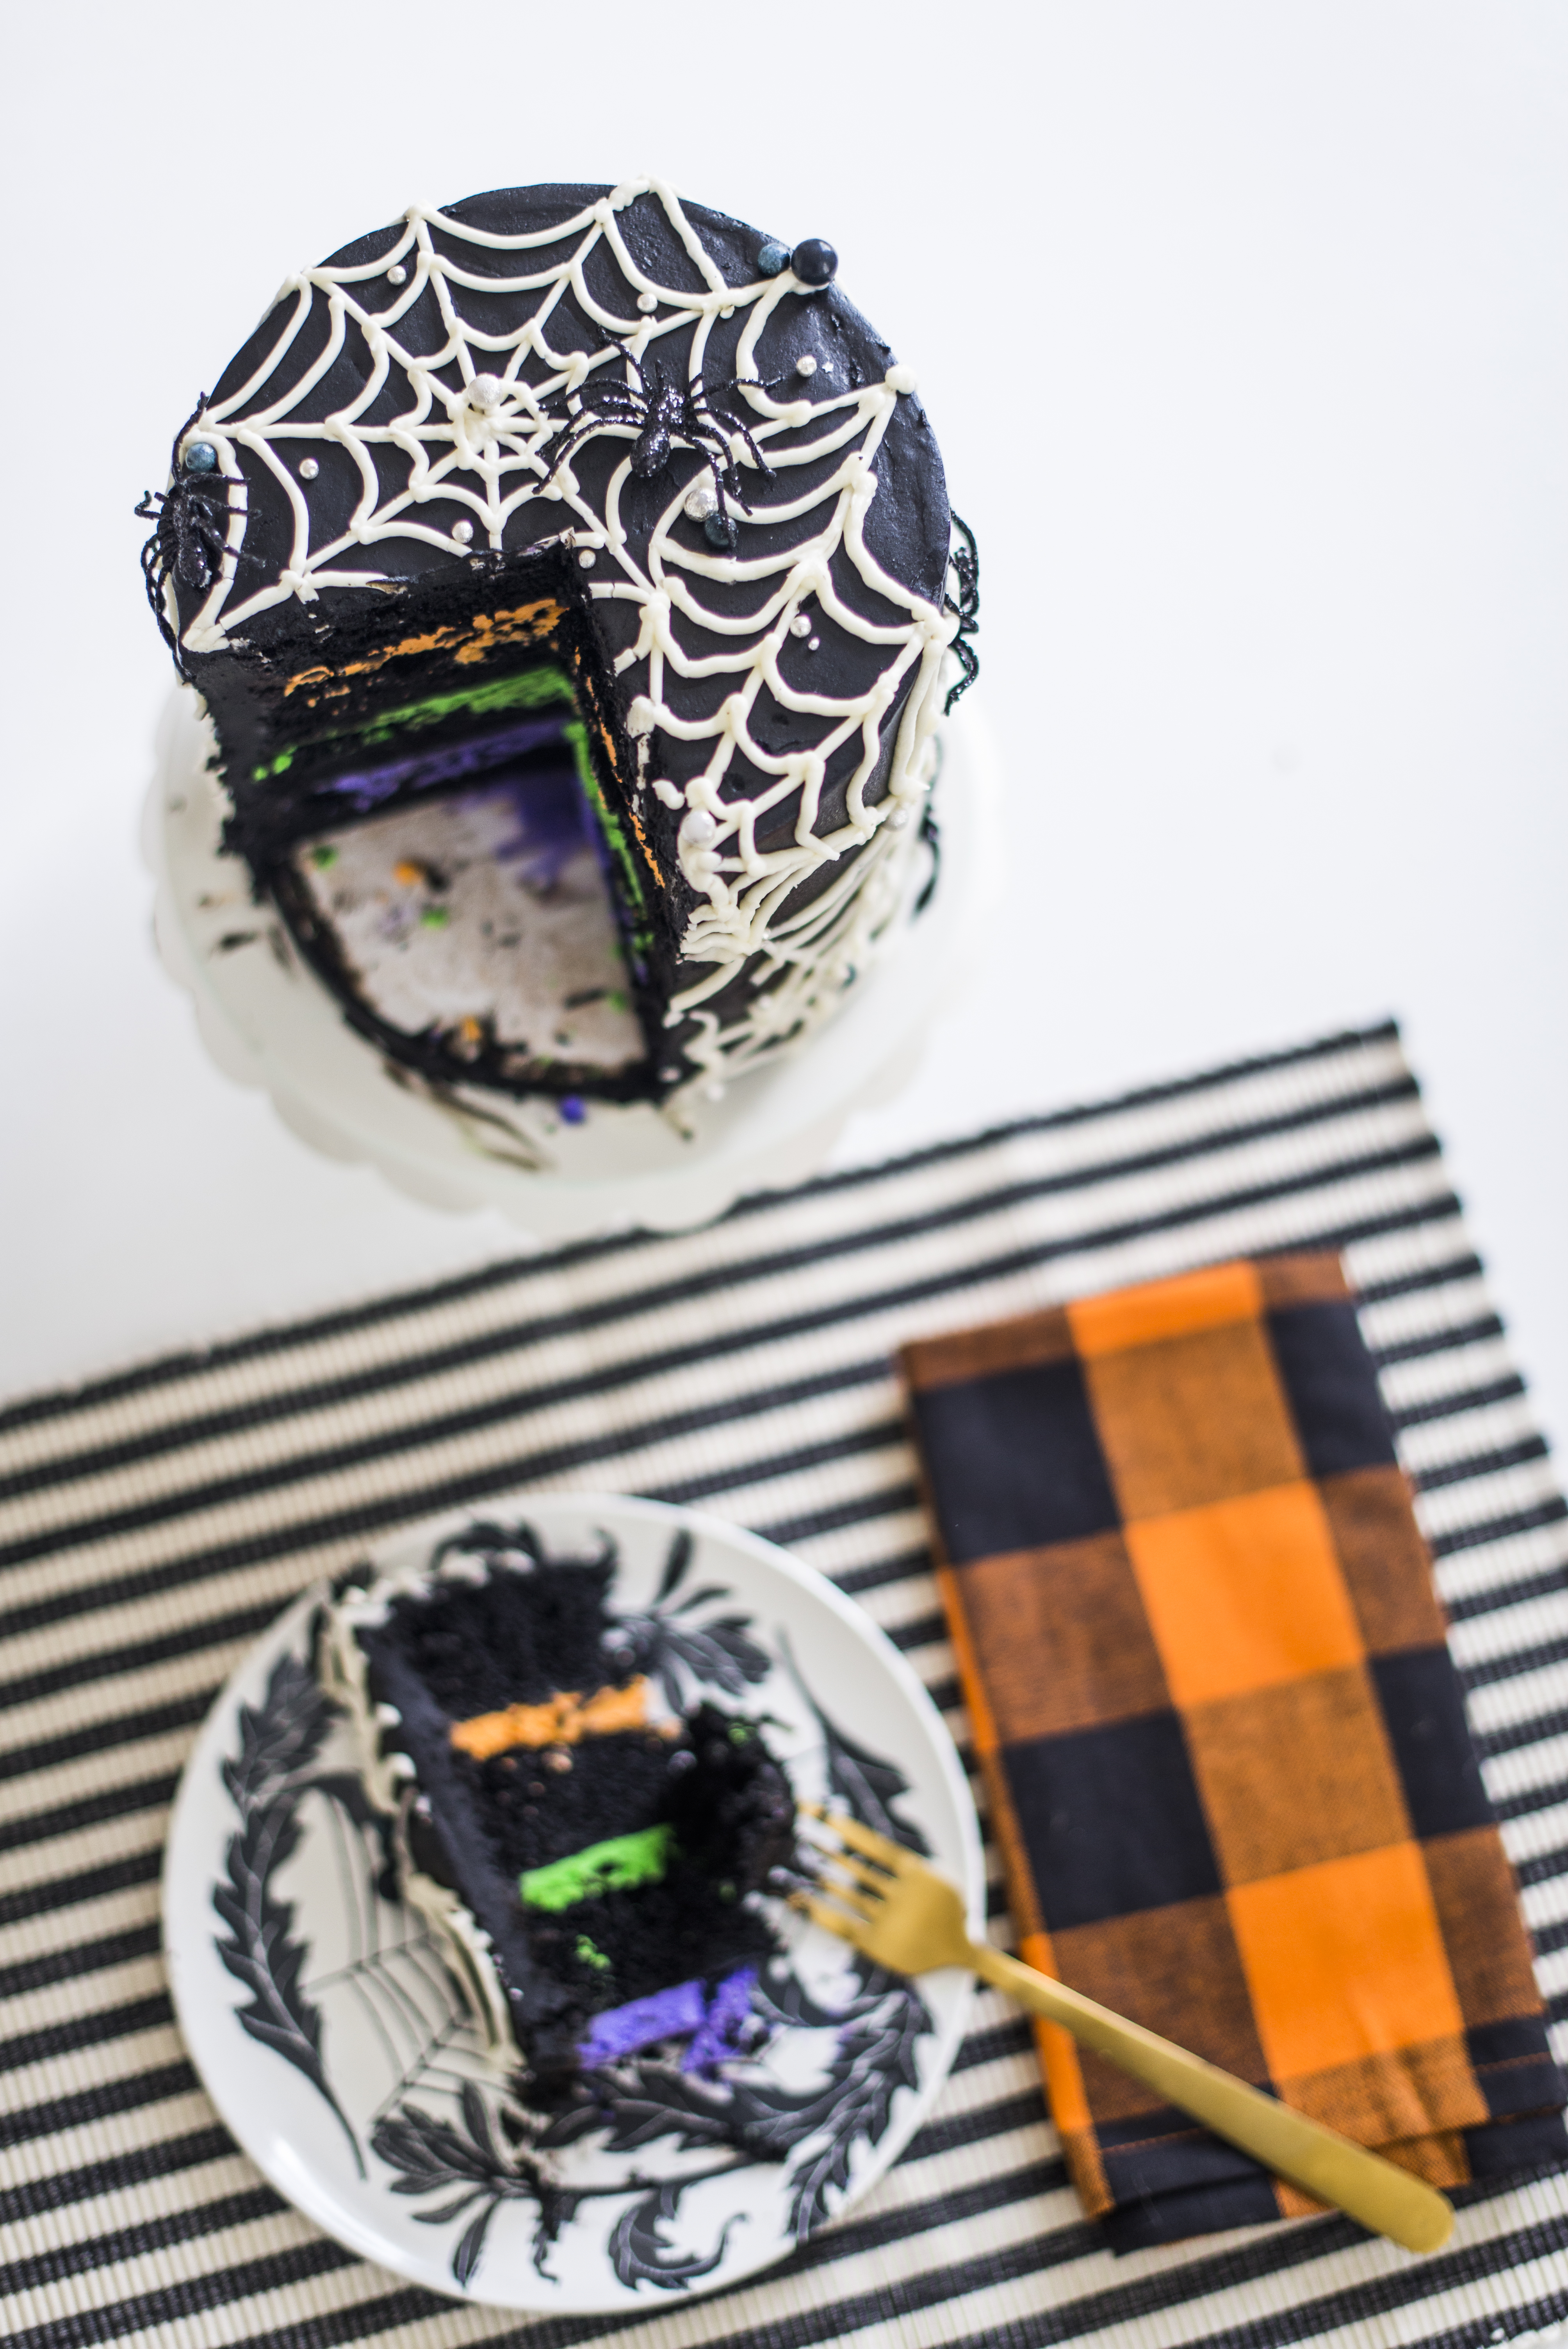
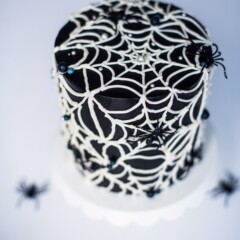
The most spooktacular black chocolate cake made up of rich, dark chocolate cake layers, whipped vanilla buttercream and black fudge frosting.

I’m so excited about this cake, you guys! It not only tastes amazing, but thanks to Sweetapolita’s black fudge frosting recipe, you can actually get a true black frosting without the fear of dying all your guests’ teeth black.
You’ve had that fear before, right? No? Just me?
Black Frosting Attempt #1
It actually wasn’t just a fear. I actually did dye all my guests’ mouths black at Westin’s 3rd birthday party. At the time Westin was hugely into superheroes and asked for a Batman cake. Not knowing nearly as much as I do now, I thought using a vanilla buttercream base was the best way to tint any frosting. Ha!
I had to use SO much black food gel to turn that white frosting black that a single bite of the cake quickly tinted everyone’s mouths’ completely black. I couldn’t believe it! Well, actually I could based on how much food gel I knew went into that frosting – so I guess a better way to say it is, I was so embarrassed!
Since then, I haven’t even thought about making black frosting. That is, until now.
Black Frosting Attempt #2
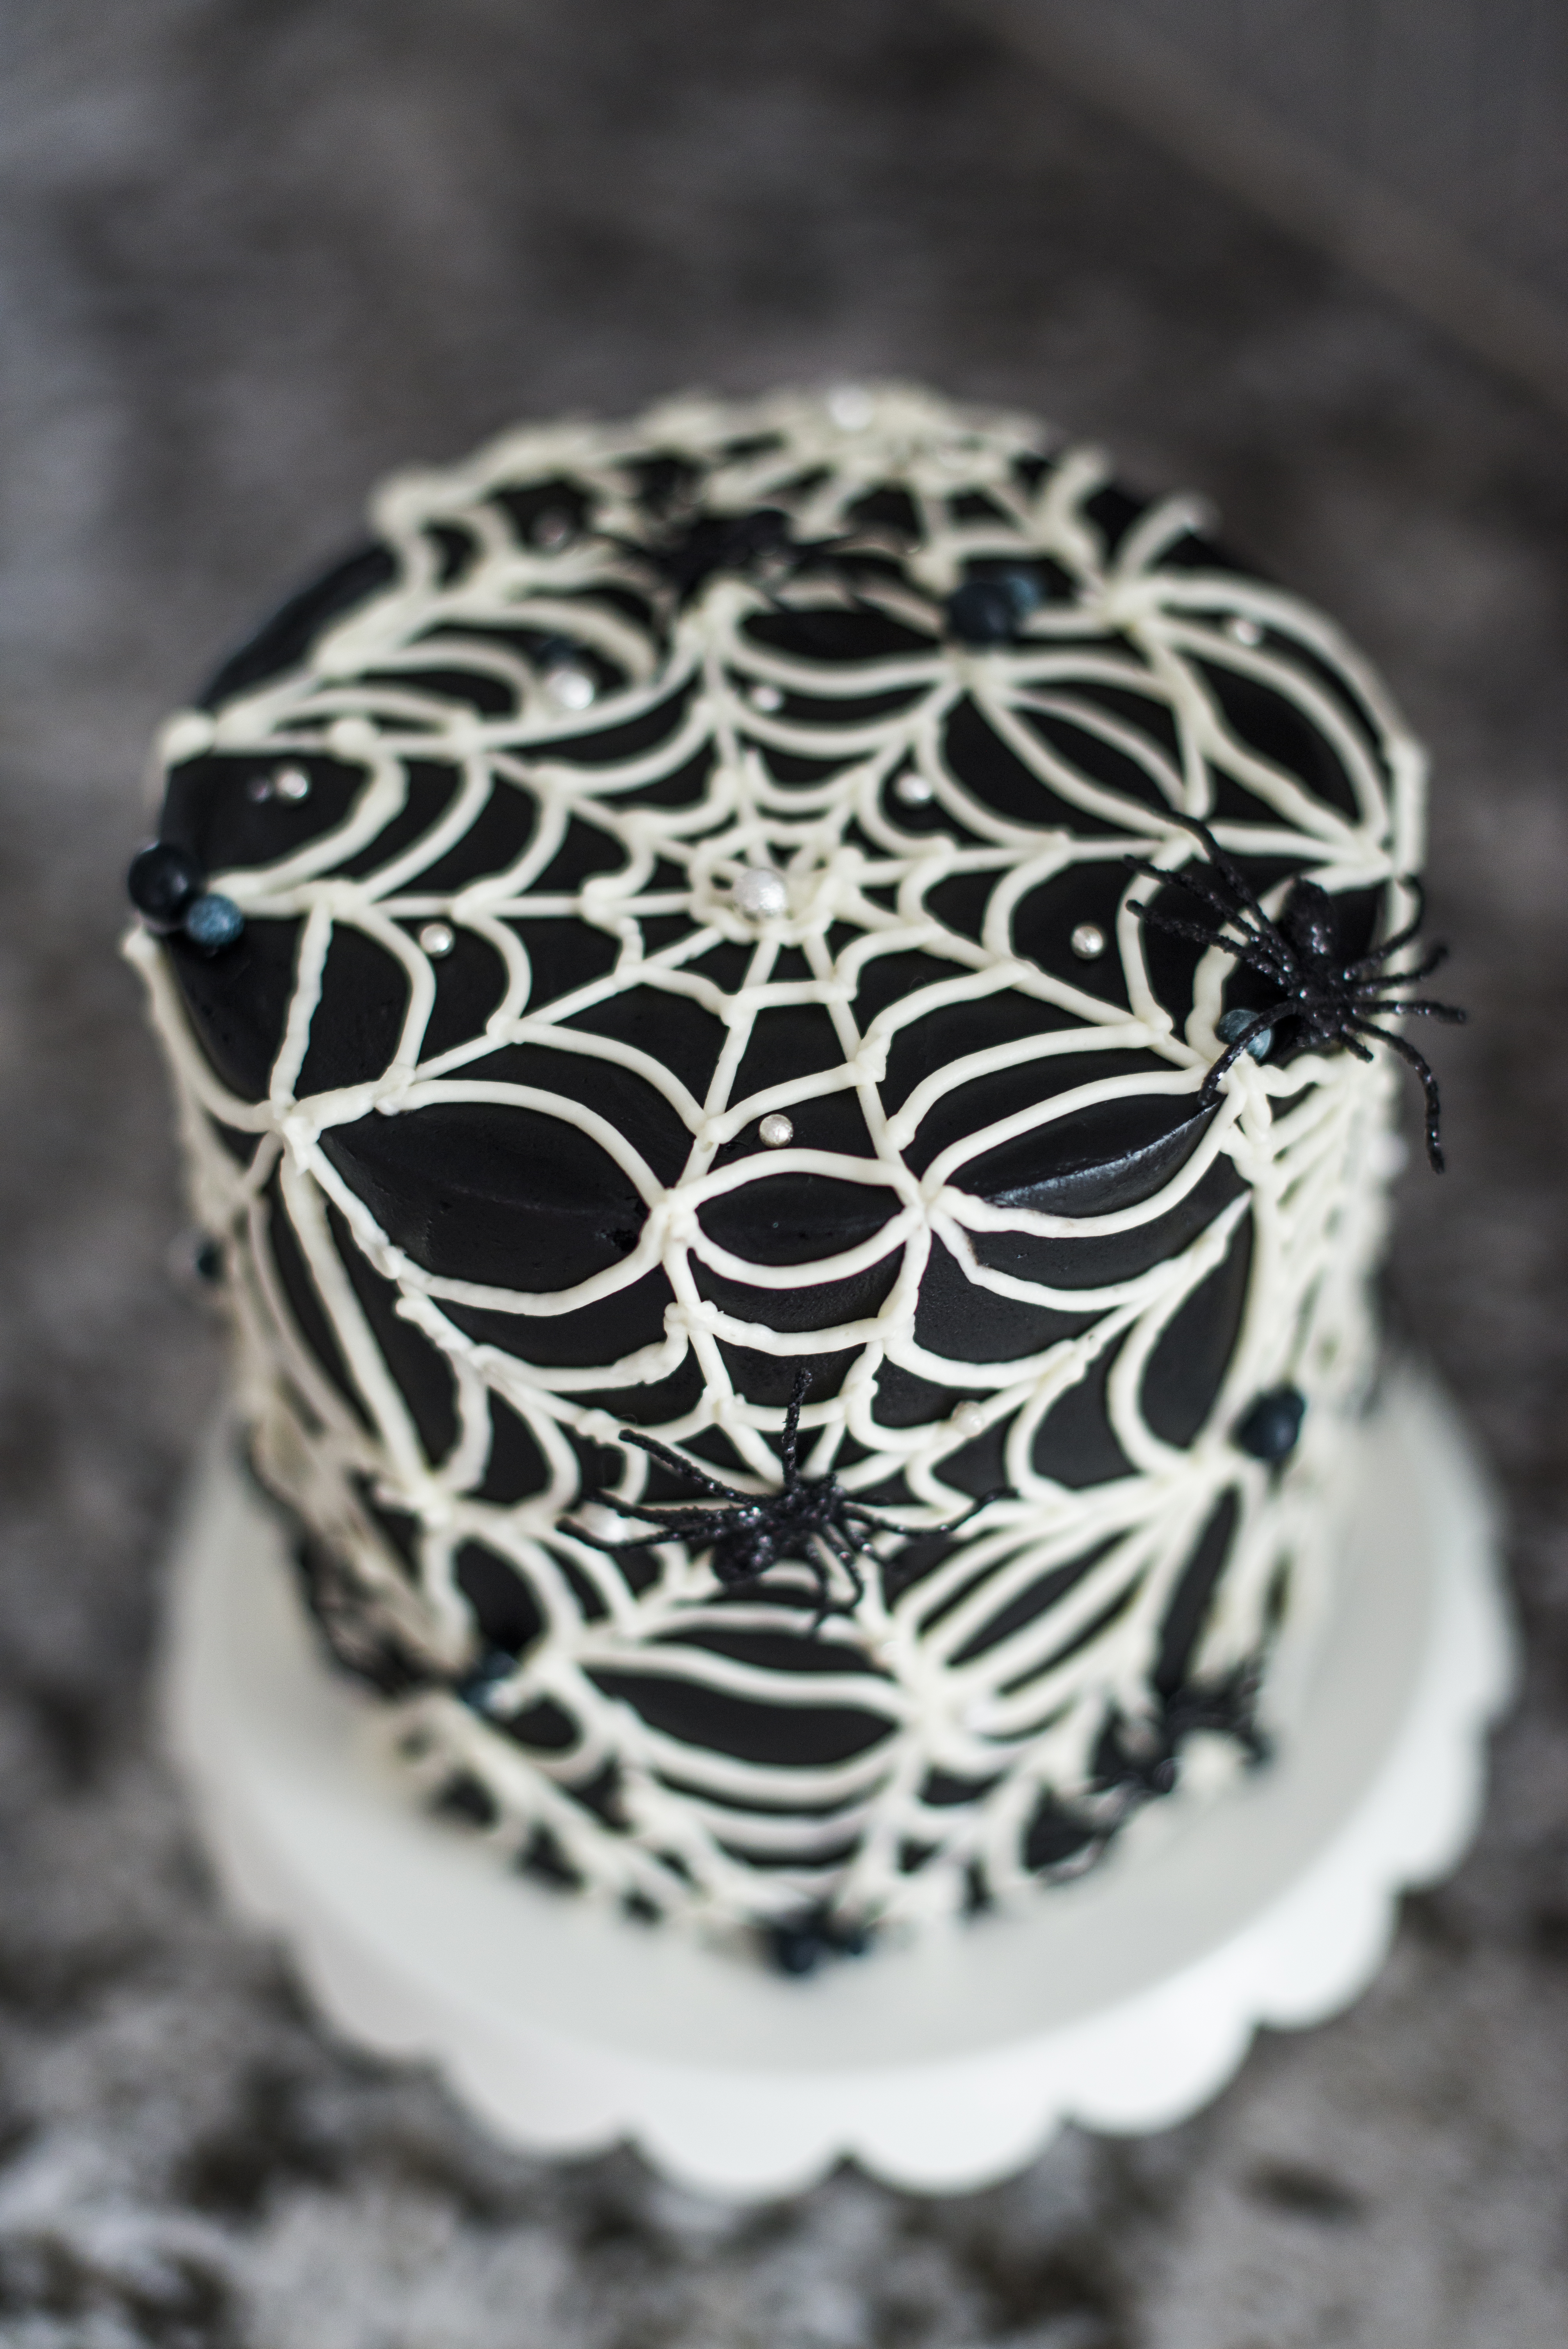
Last year, one of my favorite cake bloggers, Sweetapolita, published her Glam Rock Cake. It’s a black chocolate cake with black chocolate frosting. It’s gorgeous! But more importantly, it uses very little black food gel and claims it won’t dye your mouth black! I’ve been dying to test out this recipe and Halloween seemed like the perfect time!
Why Attempt #2 Works
The key to making this frosting truly black, is black cocoa powder. Guittard makes a Noir cocoa powder but you have to buy it in a pretty big package. I’d recommend getting THIS black cocoa powder from Amazon. As an alternative, you can use dark cocoa powder like Cacao Barry Extra Brute Cocoa Powder but it’s likely you’ll have to use a little more black food gel.

Another crucial step to this frosting recipe is the waiting time. After you mix your ingredients and add the black food gel, you need to let the frosting sit for a while. The frosting will darken as it sits. Sweetapolita recommends waiting about 15 minutes when you use the black cocoa powder. I tried this frosting with a dark cocoa powder and learned that you’ll need much more time for the frosting to turn black. If you’re using dark cocoa powder instead of black cocoa powder, I’d suggest making the frosting a day before and letting it sit overnight in the fridge to turn black without having to add too much food gel.
If you store your frosting in the refrigerator overnight, you’ll need to get the frosting back to room temperature before frosting your cake. I don’t recommend heating your frosting, but instead, letting it get to room temperature by sitting at room temperature for a few hours.
Clearly, that all sounds like a lot of extra time. Thus, I highly recommend using the black cocoa powder to make your life a lot easier. 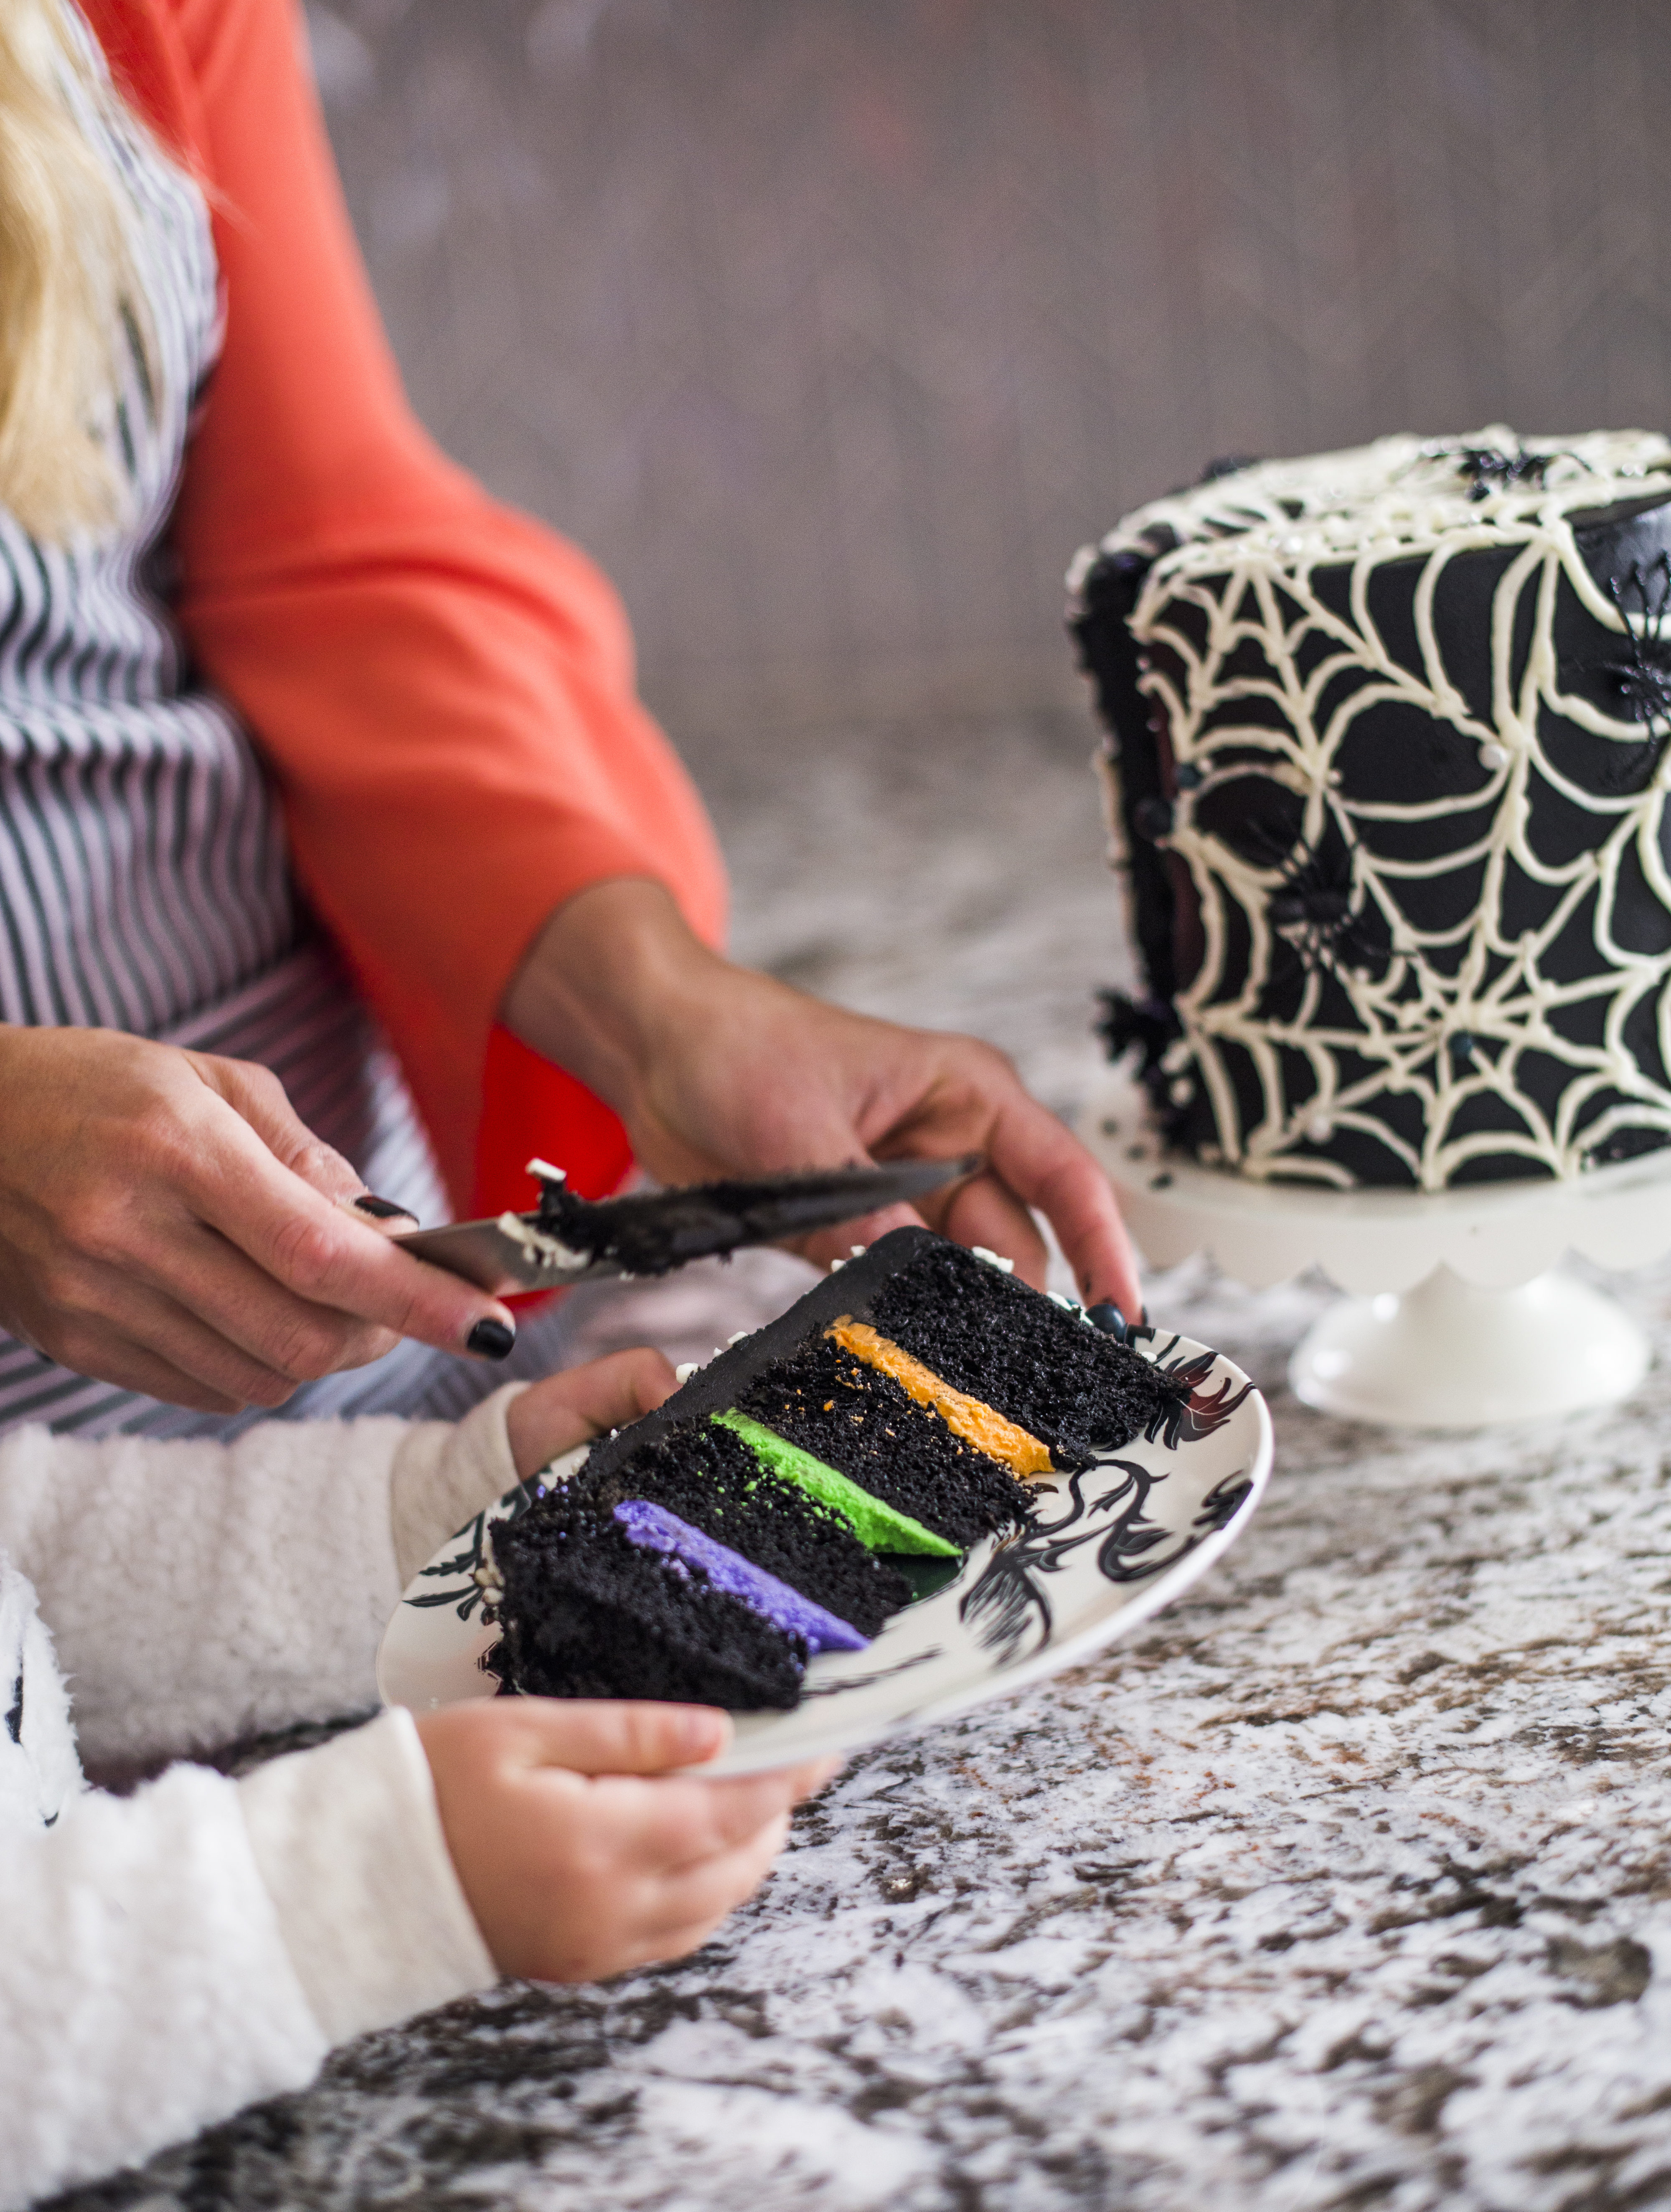
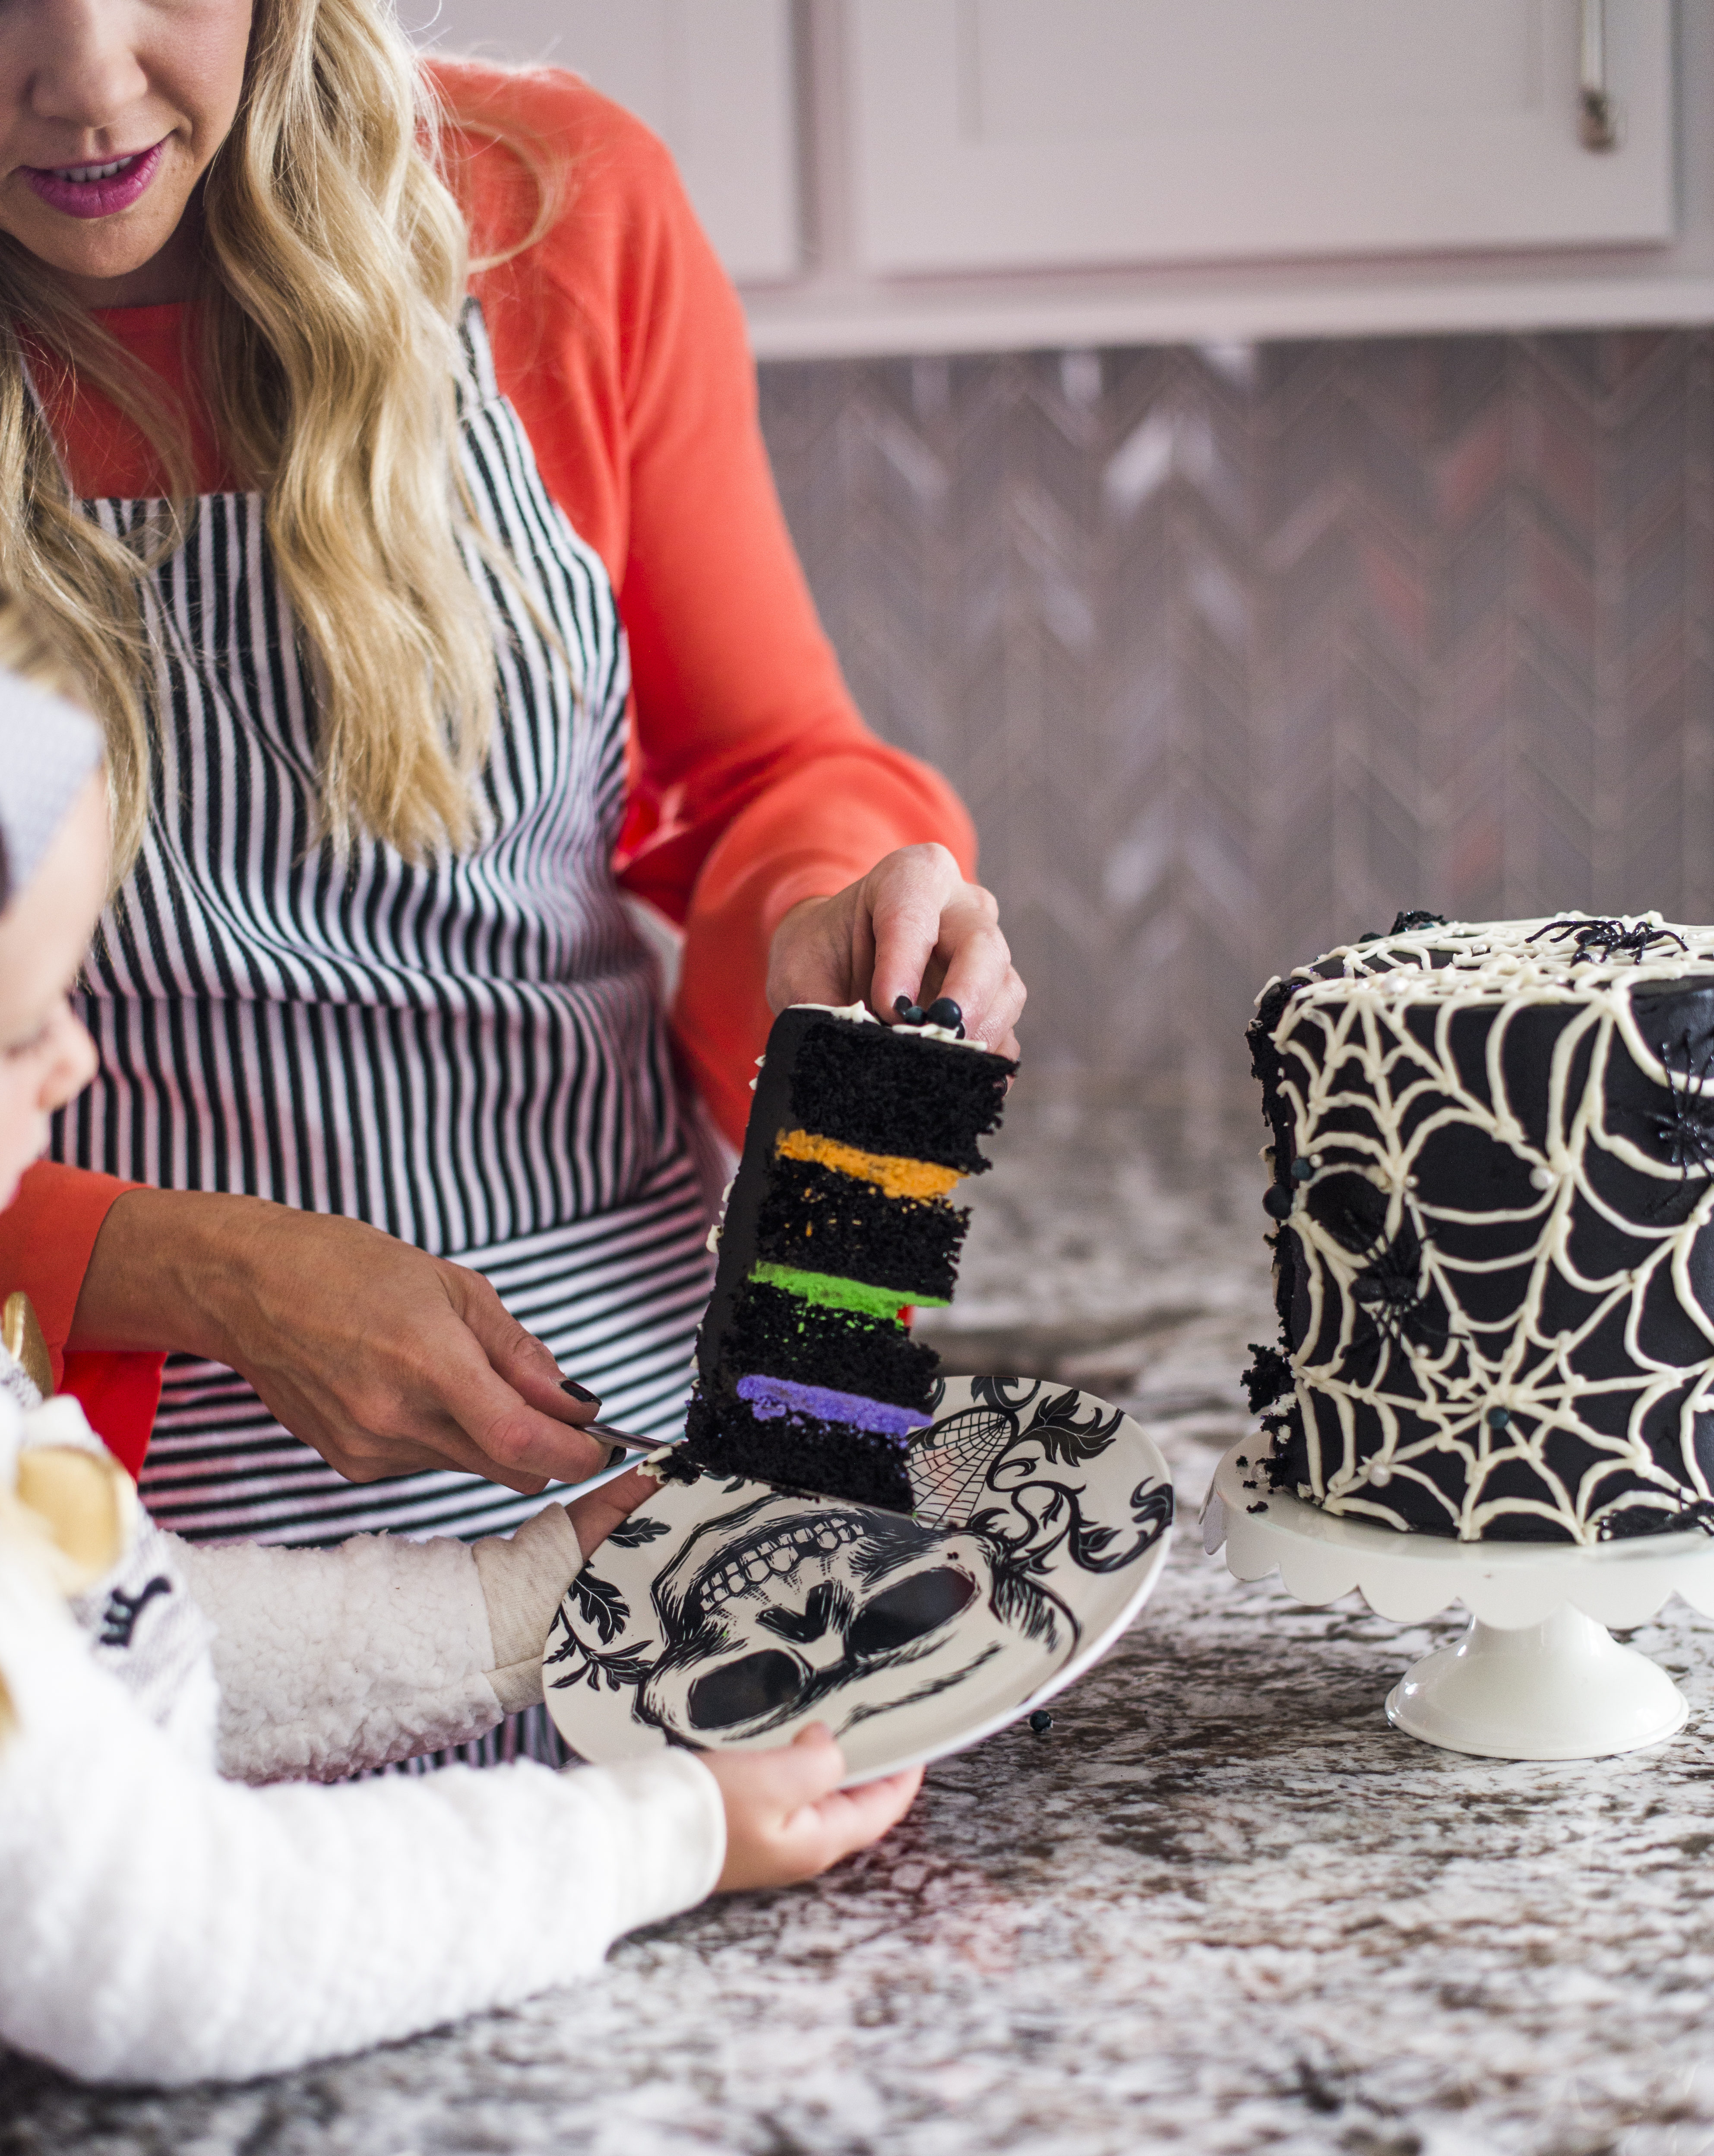
Inside the Cake
I used my whipped vanilla buttercream to till the cake, with orange, green and purple food gel to tint each layer.
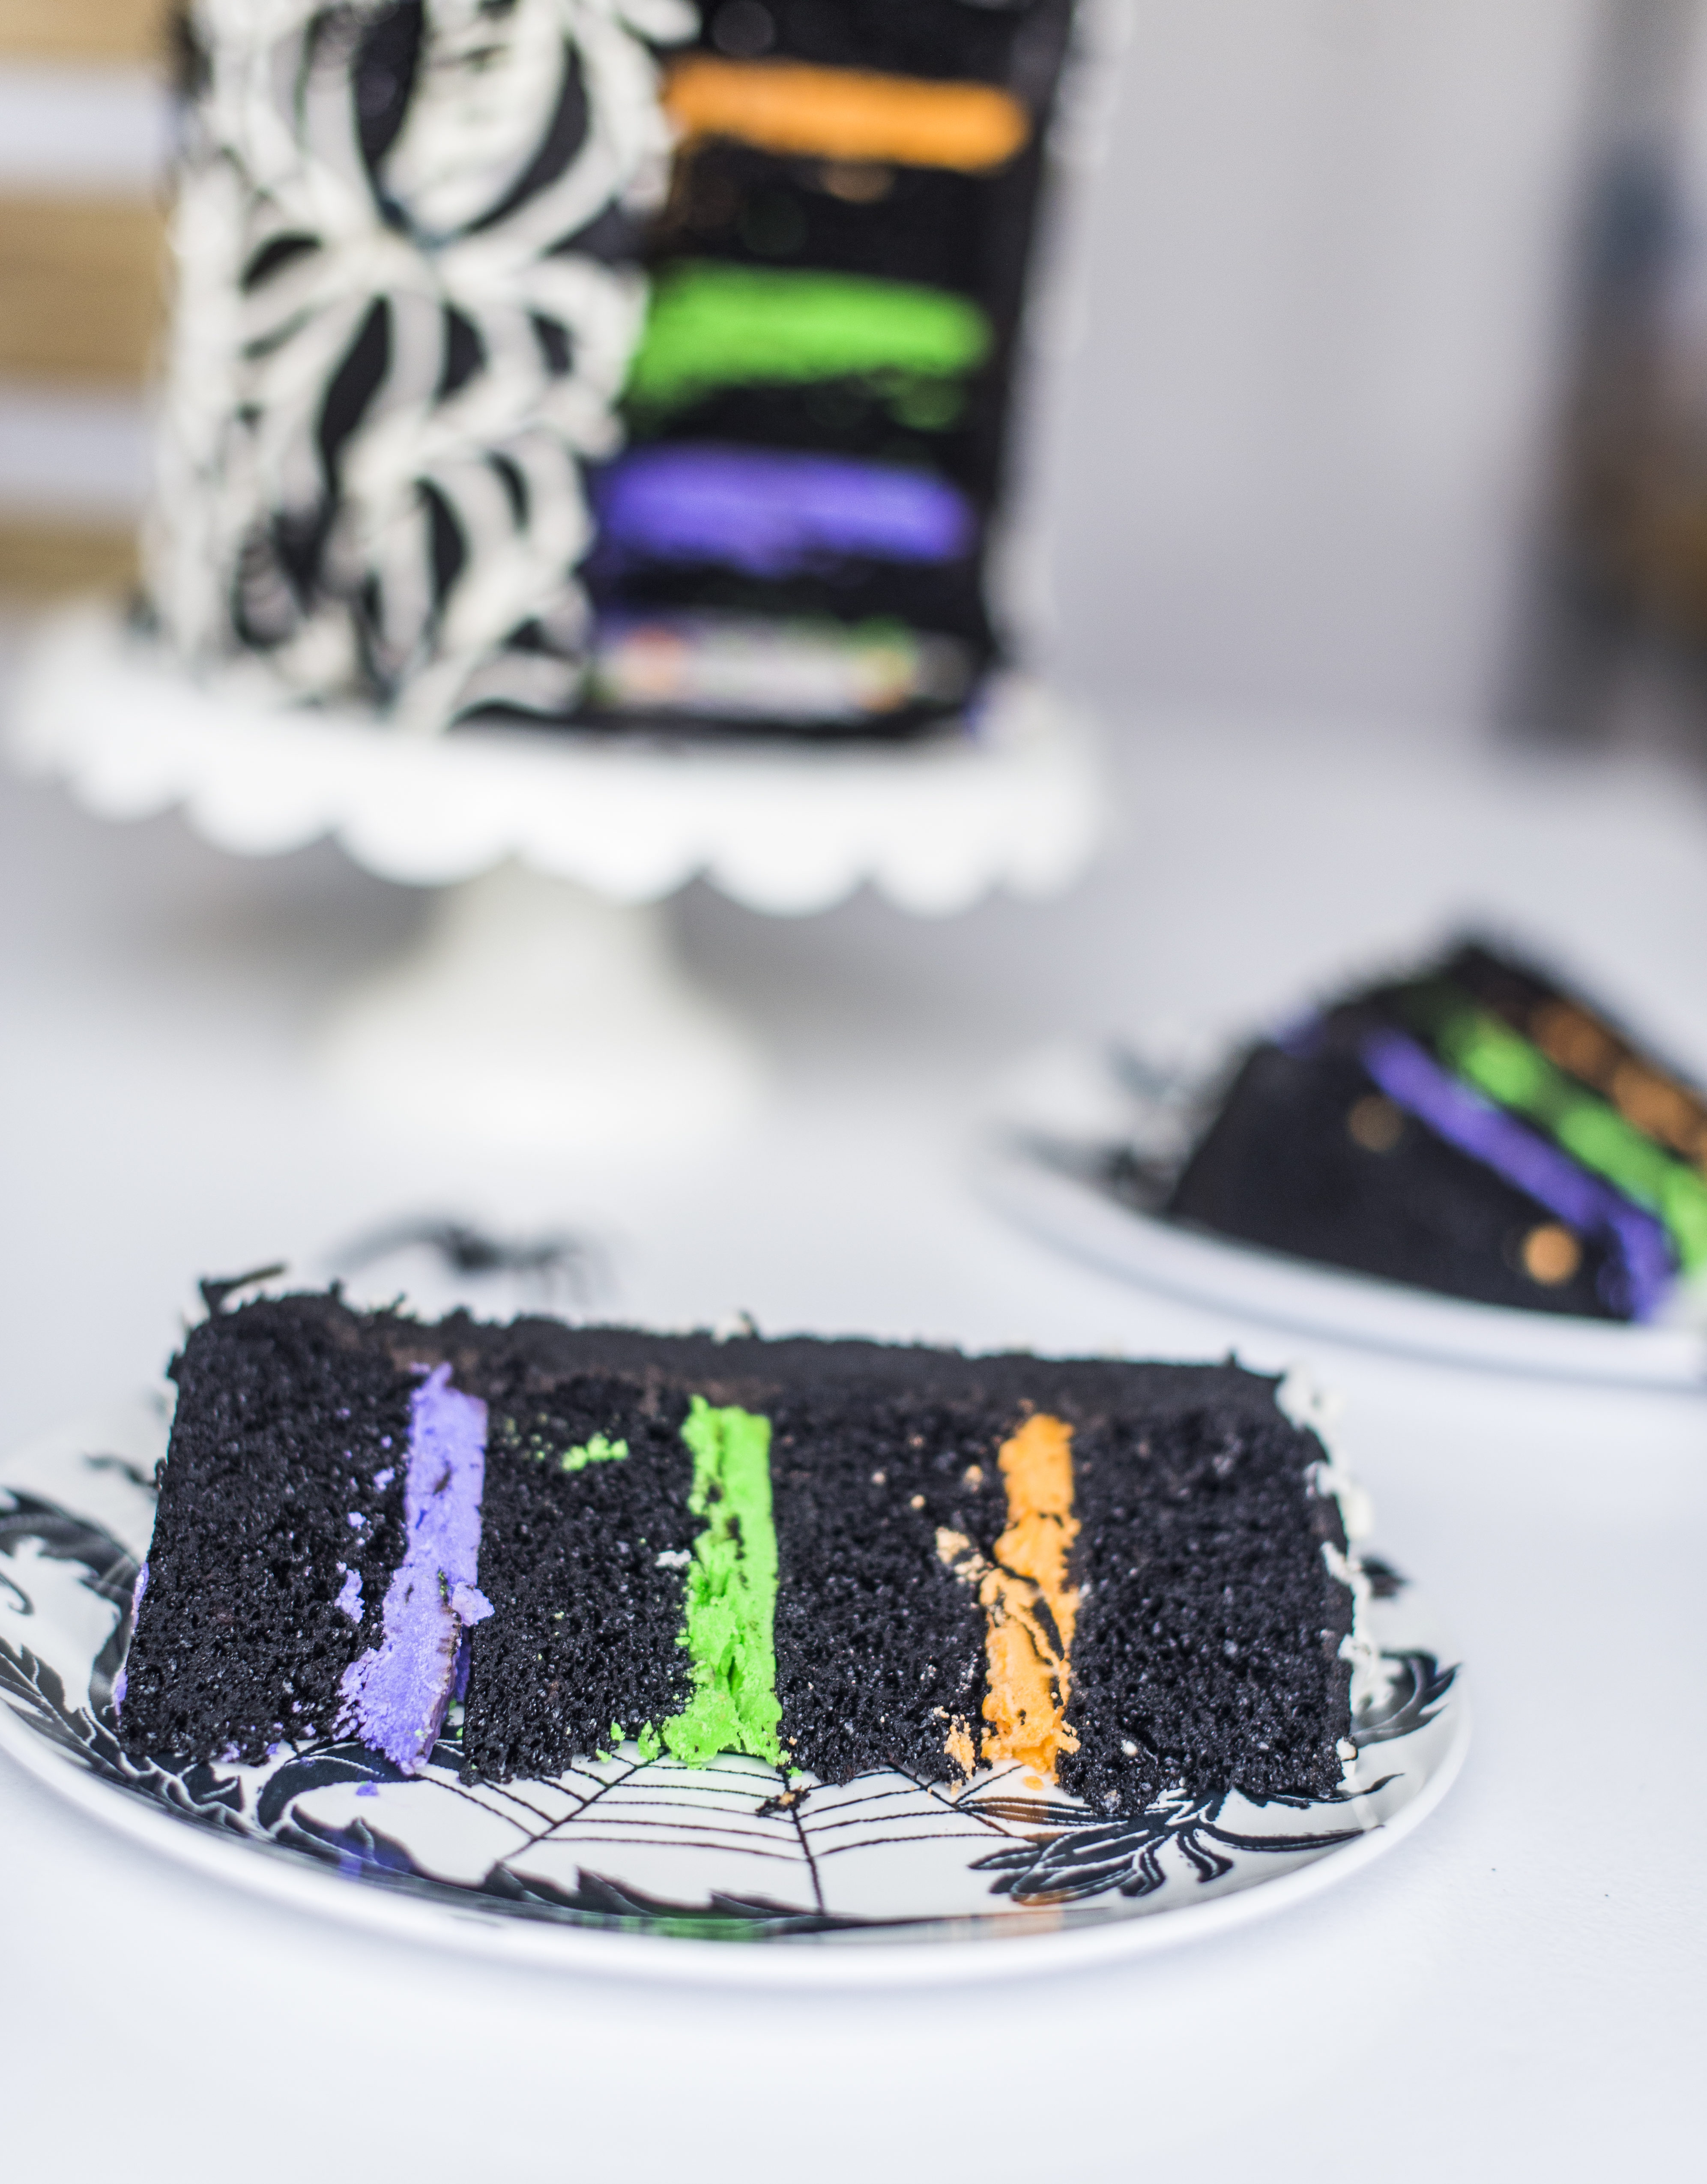
Cutting into this cake might have been my favorite part of making this cake. I mean, look at those colors and how beautifully they contrast with the black cake!
The black cake is just a little twist off of my favorite chocolate cake recipe you see on here all the time.

Westin wanted to show off his white teeth here, but I spy some chocolate cake still in his mouth!
I can’t wait for you to make this cake and to see what you do with your black frosting!
Helpful Videos
For a little extra help, I’ve put together a quick video to show you how the frosting is made, as well as a time-lapse video showing you how to assemble the cake.


Enjoy!
More Tips & Recipes You’ll Enjoy
Black Chocolate Cake
Ingredients
- For the Black Chocolate Cake
- 1 3/4 cups plus 2 tablespoons (225 g) all-purpose flour
- 2 cups minus 2 tablespoons (375 g) granulated sugar
- 3/4 cups 88.5 g good quality black or dark cocoa powder (like THIS or Extra Brute Cocoa Powder)
- 2 teaspoons 8 g baking soda
- 3/4 teaspoon 3 g baking powder
- 1 teaspoon 5.6 g kosher salt
- 1 cup 240 g buttermilk, room temperature
- 1/2 cup 109 g vegetable oil
- 3 large or extra large eggs at room temperature
- 1 teaspoon 4.2 g pure vanilla extract
- 1 cup 236.6 g hot water
- 1 teaspoon food gel in Super Black
- For the Black Fudge Frosting
- 2 cups 452 g unsalted butter, slightly chilled
- 5 cups 625 g powdered sugar, measured and then sifted
- 1 cup 118 g premium black or dark cocoa powder (like THIS or Hershey’s Extra Dark Cocoa Powder)
- 3/4 cup 177.5 g hot water
- 1 1/2 teaspoons 6 g pure vanilla extract
- Generous pinch of salt
- 8 ounces 150 g premium dark chocolate, chopped or chips, melted
- 1-2 teaspoons 3-6 g food gel in Super Black
- *This buttercream recipe makes enough to fill and cover your cake. If you want to add additional piping you’ll want to make an extra 1/2 batch.
- For the Colored Vanilla Buttercream
- 1 cup 226 g unsalted butter, slightly chilled
- 4 cups 500 g powdered sugar, measured and then sifted
- 1/2 teaspoons 2 g pure vanilla extract
- Pinch of salt
- 2 tablespoons 28.9 g heavy whipping cream
- Purple green and orange food gel
Instructions
- For the Black Chocolate Cake
- Preheat the oven to 360 degrees F. Spray four 6-inch round cake pans with nonstick spray. (You can also use three 8-inch pans). Line the bottom of each pan with parchment paper, then spray the pans again.
- Combine the flour, sugar, cocoa, baking soda, baking powder, and salt into the bowl of an electric mixer fitted with a paddle attachment and mix on low speed until combined.
- In another bowl, combine the buttermilk, oil, eggs, water, and vanilla.
- With the mixer on low speed, slowly add the wet ingredients to the dry. Mix until just incorporated. Scrape down the sides of the bowl. Add the food gel and mix for another 20 seconds.
- Pour the batter into the prepared pans (about 11 to 12 in each of the 6-inch pans or 15 to 16 ounces in each of the 8-inch pans) and bake for 16-18 minutes.
- Cool in the pans for 10 minutes, then turn them out onto a cooling rack and cool completely.
- Level each cake layer as needed and then wrap in plastic wrap and chill until ready to use.
- For the Black Fudge Frosting
- In a bowl of stand mixer fitted with paddle attachment beat the butter on medium-high speed until light and fluffy, about two minutes.
- In a small mixing bowl, combine the hot water and cocoa powder. The mixture will be thick like a paste. Set aside.
- In a microwave safe bowl, heat the chocolate chips until melted and smooth. Let cool slightly, but not all the way to room temperature.
- Reduce the mixer’s speed to medium and slowly stream in the melted chocolate, making sure to scrape down the sides of the bowl occasionally so the chocolate doesn’t harden around the sides of the bowl.
- Add the cocoa paste (cocoa and water mixture), followed the vanilla and salt. Beat until incorporated, about 1 minute.
- Decrease the speed to low and gradually add the powdered sugar. Once the powdered sugar is incorporated, add the black food gel and then beat for about two minutes. The color will likely be grey. Don’t worry. Your next job is to be patient!
- Let the frosting sit for at least a couple of hours (even a full day is great) because the color will take awhile to process and it’s best to let it sit rather than adding more and more coloring right away.
- If you’ve let the frosting rest for plenty of time and it’s still not black, add one more teaspoon of black food gel and let it rest a bit more.
- If your frosting is too soft, cover it with plastic wrap and let it chill in the refrigerator a bit.
- For the Colored Vanilla Buttercream
- In a bowl of stand mixer fitted with paddle attachment beat the butter on medium speed until light and fluffy, about five minutes.
- With the mixer on low speed, slowly add the powdered sugar, followed by the vanilla, salt and heavy whipping cream. Turn the mixer to medium-high and beat the frosting for about five minutes, until lighter in color and texture.
- Divide the frosting in small mixing bowls and tint the frosting your desired colors
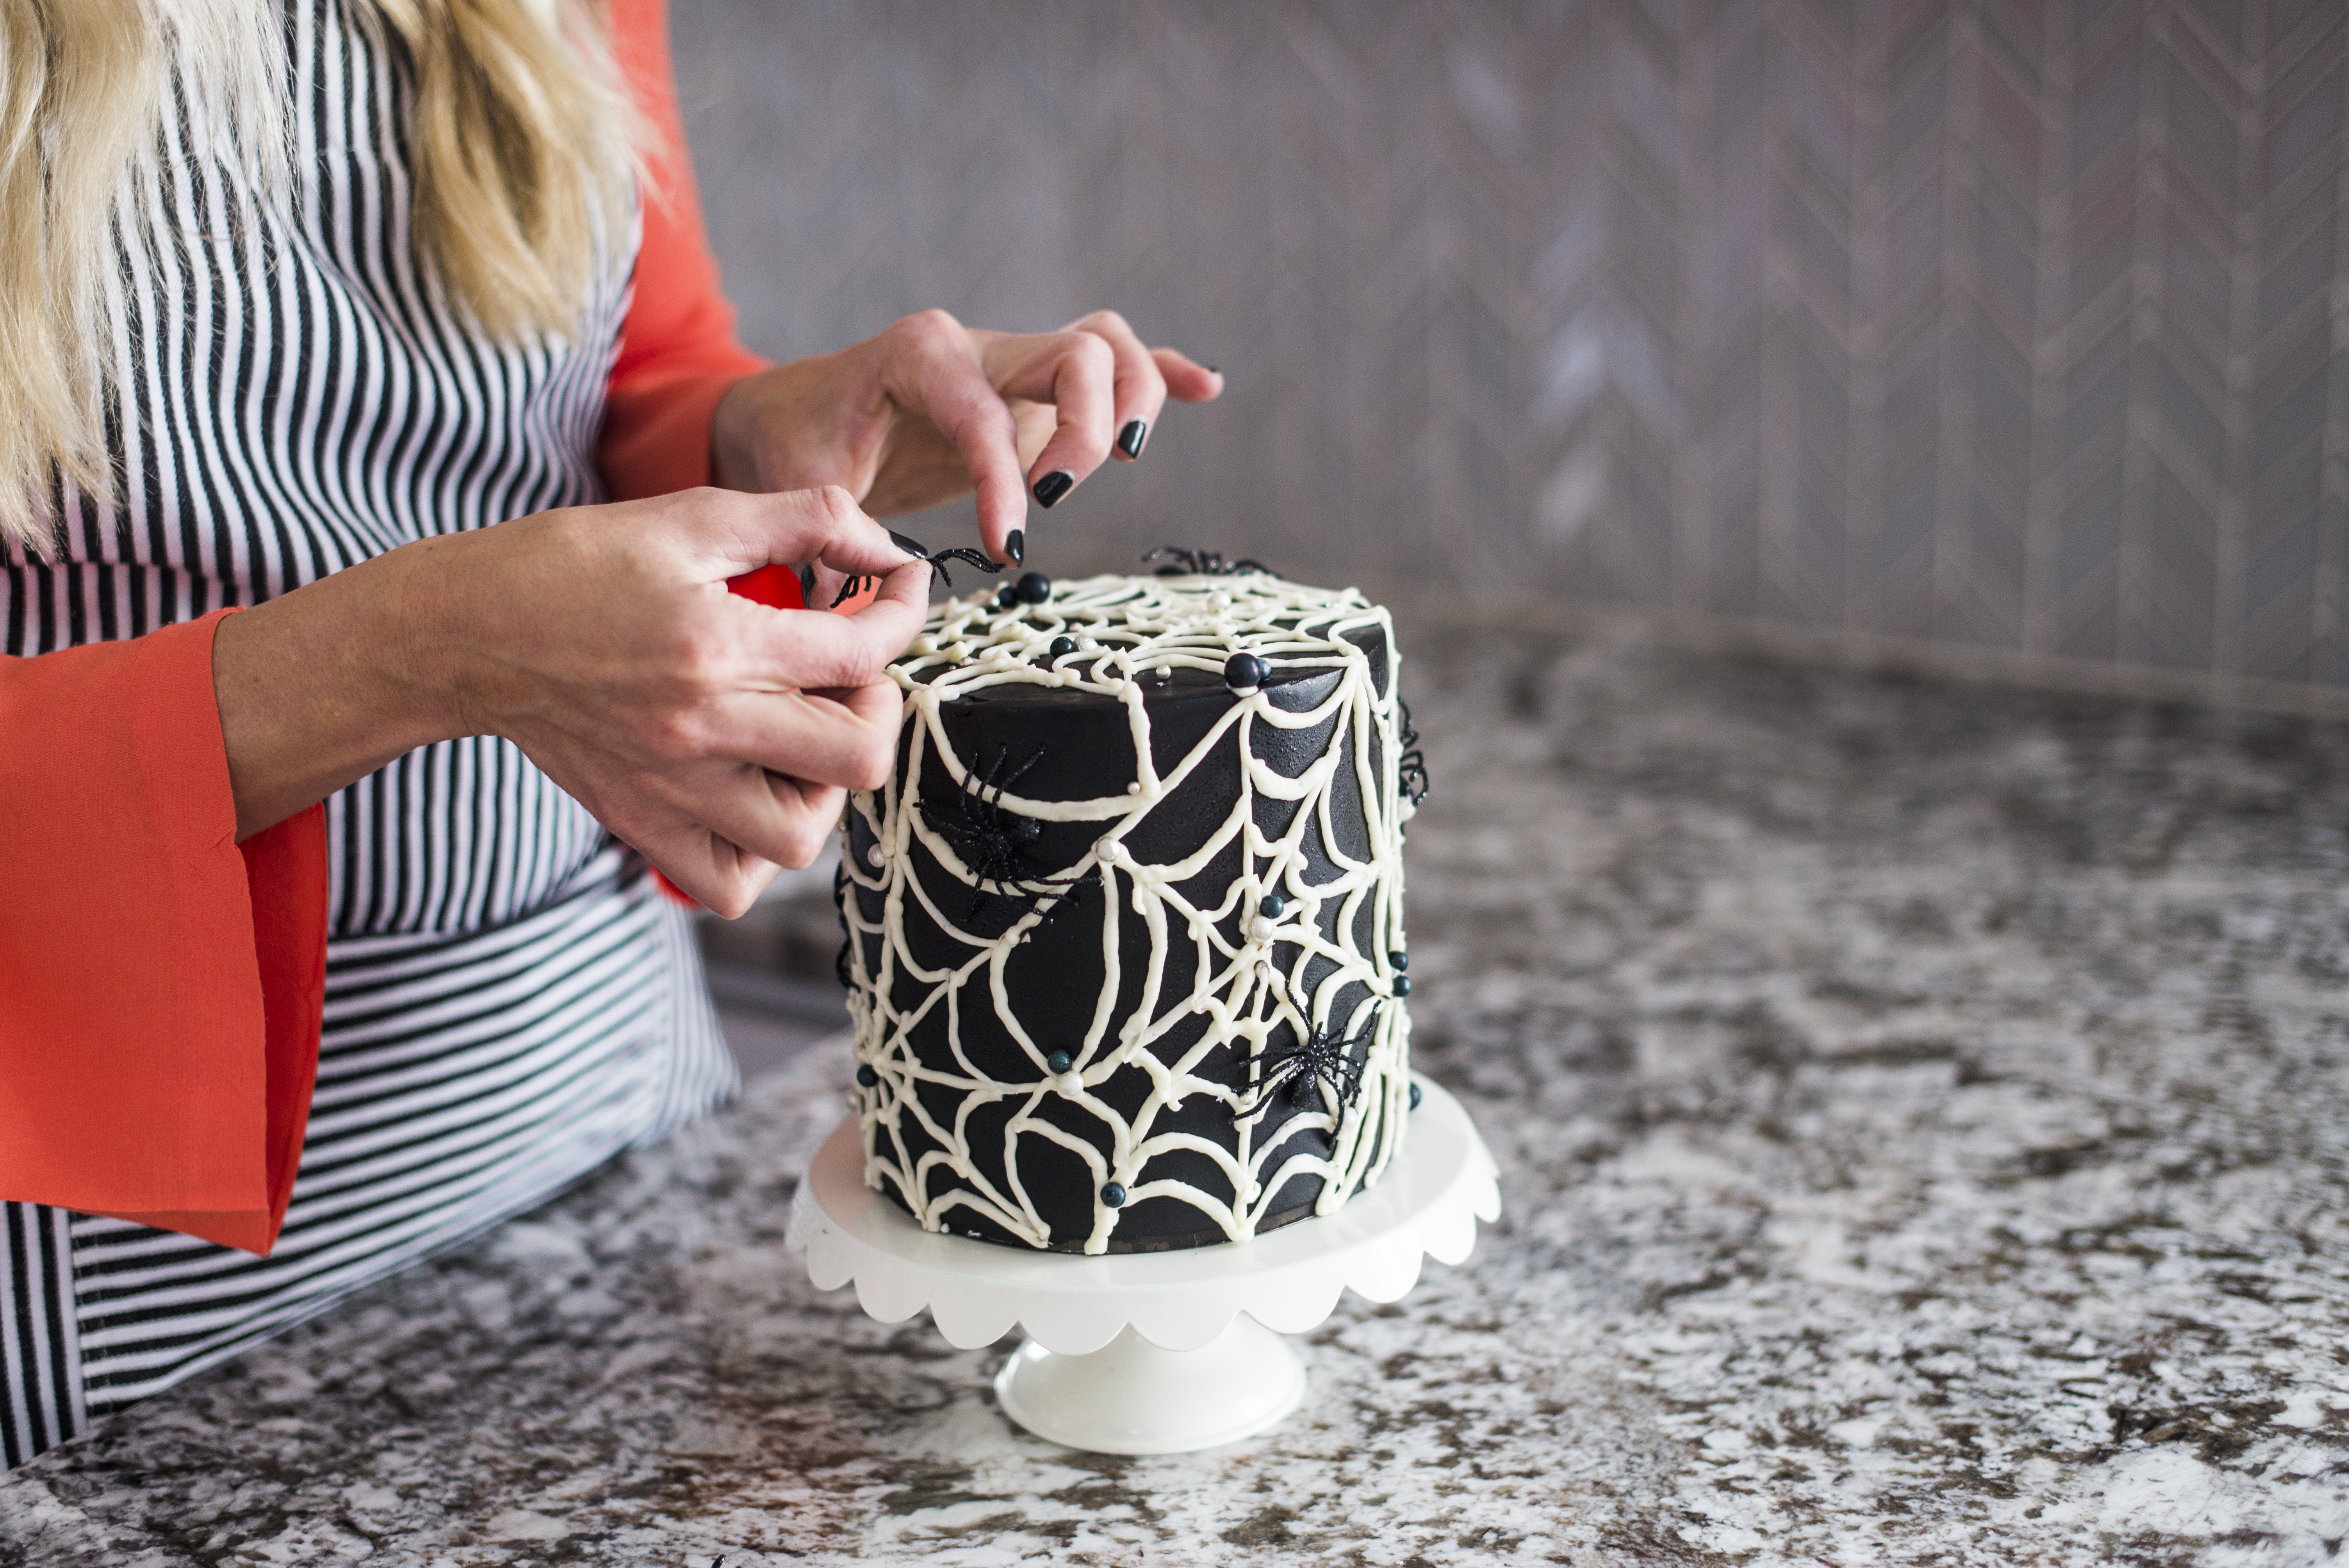
- Assembly
- Place a cake board onto your turntable. Apply a small dollop of frosting onto the cake board and smooth it out with an offset icing spatula. Place the first cake layer on top of the thin layer of frosting which will act like glue to hold the cake in place.
- Evenly spread your first color of frosting on the cake layer, making sure to get eye level with the cake to ensure you’re layer of frosting is even.
- Continue to stack and frost the layers until the last cake layer, which you’ll place top side (crumb side) down on the last layer of colored frosting.
- Apply a thin coat of black frosting around the entire cake, making sure to cover the entire cake from top to bottom. Freeze the cake for 10 to 15 minutes to lock in the crumbs.
- When the frosting is set and the crumbs are locked in place, continue to frost the cake with the remaining frosting.
This chocolate frosting tastes delicious but is so runny! How do you keep it thick enough to actually spread and stay on cake?
Yes, it’s pretty soft and if it’s too soft to spread for you, just refrigerate it for about 30 minutes to solidify the butter a bit.
Are you sure on your measurement for the water as 177.5g of water seems like a lot…..my butter cream is like water and wont solidify in the fridge (left it in there for at least 1.5 hours and still runny)
That is the right amount!
Hi Courtney! I want to use this recipe to make a batman cake for my son’s birthday (like you! But no black teeth haha) Can I make it three layers instead of four with 8 in cake pans? What should I adjust the cooking time to?
Yes, you can make three 8-inch cake layers and there’s nothing you need to change.
The video you posted is a completely different recipe and process than the frosting recipe that is printed. I’m so confused. Your video has sour cream and the steps are in a completely different order than the steps for the frosting that you printed. I just followed the printed steps and failed miserably ?
Hi! I’m so bummed to hear you had issues with the frosting! I took that video down from the post a while ago because I revised the recipe and excluded the sour cream. I found that it was making the frosting too soft and wasn’t necessary. Where did you run into problems with the printed steps? Would love to help you troubleshoot what went wrong.
Hi. I wanted to ask what is the texture of the batter? I tried to make this cake, the batter turns to be liquid (watery). Is it supposed to be like that? Please help me dear. Thank you so much ?
My chocolate cake batter is not as thick as my yellow cakes! But don’t worry, it will bake perfectly. It is supposed to be like that.
Just tried this for Halloween and batter was the consistency of water. And it def did not bake right. But they do look scary ?
This is perfect! My soon to be 5 year old specifically wants a black Darth Vader cake and this is just what I need, thank you!
Any idea how long to cook if making cupcakes, or how many cupcakes it makes?
I’ve made the cake and loved it but am making some Batman cupcakes now.
It’ll make about 20-24. Around the same time but keep your eye on it.
I am excited to try this cake because my son bought me some black cocoa powder for Christmas! 🙂 However, I’m running into trouble printing your recipe. When I try to print, the smiley face that is after step 6 in the frosting instructions is GIANT and bright yellow and takes up about 2/3rds of the page. haha! Is there any way you can get rid of the smiley face so I can print the recipe? Thank you!
Deleting it now! So sorry!
This was such a lovely cake, thank you for the recipe! I needed to make a very dark cake to contrast with some bright white frosting, and found this very effective. I love that it tastes complex and not too sweet too, I think this will become my go-to chocolate cake recipe in future 🙂
Thank you so much!!
Hi, I had a question about your black buttercream. On your video you use 1/2 c sour cream. But on your written recipe you don’t use sour cream. Just wondering which one I should follow. Thanks so much! Melanie
The video is old and needs to be removed. Follow the recipe.
Can I use three 8inch pans for the Black Chocolate Cake instead of four 6inch pans? (the spider cake)
Yes you can
I love following you and all of your recipes and ideas! This is my go to chocolate layer recipe and I would like to use it for a special request Dark Chocolate Wedding Cake. I’m so excited but I have a question: how well would this bake in a 10×4 inch Fat Daddio’s Cake Pan and what adjustments on the cooking temperature and time would I need to make? AND how many recipes to make for 2 10×4 inch layers? Thank you so much and I can’t wait to try it out!
You would want to double the recipe. Time stays the same and bake time will be about 10 mins longer.
Hi Courtney! After I’m done frosting the cake do I place the cake in the freezer? If so for how long? I am making a wedding cake. Any tips?
I have a blog post called “how to freeze, thaw and transport cakes” that will be helpful and hopefully answer all your questions.
Hi! I’m going to make this cake for my son’s birthday. I want it to be an extra tall cake, curious if your pans are 2” or 3” deep? Thanks!
Sorry but this was a miss for me. The frosting was too runny and had a bitter aftertaste. The color was beautiful however. I let it sit overnight in the fridge to get dark.
I can’t seem to find the actual recipes for this cake. Can you please provide link to the recipe? Thank you — looking forward to trying it!
Sorry about that glitch! It’s up now.