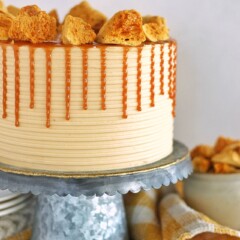
Salted Caramel Honeycomb Cake – caramel honeycomb cake layers with salted caramel buttercream, caramel drizzle and crunchy pieces of homemade honeycomb.
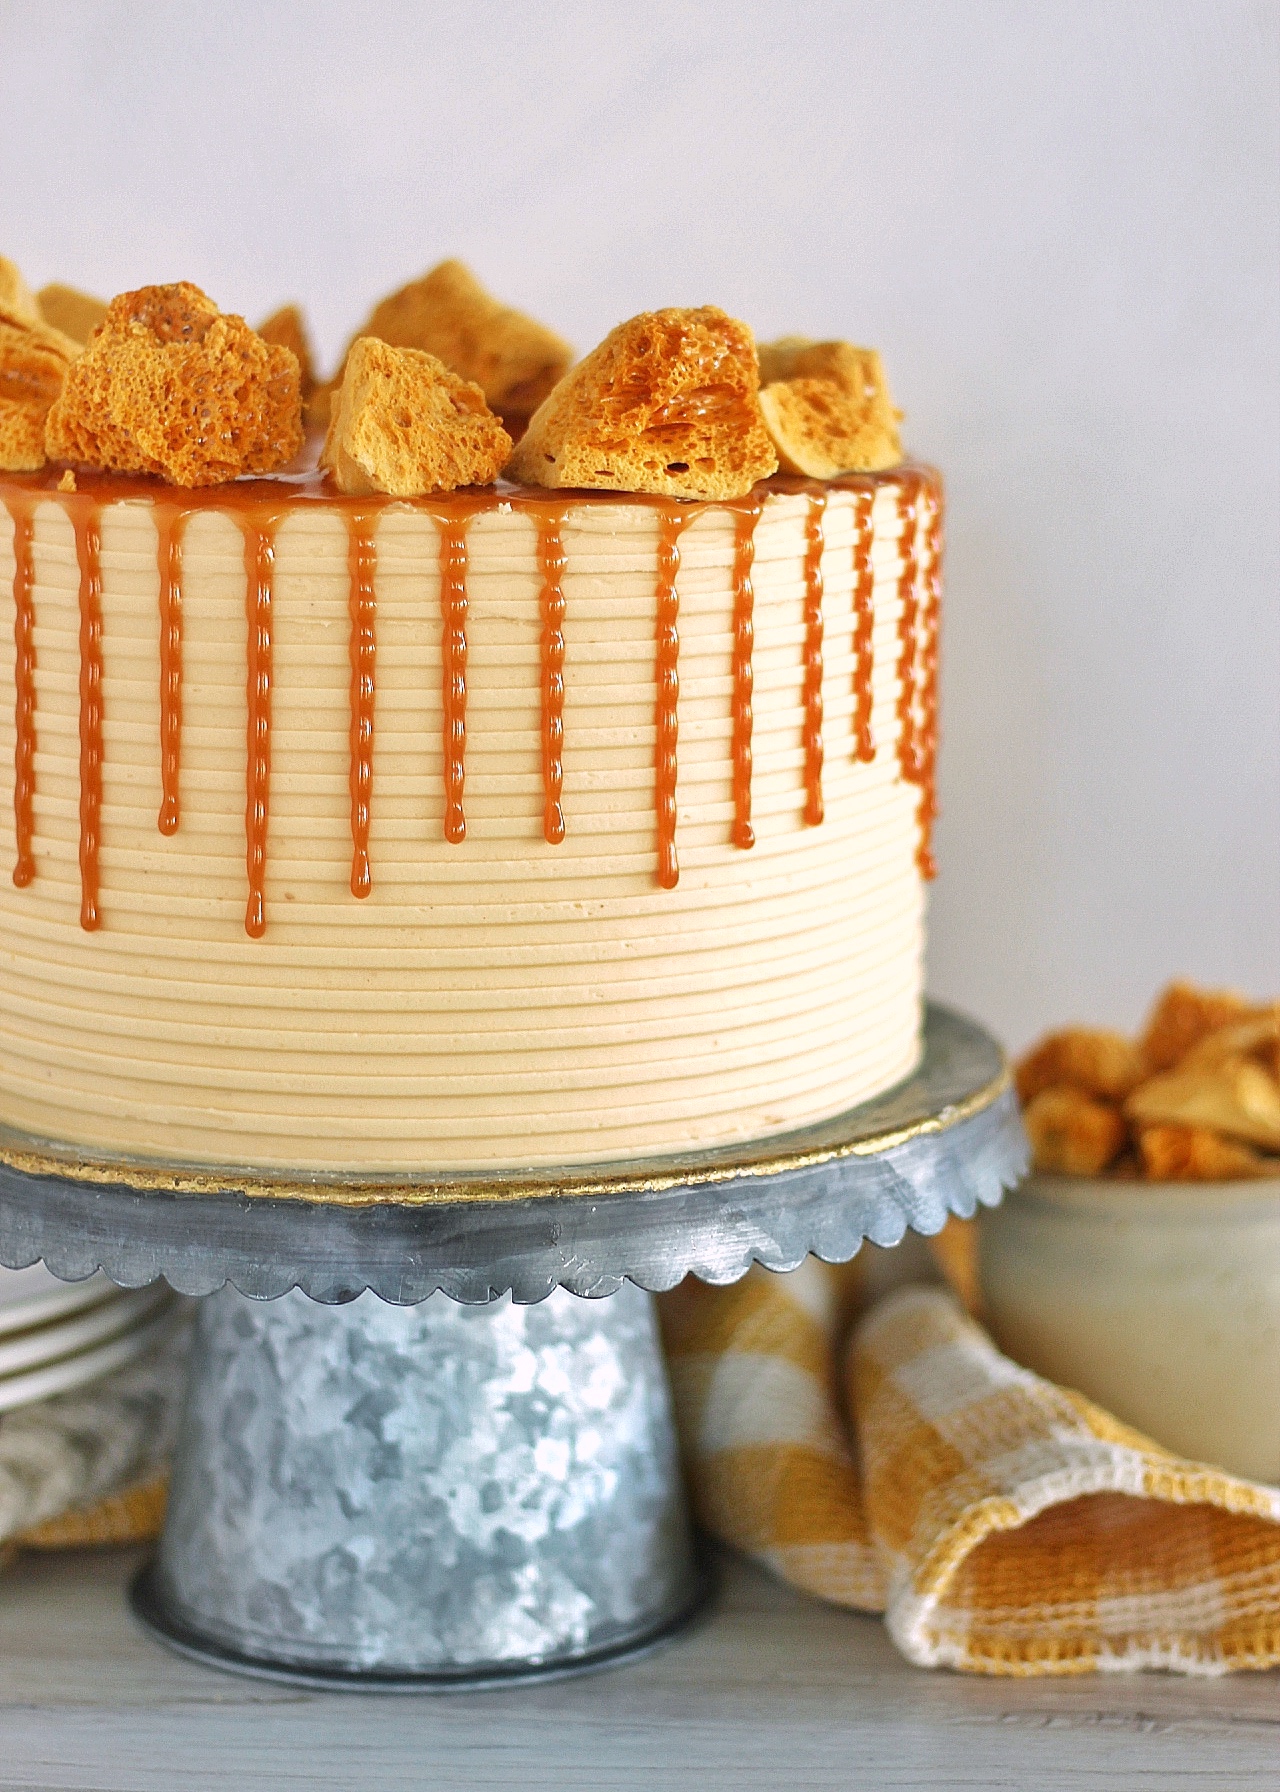
Salted Caramel Honeycomb Cake
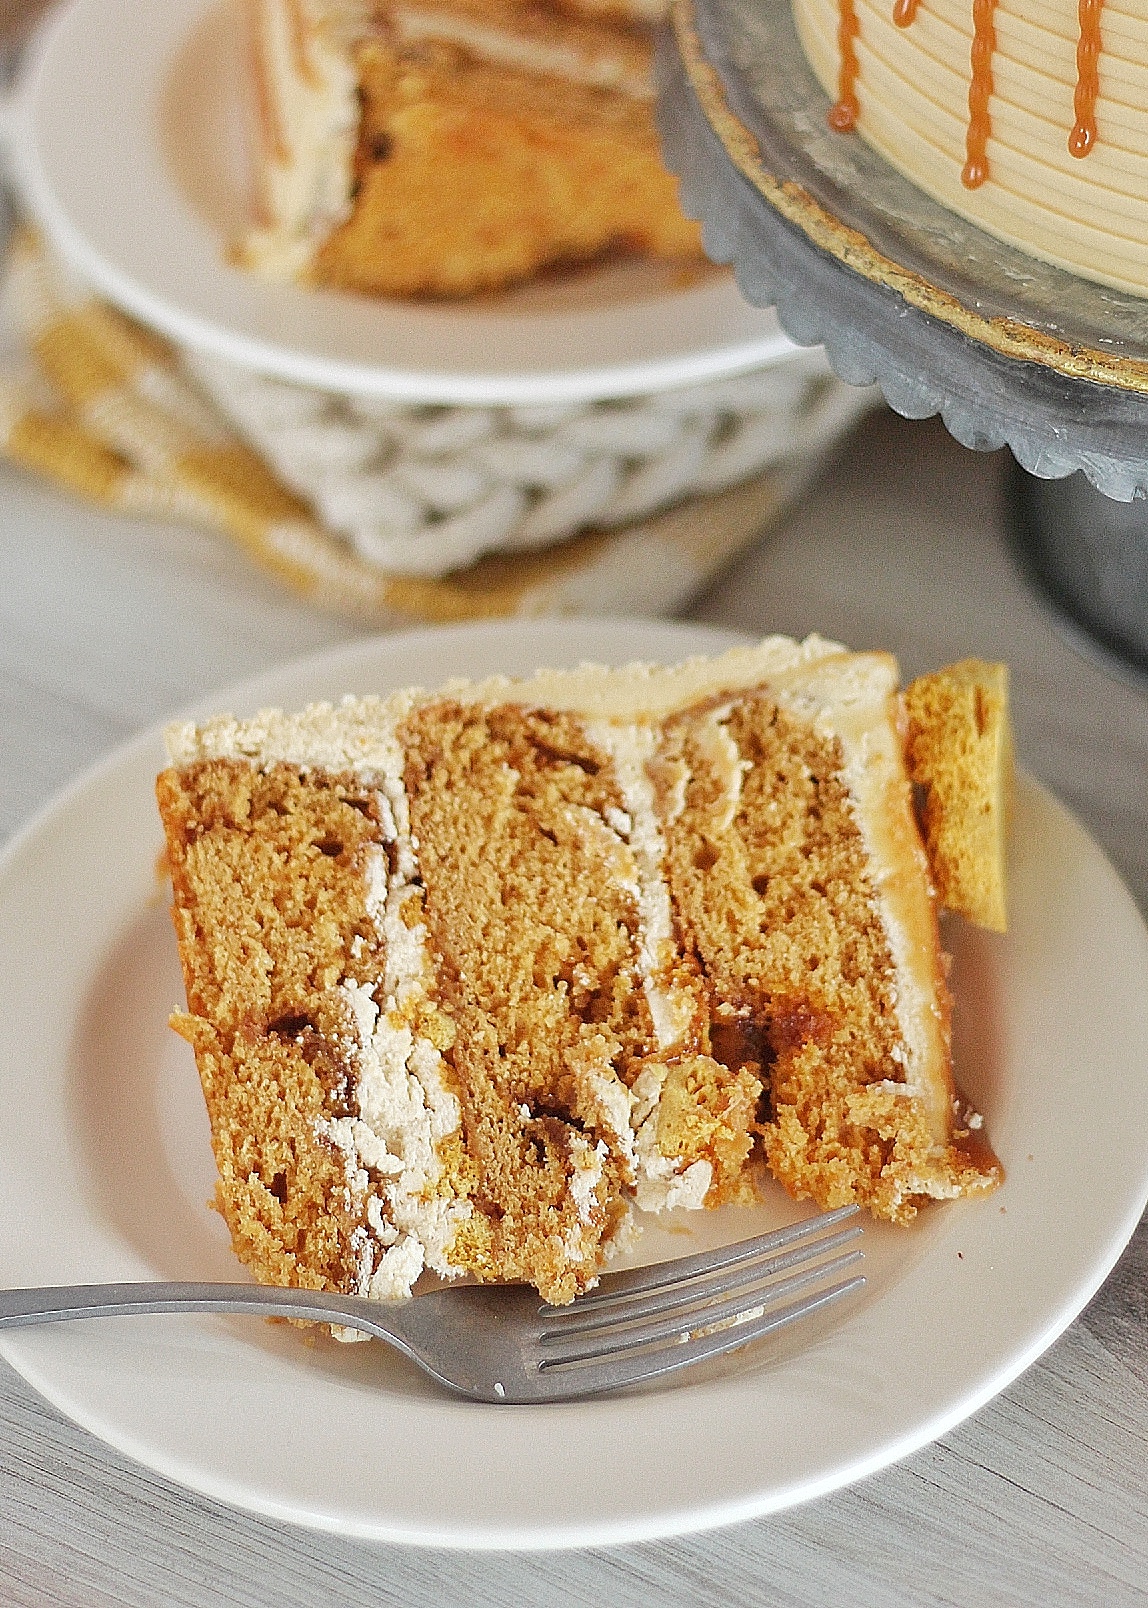
For this cake, I made caramel cake layers and folded homemade honeycomb. You’ll notice the honeycomb melts a bit and creates “craters” in the cake. Mine are probably bigger than yours will be, as I wrote in the instructions below to break your honeycomb pieces into smaller pieces. However, if you do get some honeycomb holes, no stress! You’ll just cover them right up with buttercream.
You are going to love how the honeycomb in the cake layers ends up creating a little salty crunch in the cake!
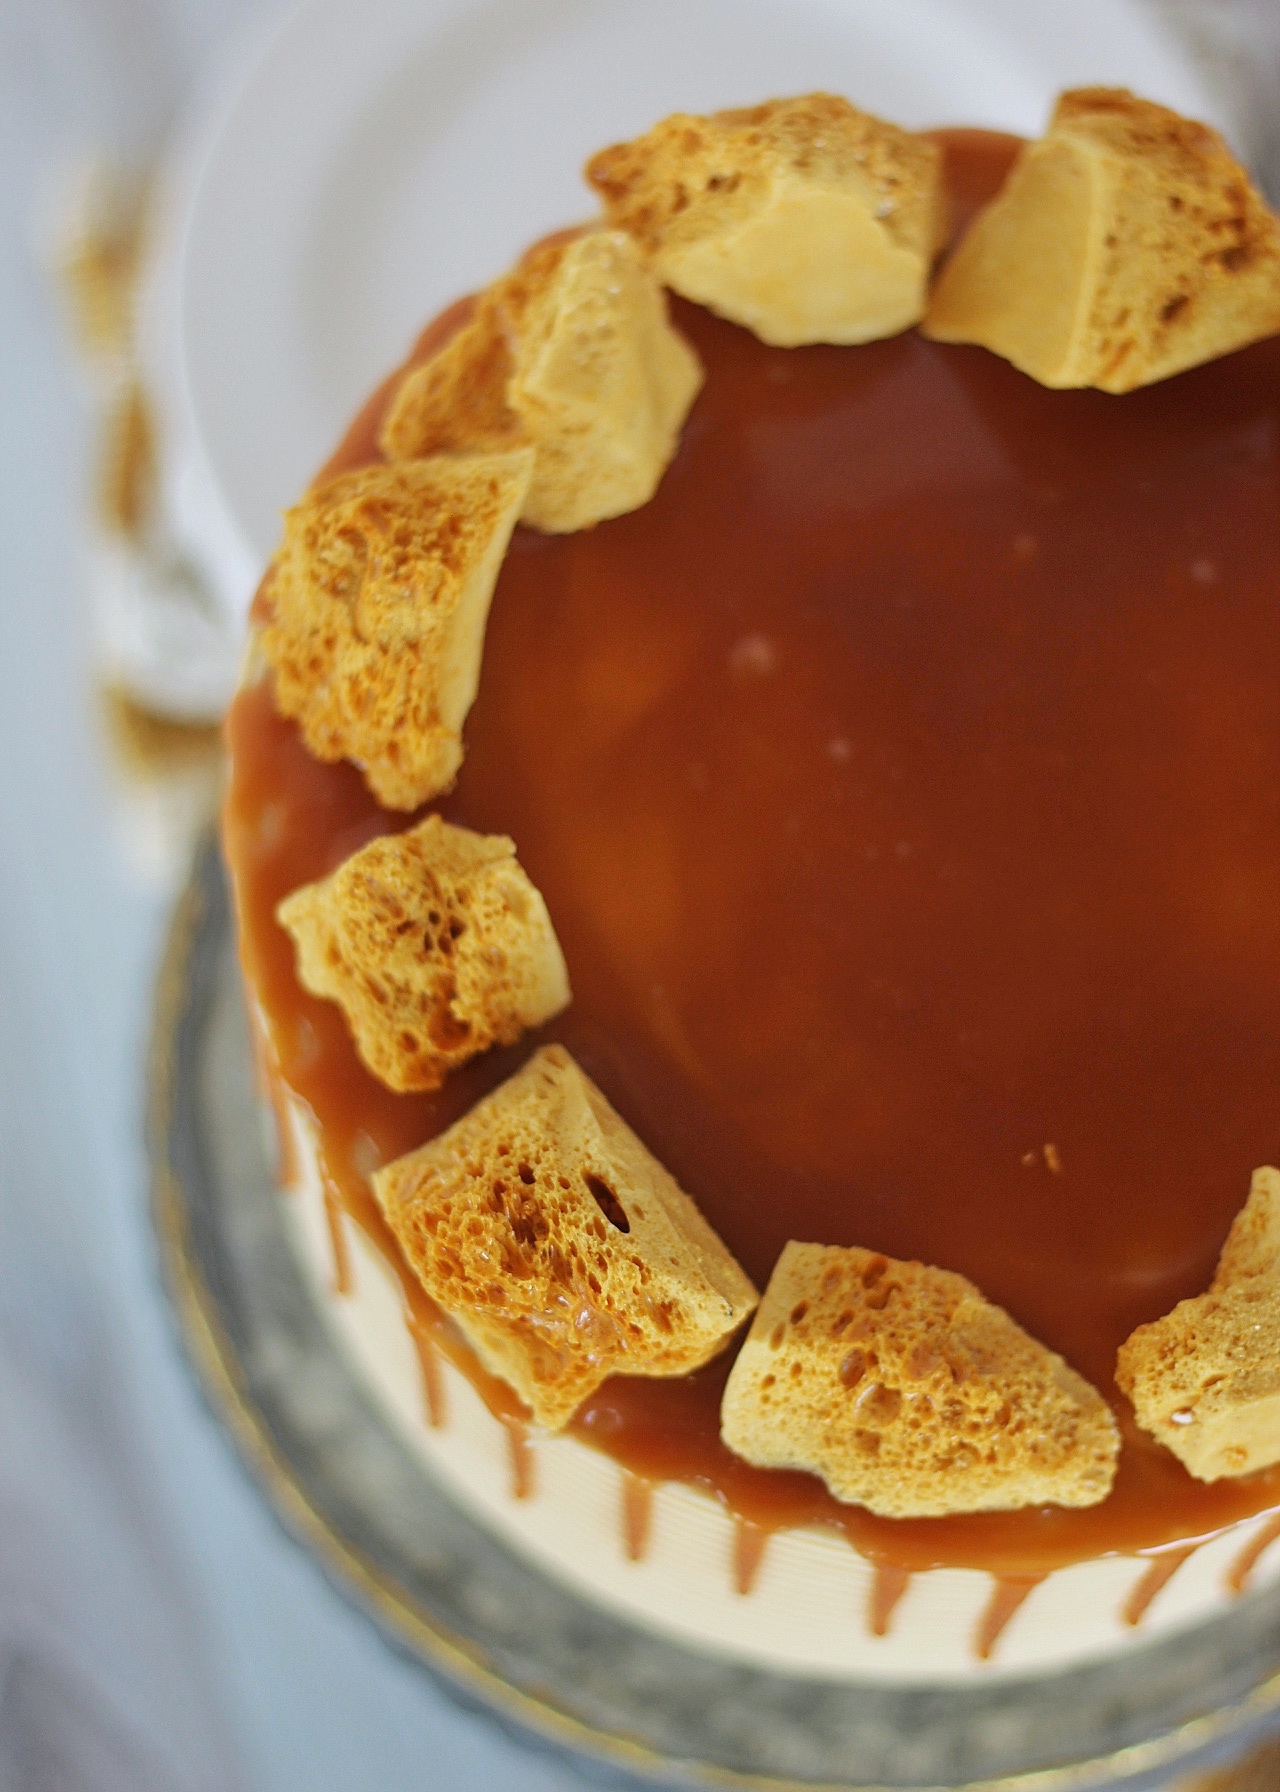
On top of the cake layers, I added caramel buttercream, caramel, and honeycomb pieces. Take a look below for instructions on how to make the salted caramel and honeycomb, along with recipes for the cake and honeycomb candy.
Ingredients for Homemade Salted Caramel
- Water
- Granulated sugar
- Corn syrup – this helps with a smooth, silky texture. We’re not using too much but you can also use honey or leave it out
- Heavy whipping cream
- Vanilla extract
- Salt
That’s it!

How to Make Homemade Salted Caramel
To make homemade salted caramel, you actually don’t have to be too hands-on. In fact, I want you to keep your hands off for the majority of the time!
- You’ll start by combining the sugar, water, and corn syrup (or honey) over the stove on medium heat.
- Stir the mixture until the sugar dissolves and then step back!
- Allow the mixture to boil and cook. Stirring the sugar mixture at this point will encourage crystallization and we don’t want that!
- It will take a few minutes for the mixture to change color, but once it does, stay close by.
- You’re looking for the mixture to turn a dark golden brown, amber color. Check the pictures below for guidance.
- Once you’ve reached the right color and your mixture is about 380 degrees F., you’re ready to start SLOWLY adding warm heavy whipping cream.
- Using warm heavy whipping cream will decrease the chance the mixture hardens.
- Once you’ve added all the cream, you can stir in the vanilla and salt.
- Allow the mixture to cool completely before using in your buttercreams and cakes.
For the step-by-step picture tutorial, head to THIS blog post.

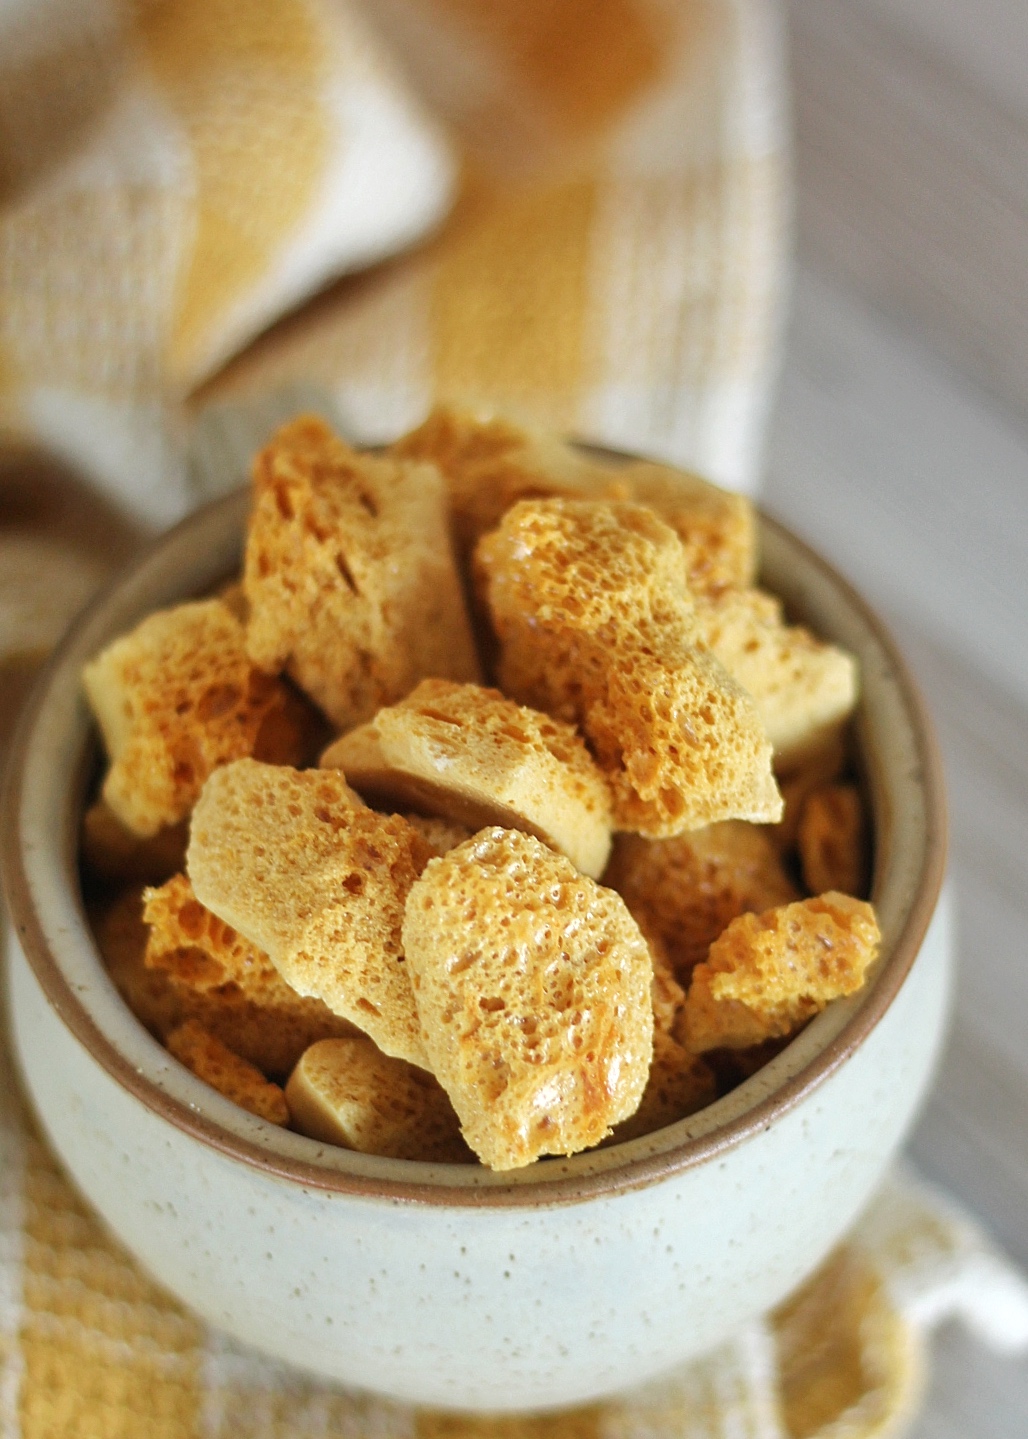
Ingredients You Need for Honeycomb Candy
This easy to make Homemade Honeycomb Candy is made with just a few simply ingredients:
- granulated sugar: I doubt this ingredient will surprise you since it’s in every candy recipe I can think of! You’ll be boiling the sugar with water and corn syrup, like like my caramel sauce recipe.
- water: this helps the sugar dissolve and will cook out as the sugar cooks.
- dark or golden corn syrup: this is another element in candy making. The dark corn syrup provides a little sweetness, a little bitterness, color, and aids in preventing crystallization.
- honey: adds flavor
- baking soda: this one is a must, so don’t forget it or try to replace it. This is what gets the honeycomb to foam up and create the texture. As with cakes, make sure your baking soda is fresh. (Nothing older than 6 months.)
- cream of tartar: acids acidity and ensures you get an even frothiness to the mixture
How to Make Homemade Honeycomb
- Prep your ingredients: before you get started, it’s best to have all of your ingredients measured and ready to go so you’re not scrambling to measure ingredients when your candy reaches the desired temperature. Make sure to all line your 8-inch x 8-inch baking pan with parchment before you get started too. You’ll want the parchment to go up the sides a little ways. The honeycomb will grow over the height of the pan if it’s 2-inches or shorter.
- Heat sugar, corn syrup, honey and water over the stove: combine the water, sugar, corn syrup, and honey in a medium saucepan over medium-high heat. Stir to combine the sugar and then let the mixture cook on it’s own. Do not continue to stir. Just like caramel sauce, the mixture will crystalize if you stir it while it cooks. Cook the mixture until it reaches 300 degrees F. Remove from heat.
- Stir in baking soda and cream of tartar: once the mixture reaches 300 degrees F, stir in the baking soda and cream of tartar using a wooden spoon. Don’t stir too much, just about 20 to 30 seconds, until there are no streaks of baking powder remaining.
- Pour into pan and let cool: immediately pour the candy into the prepared pan and allow to cool completely. This will take 1 to 2 hours.
- Break into pieces: when the honeycomb is cooled, break it into pieces and store in an airtight container until ready to use.
For the full recipe, make sure to check out my Homemade Honeycomb Candy Recipe.
More Recipes You’ll Love
Salted Caramel Honeycomb Cake
Ingredients
FOR THE CAKE
- 1 cup (226 g) unsalted butter at room temperature
- 1 1/2 cups (300 g) granulated sugar
- 4 large eggs at room temperature
- 1 tsp (4.2 g) vanilla extract
- 3 cups (360 g) all-purpose flour
- 1 tbsp (10 g) baking powder
- 1 tsp (5.6 g) salt
- 1 1/4 cups (300 g) whole milk at room temperature
- 13.4 can (380 g) dulce de leche THIS is the brand I use
- 1 cup honeycomb pieces about 1/4"-1/2" big / SEE RECIPE HERE
FOR THE CARAMEL & BUTTERCREAM
- 1 cup (200 g) granulated sugar
- 8 tbsp (113 g) water
- 4 tsp (28 g) light corn syrup
- 3/4 cup (173 g) heavy whipping cream at room temperature
- 2 tsp (8.4 g) vanilla extract
- 2 tsp (11.2 g) salt
- 2 cups (452 g) unsalted butter slightly cold
- 6 cups (750 g) powdered sugar measured and then sifted
- *This buttercream makes enough to fill and frost the cake. If you want to add any piping to the top of your cake, I recommend making an extra 1/4 to 1/2 batch.
Instructions
FOR THE CAKE
- Preheat your oven to 325 degrees F. Spray three 8-inch cake pans (or four 6-inch pans) with nonstick spray, line the bottom with parchment paper and spray again. Set aside.
- In a medium sized mixing bowl, combine the flour, baking powder and salt. Whisk to combine and then set aside.
- In the bowl of a stand mixer fitted with the paddle attachment, combine the butter and the sugar. Mix on medium-high speed for about 3 to 5 minutes, until the mixture is light and fluffy.
- Add the eggs, one at a time, scraping down the sides and bottom of the bowl to make sure all of the butter and sugar are mixed well with the eggs. Add the vanilla.
- With the mixer on medium-high speed, add the dulce de leche and mix for a couple minutes. The mixture will get a little lighter in color.
- With the mixer on low speed, alternately add the dry ingredients and the milk, starting and ending with the dry mixture. Mix until just combined.
- Fold in the honeycomb pieces. NOTE: the honeycomb will cook and create caramelized areas and "craters" in the cake. Don't worry, any holes will get filled with buttercream and you'll have these delicious bites of salted caramel crunch.
- Pour the batter into your three 8-inch pans (or four 6-inch pans) and bake until a toothpick inserted in the center of the cake comes out with a few moist crumbs on it, about 30 to 35 minutes.
- Allow the cakes to cool in the pan on wire racks for about 10 to 15 minutes and then invert onto wire racks (TIP: spray the racks with non stick spray) and allow to cool completely.
- Cakes can be made ahead of time and wrapped in plastic wrap and frozen until ready to use. Be sure to give the cakes about 30 to 60 minutes at room temperature before stacking and decorating.
FOR THE CARAMEL & BUTTERCREAM
- Mix sugar, water and corn syrup in a small saucepan.
- Bring the water and sugar mixture to boil over medium heat, but DO NOT STIR. (Stirring encourages crystallization). Let the mixture cook until it caramelizes into a golden brown color (I like to let mine get nearly bronze). It happens quickly, so keep an eye on it.
- Remove the caramelized sugar syrup from the heat and slowly mix in the cream. Pour in just a tiny bit at a time, especially at the beginning, and mix to combine. You can start adding more and more as you go along.
- Mix in salt and vanilla. Stir to combine.
- Set the caramel sauce to the side and let cool completely before making the frosting.
- Once the caramel sauce is cooled completely, divide it in half and reserve one half of the caramel drizzle in the cake. Use the other half for the frosting (see below).
- In a stand mixer fitted with the paddle attachment, combine the butter, powdered sugar and caramel together and beat until smooth. If the icing seems to stiff, add a bit of cream – just a little at a time until it reaches a smooth, spreadable consistency of your liking.
ASSEMBLY
- Place the first cake layer in the center of the cake board. Using an offset palette knife, spread about 1 cup of the buttercream evenly across the cake layer. Drizzle with about a couple tablespoons of caramel sauce. Break up about 1/2 to 1 cup honeycomb into small pieces and sprinkle the honeycomb over the caramel and buttercream. Pat into place.
- Place the second cake layer on top of the filling and repeat these steps.
- Place the third cake layer, top side down.
- Crumb coat the entire cake with a thin layer of frosting and freeze for about 10 to 15 minutes to set.
- Once the crumb coat is set, continue to frost the cake with the remaining buttercream, and then use the remaining caramel sauce as a drip. Top with honeycomb.
Making this cake in advance, do you think the fully completed cake would freeze and thaw well? Curious if freezing would change the texture of the honeycomb.
I did freeze and thaw it and it did great. If the honeycomb pieces are a little bigger, they’ll keep their crunch even more.
Hi there, this looks SO yummy! Perfect for a Bee-day theme for our 1yr old granddaughter. I’m familiar with freezing cake layers and BC covered cakes but need to freeze the fully assembled cake a month before this time. Any tips for the honeycomb? Does the caramel freeze well? Thank you!
This cake is amazing! Super fun to make and very different from any cake I’ve ever made before. The honeycomb adds great texture and I love the dulce de leche in the cake layers. Thanks for the amazing recipe!
Thank you so much!
How long would I need to bake these if doing cupcakes?
I am about to make this recipe but so far it is sounding deeeelicious! A quick question, the 3 8″ pans are they only 2″ high or are they 3″ high, my 8″ pans are 3″ high and curious as to weather I would only need 2 pans?
Thanks
sorry about that reply it was posted incorrectly.
Hello, I haven’t made this recipe yet, but so far it is reading delicious! Curious question with regard to the pan sizes. the 3x 8″ pans are they only 2″ high? I have 8″ pans that are 3″ high and curious as to whether this mix would be enough for just the 2 pans.
Thank you
No you need 3 pans.
Can I use dark corn syrup instead of light corn syrup for the caramel?
I would use light
Brilliant cake recipe
Thank you!
I made this into cupcakes for my daughter’s first bee day. They were a hit!! So delicious! I am making them again for a Mama to Bee baby shower I’m hosting. Question: my buttercream was sliding off my daughter’s smash cake and off the cupcakes. What can I do this time to prevent that? How do I make the buttercream firmer/thicker so it’s not “melting” in appearance.
My wonderful friend made this cake for my baby shower last year and I think about it at least weekly. Now I’m going to make it for my baby’s first birthday party! ? It’s one of the best cakes I have ever tasted, and I’ve tasted a lot of cake. ?