Homemade Little Debbie Christmas Tree Cakes – the homemade version of your favorite childhood holiday snack, with tender yellow cake, whipped cream, and white chocolate.
Homemade Little Debbie Christmas Tree Cakes
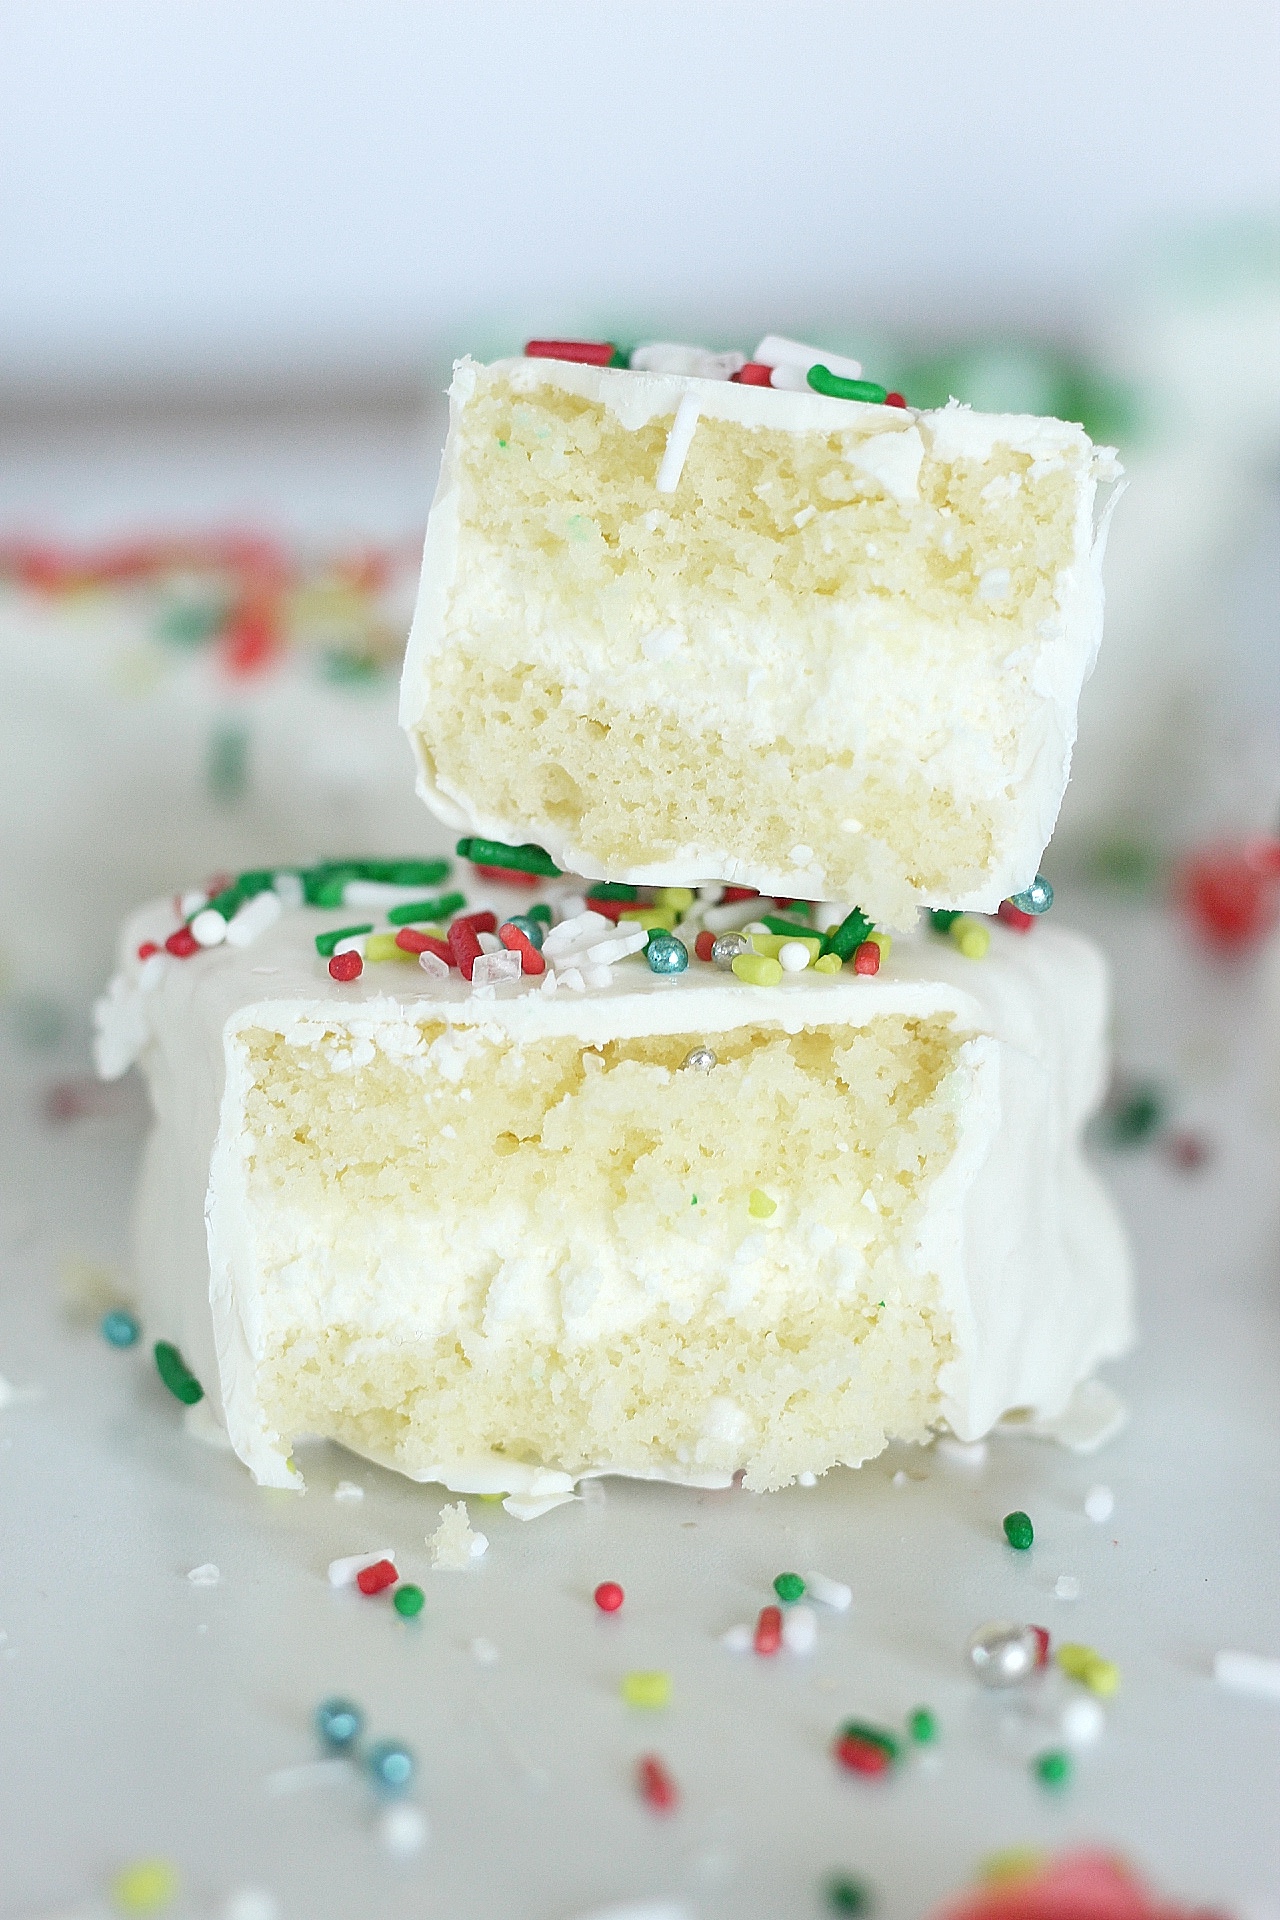
Do you remember the Little Debbie Christmas Tree Cakes from the grocery store? These were a fan-favorite at my house growing up. On special occasions, like field trips, my mom would surprise us with a Little Debbie treat. And oh! What a treat these were! Yellow cake, filled with whipped cream and dipped in chocolate. Yum!
While my taste buds have matured quite a bit since then, the nostalgia of these little tree cakes remains the same.
I couldn’t have been more excited when an Instagram follower suggested I make a homemade version of the Little Debbie Christmas Tree Cakes. What a great idea – because we all know the packaged ones don’t taste nearly the same as they used to.
How to Make Homemade Little Debbie Christmas Tree Cakes
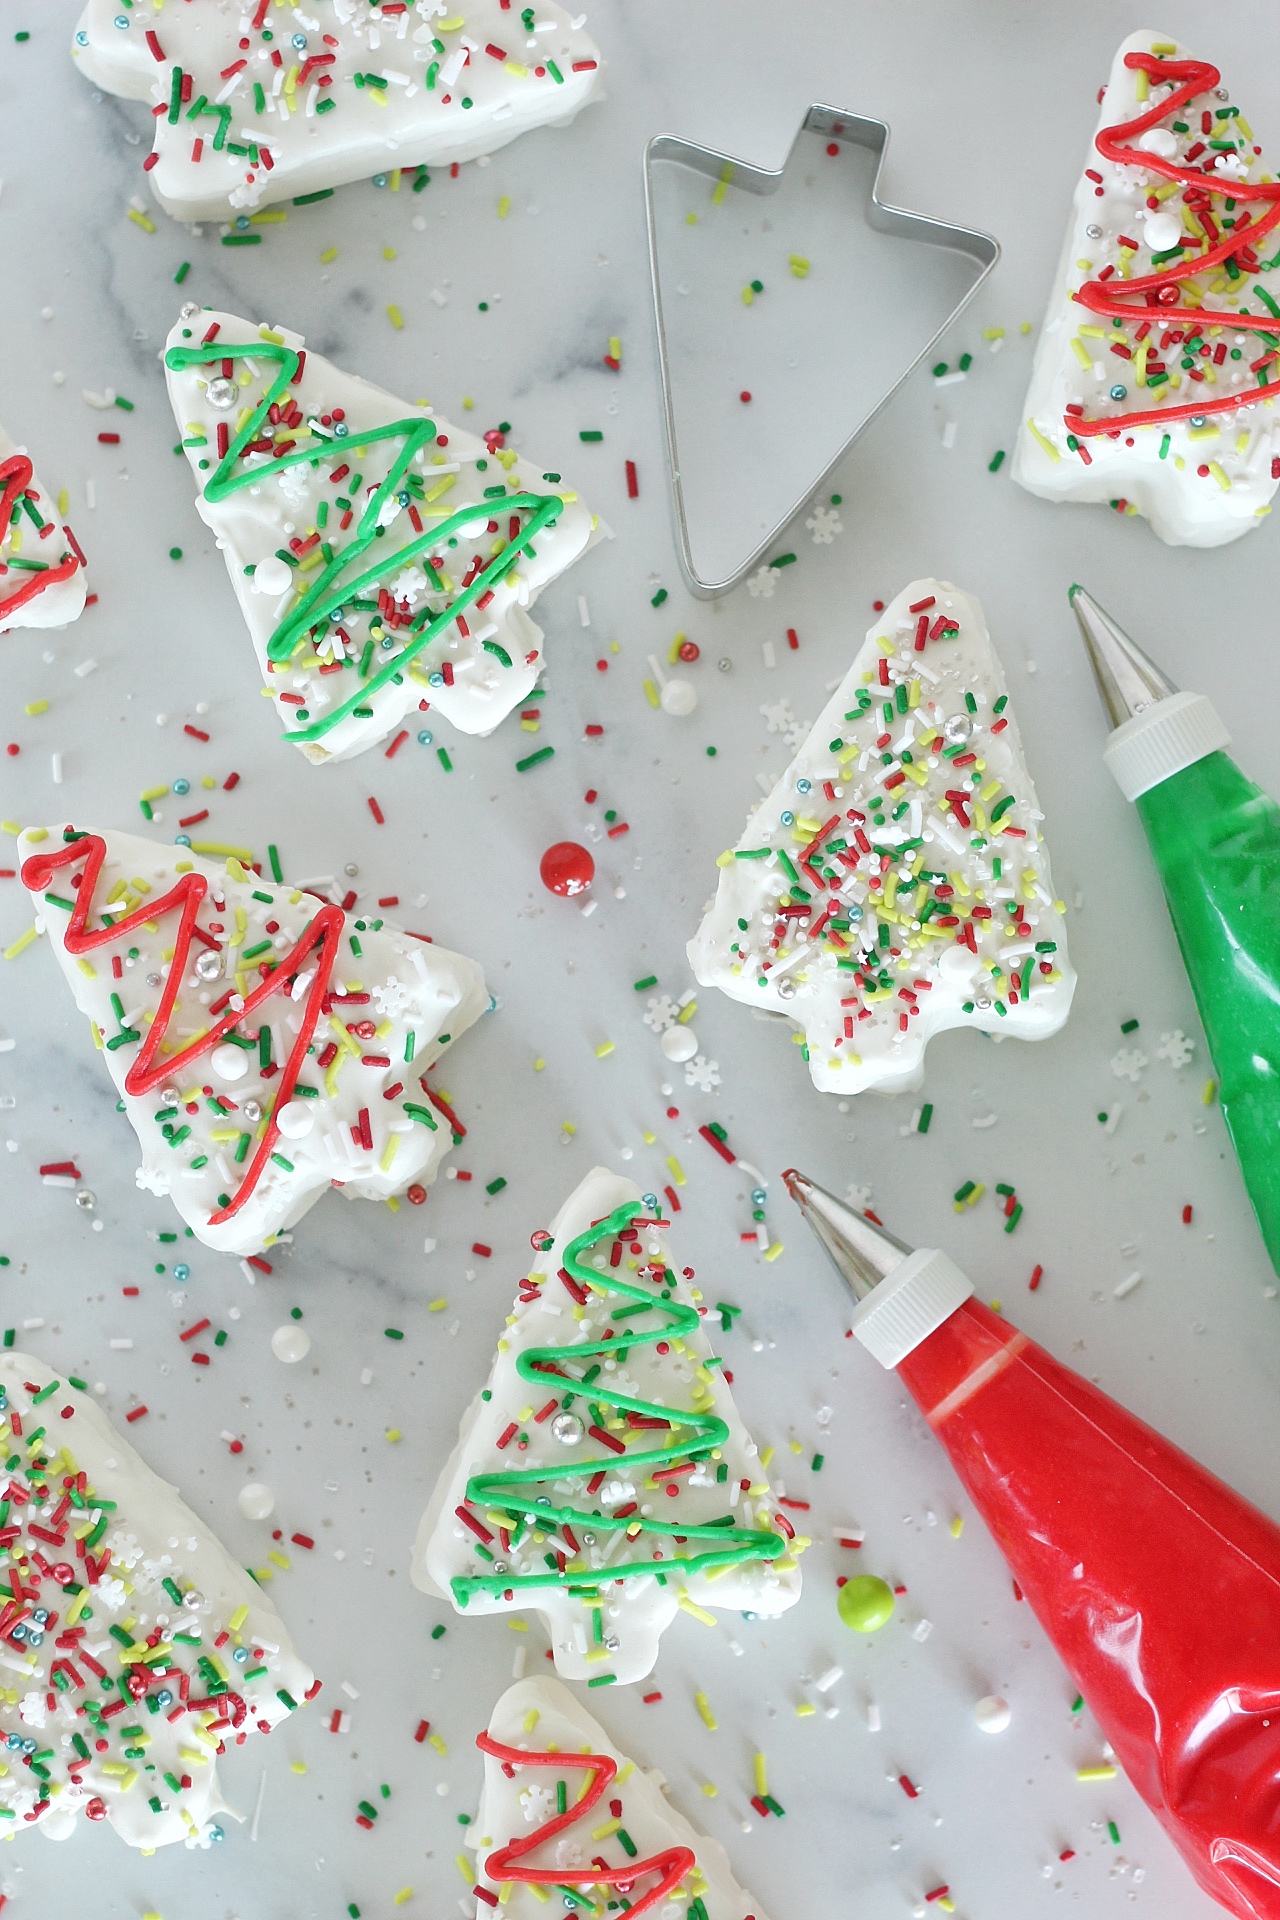
- Make one Classic Yellow Cake (recipe below) in an 11″ x 15″ rectangular cake pan or similar size.
- Cool the cake completely and then you have two options: first, you can start by torting (cutting in hang lengthwise) the entire sheet cake. After torting the cake, keep the two layers stacked and then cut your tree shapes using a cookie cutter (I used THIS ONE). OR, you can do the reverse: cut your tree shapes using a cookie cutter first and then split each tree in half. Either way, you’re looking to create 2-layer, 4-inch trees.
- Make stabilized whipped cream, using E-Z Gel.
- Fill each tree cake with whipped cream, making sure the whipped cream goes to the edge of the tree shape. You don’t want gaps between the cake layers, otherwise the chocolate won’t cover the cake as smoothly.
- Place the tree cakes on a baking sheet in a single layer, seal with a fitted cover or plastic wrap, and then freeze overnight.
- Freezing the tree cakes is essential for dipping the trees in white chocolate.
- Melt good quality white chocolate.
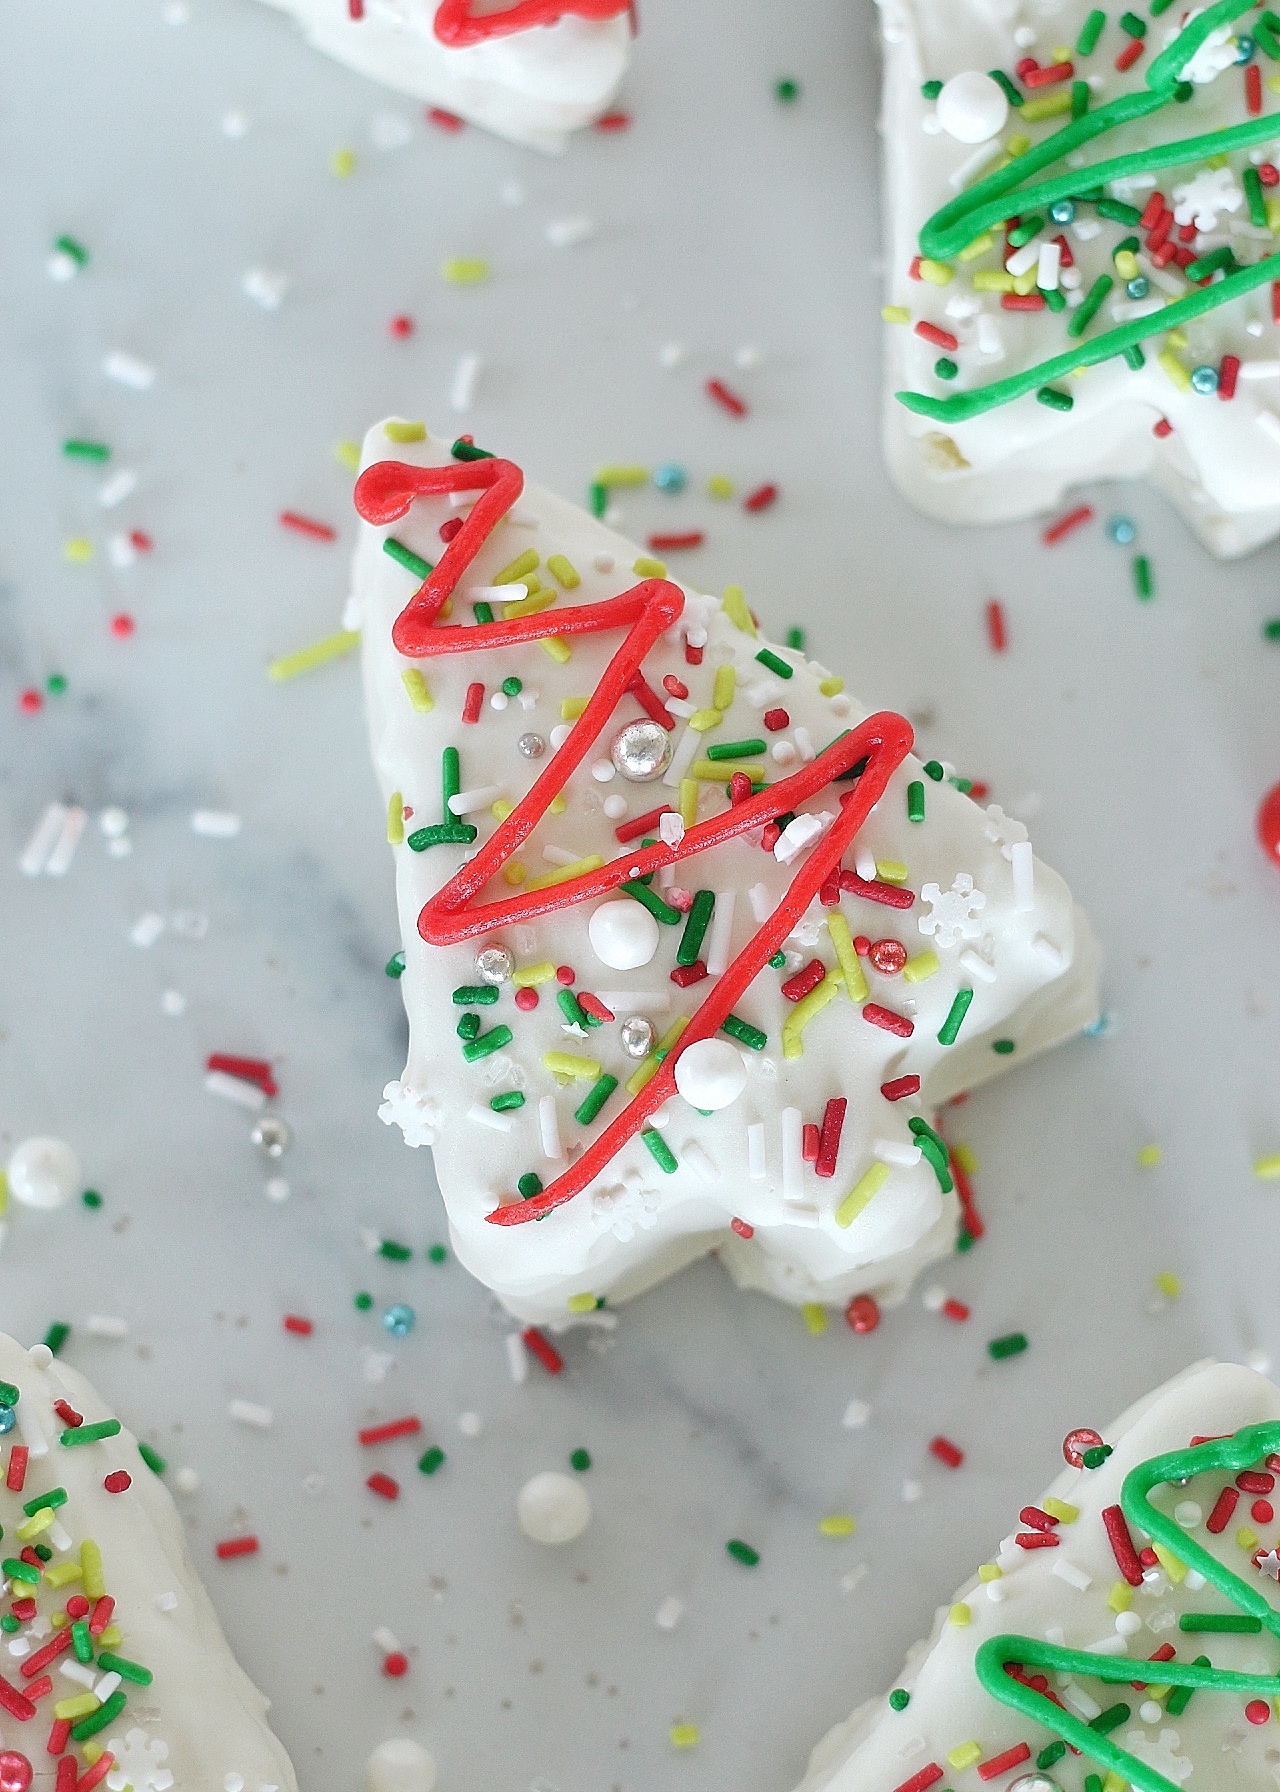
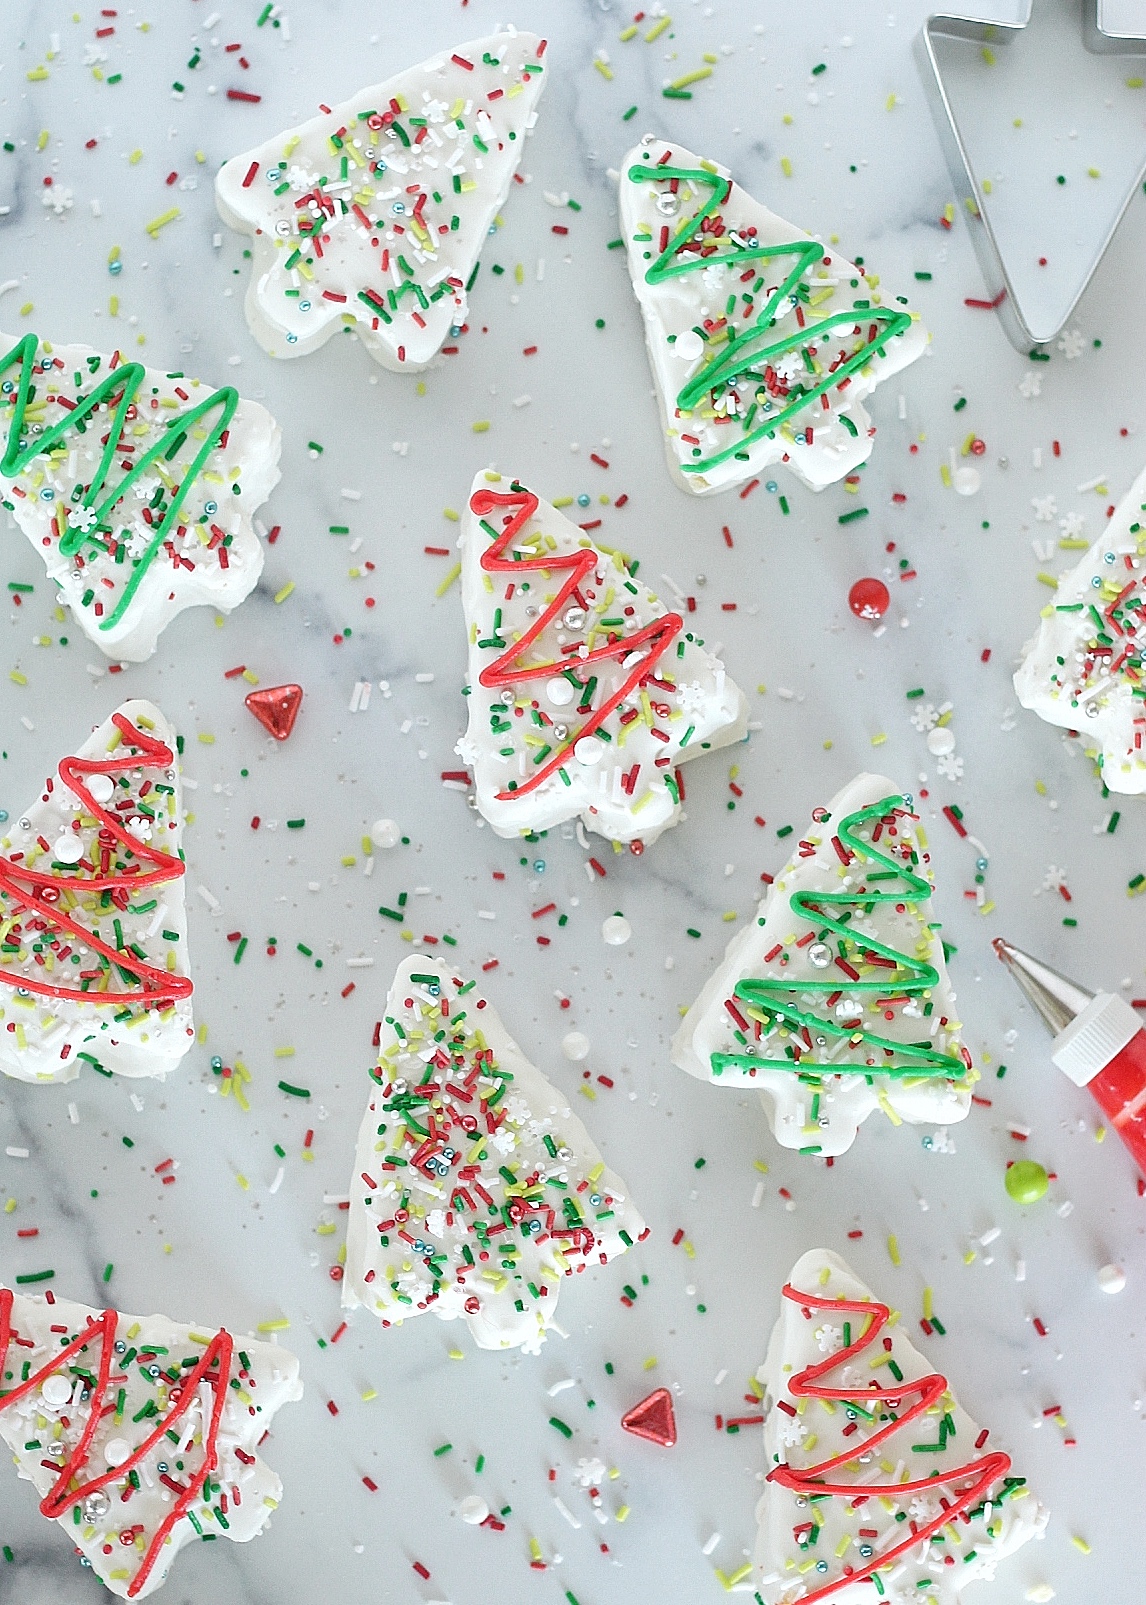
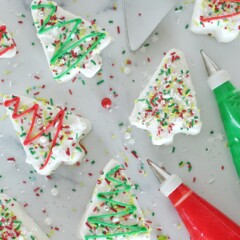
- Dip the frozen trees in white chocolate and the place on parchment paper.
- Immediately decorate the trees with sprinkles.
- Allow the chocolate to harden and then pipe additional designs with vanilla buttercream. You’ll only need about 1/4th batch of the buttercream for the piping designs.
Tips for Making Christmas Tree Cakes
We just went through the steps for making the Christmas tree cakes, but let’s review the important tips you need to know to ensure the process is smooth sailing!
- If possible, use a sheet pan that has 2-inch tall sides. If you don’t have a sheet pan/cake pan with tall sides, you may want to consider dividing the batter between two sheet pans (also known as jelly roll pans), so you don’t have cake batter bake over the sides.
- Cool the cake completely before cutting your shapes.
- Use a metal cookie cutter, not plastic.
- Make sure to add E-Z Gel to your gelatin to stabilize it. If you can’t find E-Z Gel, you can bloom gelatin for your whipped cream.
- Use a knife or icing spatula to smooth the whipped cream along the sides of the cakes.
- Freeze the mini cakes overnight before dipping in white chocolate to ensure the cakes don’t break and fall apart as you dip.
- Use good quality white chocolate, similar to what I linked above.
- Add sprinkles while the chocolate is still soft.
More Posts Like This
Homemade Little Debbie Christmas Tree Cakes
Ingredients
For the Cake
- 3 cups (345 g) cake flour
- 2 tsp (8 g) baking powder
- 1 tsp (6 g) salt
- 1 cup (226 g) unsalted butter at room temperature
- 1 3/4 cups (350 g) granulated sugar
- 1/3 cup (72 g) grapeseed oil can use vegetable or canola
- 5 whole eggs at room temperature
- 2 egg yolks at room temperature
- 2 tsp (8.4 g) clear vanilla extract
- 1 cup (240 g) sour cream at room temperature
For the Whipped Cream
- 3 cups (693 g) heavy whipping cream cold
- 1 cup (125 g) powdered sugar measured then sifted
- 2 tbsp (3 g) E-Z Gel
- 1 tsp (4.2 g) vanilla extract
For the White Chocolate
- 2.5 lbs good quality white chocolate
Instructions
For the Cake
- Set your oven to 325 degrees F. Spray an 11" x 15" rectangular baking sheet with nonstick spray, line the bottom with parchment paper, and spray again. Set aside.
- In a medium bowl, whisk together the flour, baking powder, and salt. Set aside.
- Using a stand mixer fitted with the paddle attachment, beat the butter, oil, and sugar on medium-high for 3 minutes, until light in color and fluffy in texture.
- With the mixer on medium speed, add the eggs, one at a time, scraping down the bowl between additions. Continue to beat on medium-high speed for 2 minutes until smooth. Add extracts and stir to combine.
- With the mixer on low speed, add in internals, blending after each addition: 1/3 dry ingredients, 1/2 sour cream, 1/3 dry ingredients, 1/2 sour cream, 1/3 dry ingredients.
- Scrape down the bowl and mix for another 20 to 30 seconds.
- Pour the batter into the prepared pan and bake for 20 to 25 minutes.
- Cool completely before cutting into tree shapes.
For the Whipped Cream
- Using a stand mixer fitted with the whisk attachment, whip cream, E-Z Gel, powdered sugar, and vanilla on high speed until stiff peaks form.
For the White Chocolate
- When ready to dip: using a double boiler or microwave safe bowl, melt the white chocolate. If using the microwave, heat in intervals to ensure you don't burn the chocolate.
For Assembly
- Using a tree-shaped cookie cutter, cut the cake layer into 24 to 26 trees.
- Split each tree in half, using a serrated knife.
- Pipe whipped cream on one tree, making sure to pipe to the edge of the tree. Place a second tree on top of the whipped cream and gently pat into place to secure the trees.
- Once all of the trees have been assembled, cover and freeze the trees overnight.
- When you're ready to start dipping, gently dip a frozen tree into the melted white chocolate, using a fork to help you lift the tree up and onto parchment paper.
- Cover in sprinkles while the chocolate is still wet.
- Allow the chocolate to harden before serving.
Is there a chocolate cake recipe you’d recommend in place of the yellow? We like chocolate cake better at our house
My chocolate cake from my Twix cake. It’s a little firmer than my dark chocolate cake.
I can’t afford to buy the e-z gel. If I use the gelatin, how would that work when subbing it? I am not experienced with gelatin. Thanks so much! I’m really excited to try this recipe.
Works the same!
I just made the trees/whipped cream and about to dip in white chocolate. I’m wondering how should I store these? In the fridge or at room temperature?
Fridge or freezer
Thank you so much for this recipe! Do you think I could sub gluten free flour ( King Arthur 1:1 blend) in the cake recipe?
Yes you can. I would reduce the GF flour by 1/4 cup so you still get a fluffy light texture.
How do I keep the white chocolate from hardening while in the dipping process?
I would say try using the double boiler method to melt the chocolate! You put the chocolate in a bowl and put that bowl in a pot of boiling water. You can dip the cakes while the chocolate is on the water and it’ll keep it warm so it doesn’t melt!
Thank you! I will try that method this year!
Is there a way to substitute the oil for something? Can I just use more butter?
You can but it will change the texture a little. For a healthier oil option, you can swap for coconut oil or avocado oil.
I would like to make a large singular cake for a youth event at my church. What is your recommendation for that? Thanks!
Using this recipe, the cake batter will fill a half sheet pan but will be a thin cake or you can bake it in a 9×13″ pan.
I made this recipe and the cake is delicious but it only made 18 cakes – not 26 as the recipe states.
best yellow cake I have ever had! Any thoughts to make it in 8 inch round pans? Baking time, etc?
Yay! So happy you loved these! I actually have a yellow cake recipe on my blog that I bake in 8-inch pans, so you’ll have the whole recipe and instructions in that post. Just search “yellow cake”